
A gas grill can turn a quiet Saturday afternoon into a backyard barbecue worth talking about.
But when one burner refuses to light, another runs hotter than a blast furnace, and your steak somehow comes out looking like a geography lesson, that shiny cooking machine suddenly feels a lot less impressive.
Here’s the secret: great grilling depends on more than good meat, a favorite barbecue sauce, or a pair of expensive tongs. It also depends on understanding what’s happening beneath the cooking grates.
The good news?
You don’t need an engineering degree to figure it out. Knowing how gas grill parts work can help you cook more consistently, spot small problems before they become expensive repairs, and keep your grill ready for its next assignment.
From burners and regulators to ignition systems and grease trays, every component has a job to do. Some deliver fuel, others create heat, and a few spend their entire working lives catching the mess left behind by a rack of ribs.
Let’s open up the firebox and see what makes your grill tick – and how to keep every important part working properly.
Understanding the Main Gas Grill Parts and What They Do
A gas grill might look straightforward from the outside, but several components work together to turn fuel into dependable cooking heat. Understanding their individual roles makes maintenance easier and troubleshooting less of a guessing game.
Burners: The Heart of the Heat
Burners are among the most important gas grill parts because they distribute fuel and produce the flames that heat your cooking surface.
Most conventional gas grills use metal burners with small openings, commonly called ports, along their length. Gas mixes with air before combustion, and the resulting flames spread across the burner to create heat beneath the cooking grates.
Burners can develop clogged ports, corrosion, or uneven flames over time. Grease, food debris, and environmental exposure all contribute to wear.
What to watch for: Uneven flames, persistent weak spots, excessive yellow flames, or sections that refuse to light can indicate a problem. Check the manufacturer’s troubleshooting instructions before deciding whether cleaning or replacement is necessary.
Cooking Grates: Where the Magic Happens
Cooking grates support your food and transfer heat to its surface. They’re also responsible for those attractive grill marks that make a steak look like it belongs on a restaurant menu.
Grates come in materials such as stainless steel, porcelain-coated cast iron, and bare cast iron. Each has different maintenance requirements.
Cast iron retains heat particularly well, while stainless steel is generally easier to maintain. Porcelain-coated grates need gentle handling because chipped coatings can expose the underlying metal to corrosion.
Maintenance tip: Clean your grates after cooking using a method and tool appropriate for their material. Avoid aggressive scraping that damages protective coatings.
Heat Tents: The Unsung Heroes
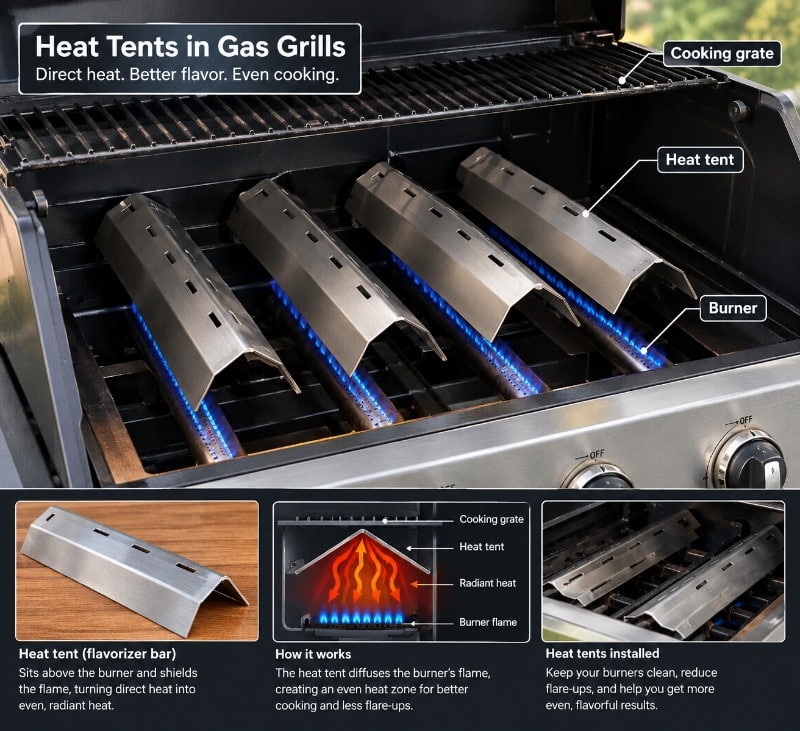
Heat tents, also known as flame tamers or burner shields, sit above the burners on many gas grills.
Their job is to intercept dripping grease, help distribute heat, and reduce direct exposure of the burners to food residue. Some drippings vaporize on hot surfaces, contributing to the smoky aromas associated with grilling.
They aren’t magical flare-up eliminators, though. Too much accumulated grease can still produce dramatic flames.
Replace heat tents when they’re badly corroded, perforated, or no longer fit securely.
Ignition System: The Spark That Starts It All
The ignition system creates the spark or other ignition source needed to light the gas.
Many grills use push-button or electronic spark ignition. Others use battery-powered systems, while some have a manual lighting option specified by the manufacturer.
A clicking sound doesn’t always mean the burner will ignite. The electrode might be dirty, damaged, or incorrectly positioned, or the gas supply might not be reaching the burner properly.
Remember: Never keep releasing gas while repeatedly attempting to light a burner. Follow the manufacturer’s lighting procedure, including any required waiting period between attempts.
Gas Regulator and Hose: Keeping Fuel Under Control
The regulator controls gas pressure delivered from the fuel supply, while the hose carries gas to the grill. Together, these components help supply the burners with fuel under the conditions the grill was designed to use.
Many propane grills have a regulator attached to the cylinder connection. Natural gas grills may use different connection arrangements and components.
Inspect hoses for cracks, abrasion, kinks, and other visible damage. Replace damaged components with compatible parts specified for your grill.
Control Valves, Firebox, Lid, and Grease System
Control valves regulate how much gas reaches each burner. Turning a control knob changes the gas flow, which affects the heat produced by that burner.
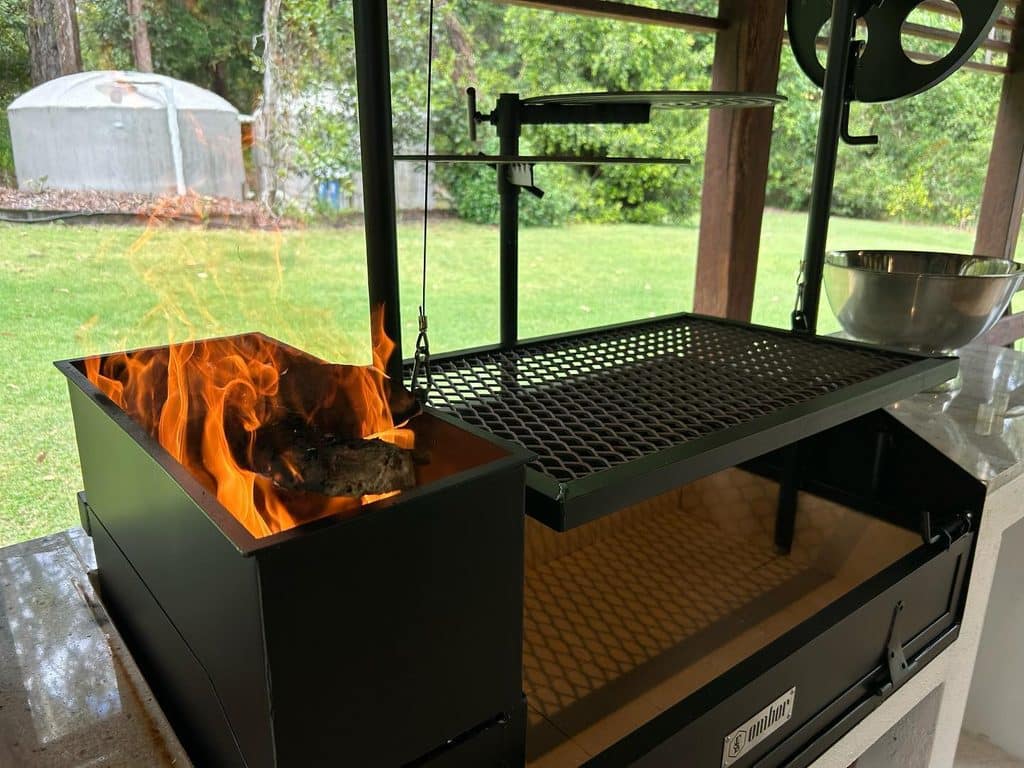
The firebox houses the burners and other heat-producing components. The lid helps retain heat and allows hot air to circulate around food when closed.
Finally, the grease tray and catch pan collect drippings before they accumulate inside the grill.
These parts might not get much attention, but neglecting the grease system is an excellent way to turn a relaxed barbecue into an unnecessarily exciting afternoon.
How a Gas Grill Works: From Fuel Supply to Cooking Heat
Now that the major components have names, let’s follow the process from the fuel source to the food on your plate.
Step 1: Gas travels to the grill.
Fuel comes from a propane cylinder or a natural gas supply. It passes through the appropriate connections, hose, and pressure-regulating equipment before reaching the grill’s control valves.
Step 2: The control valve meters the gas.
When you open a burner control, gas flows toward that burner. The amount supplied depends on the control setting and the grill’s design.
Step 3: The ignition system lights the burner.
The ignition system provides a spark or another approved ignition source. The gas-air mixture ignites, creating flames along the burner ports.
Step 4: Heat spreads through the cooking area.
The flames heat the burner shields and cooking grates. Food cooks through direct heat from hot surfaces and radiant energy, while hot air circulating inside the closed grill helps cook its upper surfaces.
This combination makes gas grills versatile. You can sear a steak over a hot burner, roast chicken with the lid closed, or create separate cooking zones for foods that need different temperatures.
Step 5: You control the result.
Adjusting the burner settings changes the heat output. On a multi-burner grill, you can create a hotter direct-cooking zone and a cooler indirect zone.
Here’s a useful trick: preheat the grill, then use the built-in temperature gauge as a reference rather than an absolute measurement.
Lid thermometers can read differently from the temperature at grate level, where your food actually cooks.
Once you understand this process, uneven cooking becomes easier to diagnose. The problem might be a blocked burner, damaged heat tent, poor preheating, or simply a cooking setup that doesn’t match the food.
How to Maintain Essential Gas Grill Parts
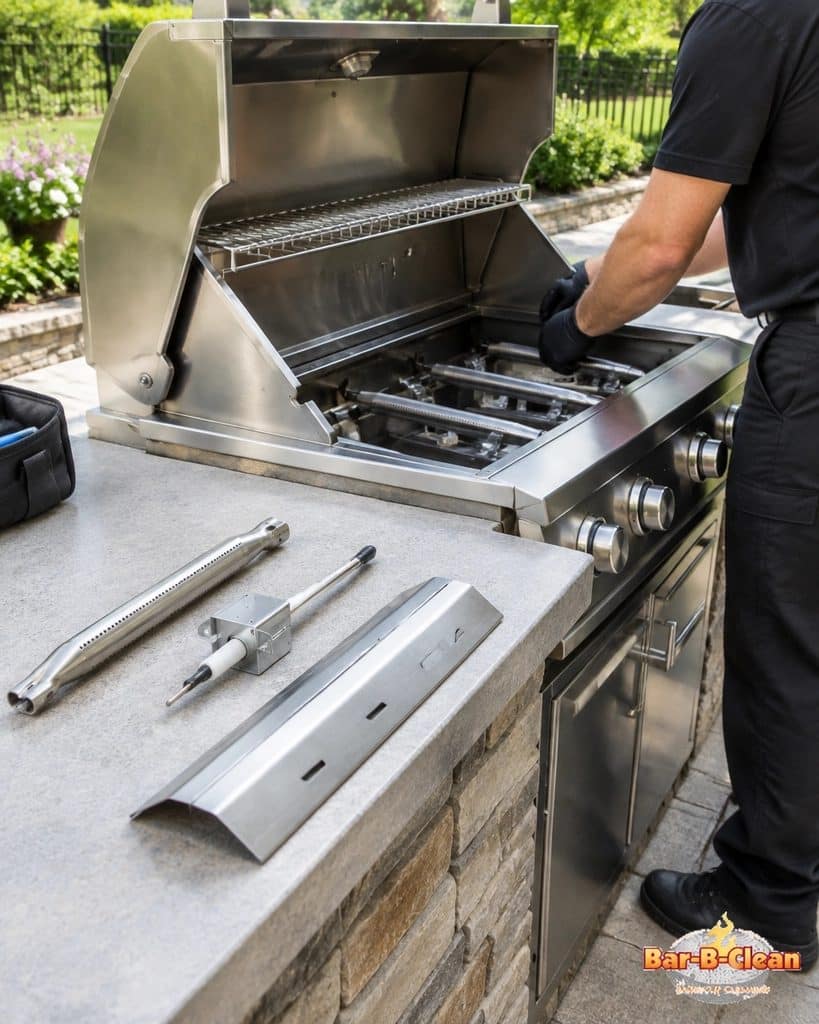
A well-maintained grill doesn’t need constant attention, but it does need consistent care. Small cleaning and inspection habits can prevent many common problems.
Clean the Burners Carefully
Grease and debris can block burner ports, leading to uneven flames or poor heat distribution.
Before cleaning, turn off the burners and fuel supply, disconnect the fuel source when appropriate under the manufacturer’s instructions, and allow the grill to cool completely.
Follow the manual when removing burners or accessing internal components. Use a suitable soft brush to remove loose debris, and clean accessible ports only as directed.
Avoid enlarging burner openings with nails, drill bits, or other improvised tools. Changing the size of these openings can affect combustion.
Inspect the burners for cracks, severe rust, deformation, or other damage. Cleaning won’t rescue a burner that’s deteriorated beyond safe use.
Keep Cooking Grates in Good Shape
After cooking, clean the grates using the method recommended for their material. Some grills allow cleaning while the grates are warm, but always follow the manufacturer’s guidance and protect yourself from burns.
For cast iron, maintain the seasoning as directed. For porcelain-coated grates, avoid harsh scraping and abrasive tools that can chip the coating.
Check grates periodically for loose sections, deep corrosion, or damaged surfaces.
Inspect Heat Tents and Flame Tamers
Heat tents gradually wear down under high temperatures and exposure to grease. Remove loose residue and inspect them whenever you clean the interior.
A little discoloration is normal. Deep corrosion, holes, or pieces that crumble when handled are different matters.
Replace severely damaged heat tents rather than expecting them to distribute heat properly.
Use parts designed for your specific grill model.
Maintain the Ignition System
Keep accessible ignition electrodes free of grease and debris. Inspect visible wiring and electrode supports for damage, but don’t dismantle electronic components unless the manual provides instructions for doing so.
For battery-powered igniters, check the battery when the system becomes unreliable. A weak battery can cause problems that look more serious than they are.
If the igniter continues to fail after basic approved checks, consult the manufacturer or a qualified technician.
Check the Hose and Regulator
Inspect the hose and connections regularly, especially before the grilling season begins.
Look for cracks, cuts, kinks, corrosion around fittings, or signs that animals have chewed the hose. Never use a grill with visibly damaged fuel-delivery components.
After reconnecting a propane cylinder, perform the leak test described in the owner’s manual.
Many manufacturers recommend an approved soapy-water solution for checking connections; never use an open flame to search for leaks.
If bubbles appear during a prescribed leak test, shut off the gas supply if safe and address the problem before using the grill.
Don’t Ignore the Grease Tray
Grease management is one of the least glamorous parts of grill ownership, but it has an outsized effect on safety.
Empty the grease tray and catch pan frequently, particularly after cooking fatty meats. Clean away accumulated grease before it becomes thick, sticky, and difficult to remove.
A clean grease system reduces the risk of flare-ups and grease fires. It also prevents unpleasant odors from lingering around your next cookout.
Common Gas Grill Problems and How to Troubleshoot Them
When a grill misbehaves, resist the urge to replace parts immediately. Start by identifying the symptom, then work through the simplest safe checks.
Problem: The Burner Won’t Light
Possible causes include an ignition problem, blocked burner ports, or an interrupted fuel supply.
Check whether the fuel supply is available, inspect the ignition components you can safely access, and follow the exact lighting instructions in the owner’s manual.
If your grill has an approved manual-lighting procedure, use it only as directed. Never improvise a lighting method.
Problem: The Flames Are Weak or Uneven
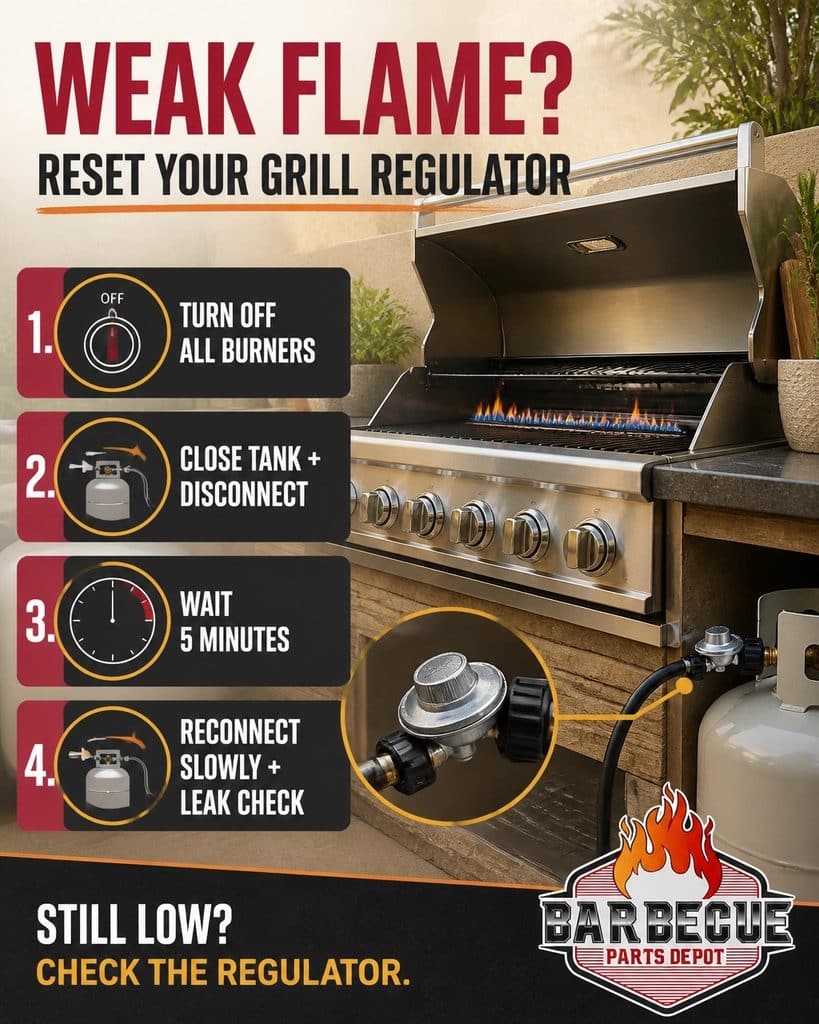
Weak flames can result from blocked ports, fuel-supply restrictions, a regulator issue, or a burner that’s deteriorating.
On some propane grills, a regulator may restrict gas flow after an unusual pressure change or operating sequence. Follow the manufacturer’s reset procedure if one is provided.
Don’t assume every weak flame is a regulator problem. Inspect the accessible components and use the troubleshooting chart for your model.
Problem: Food Cooks Unevenly
Uneven cooking can come from blocked burner ports, damaged heat tents, poor preheating, or differences in heat across the cooking surface.
Check the burner condition and heat tents, preheat the grill adequately, and arrange food according to the hotter and cooler zones.
A simple two-zone setup often works better than setting every burner to maximum and hoping for the best.
Problem: Flames Suddenly Become Excessive
Large flare-ups often happen when fat drips onto hot surfaces or grease has accumulated inside the grill.
Trim excessive external fat when appropriate, keep the grease system clean, and avoid allowing heavy grease buildup to remain in the firebox.
If a grease fire develops, turn off the burners and fuel supply if you can do so safely.
Never pour water onto a grease fire. Keep the lid closed if it is safe to do so, stay clear of the grill, and call emergency services if the fire cannot be controlled safely.
Problem: You Smell Gas
Treat a suspected gas leak seriously.
Stop using the grill. If safe, shut off the gas supply. Keep flames away, avoid operating electrical switches near the suspected leak, and move away from the area if the smell persists or is strong.
Don’t attempt to light the grill again until the problem has been identified and corrected. Contact the gas supplier or a qualified technician when needed.
Safety rule: Troubleshooting stops when a gas leak is suspected.
Gas Grill Safety: What to Check Before Every Cookout
Maintenance helps your grill perform well, but safe operating habits are just as important. Before lighting up, make a quick inspection part of your routine.
- Check the fuel system. Look for visible damage to hoses, connections, and the fuel supply.
- Inspect the grease tray. Remove accumulated grease and make sure the tray is positioned correctly.
- Keep the cooking area clear. Move combustible materials away from the grill and follow the required clearance distances.
- Grill outdoors. Never operate a gas grill in a home, garage, enclosed porch, or other enclosed space. Gas grills produce carbon monoxide, an odorless and potentially deadly gas.
- Follow the lighting instructions. Use the recommended sequence and allow the specified waiting period between unsuccessful attempts.
- Know how to shut it down. Learn the correct procedure for turning off the burners and fuel supply.
Never use a grill with a suspected leak, a damaged gas hose, or an ignition fault that makes safe lighting uncertain.
For propane grills, store cylinders upright in an appropriate outdoor location, away from excessive heat and ignition sources, following local requirements and the cylinder manufacturer’s instructions.
A Simple Gas Grill Maintenance Schedule
You don’t need to spend every weekend dismantling your grill. A manageable routine is usually enough to catch problems early.
Before Every Cookout
- Check the fuel supply and visible connections.
- Look for obvious damage or unusual odors.
- Make sure the grease tray isn’t full.
- Confirm that the cooking area is clear and the grill is stable.
After Cooking
- Clean the cooking grates according to the manufacturer’s instructions.
- Remove food residue and inspect for excessive grease buildup.
- Allow the grill to cool and shut it down properly.
Monthly During Frequent Use
- Inspect burners, heat tents, and accessible ignition components.
- Clean the grease tray and catch pan thoroughly.
- Check the hose and regulator for visible damage.
- Look for corrosion, loose fittings, and other signs of wear.
At the Start and End of the Grilling Season
- Give the grill a more thorough cleaning.
- Inspect all accessible components.
- Check the owner’s manual for seasonal maintenance recommendations.
- Store the grill and fuel supply according to the manufacturer’s instructions.
Adjust this schedule for how often you cook, the weather where you live, and the specific requirements of your grill.
When to Repair or Replace Gas Grill Parts
Not every worn component means it’s time to buy a new grill. Many gas grill parts can be replaced individually, allowing you to restore performance without replacing the entire unit.
Burners with severe corrosion, damaged hoses, unreliable ignition components, and heat tents that have rusted through are common candidates for replacement.
Before ordering anything, find the grill’s model number and check the manufacturer’s parts list. Components that look similar may differ in dimensions, fittings, or operating specifications.
It’s also worth considering the condition of the rest of the grill. Replacing a burner on a sound, well-maintained grill can be sensible. Investing heavily in a grill with a badly corroded firebox, damaged frame, and multiple failing components may not be.
Never substitute an incompatible gas component simply because it fits.
Gas valves, regulators, hoses, and burners must meet the specifications for the appliance and fuel type.
Routine cleaning and straightforward maintenance may be suitable for a careful owner. Gas leaks, damaged fuel connections, and complex valve or regulator faults should be handled by the manufacturer or a qualified technician.
Keep Your Grill Ready for Every Cookout
A dependable grill isn’t just about powerful burners or fancy features. It’s about understanding how the components work together and giving them the care they need.
Learn the basics of gas grill parts, keep grease under control, inspect fuel connections, and deal with small problems before they become major headaches.
Do that consistently, and your grill will be better prepared for everything from quick weeknight burgers to a slow afternoon of barbecue ribs.
After all, the best grill is the one that works when the guests arrive – and doesn’t turn dinner into a repair project.
Frequently Asked Questions About Gas Grill Parts
What are the main parts of a gas grill?
The main components typically include burners, cooking grates, heat tents, an ignition system, control valves, a regulator and hose where applicable, a firebox, a lid, and a grease collection system. Exact designs vary by model.
How often should gas grill parts be cleaned?
Clean the grates after cooking according to the manufacturer’s instructions, and empty the grease tray regularly. Inspect burners and heat tents periodically, with more frequent checks for grills used heavily.
Why is my gas grill not heating evenly?
Possible causes include blocked burner ports, damaged heat tents, inadequate preheating, or normal temperature differences across the cooking surface. Inspect the grill safely and consult the model-specific troubleshooting guide.
When should I replace a gas grill burner?
Consider replacement when a burner has severe corrosion, cracks, significant deformation, or persistent performance problems that remain after approved cleaning and troubleshooting.
Can I replace gas grill parts myself?
Many owners can replace certain grates, heat tents, grease trays, and other user-serviceable components. Follow the manual and use compatible replacement parts. Gas-system repairs may require a qualified technician.
Featured image credit: @goodhousekeeping
