
“No society can prosper if its people do not feast together in joy,” declared Emperor Ashoka the Great over two thousand years ago.
He was onto something profound about the unifying power of food, though he almost certainly wasn’t standing in a stadium parking lot at 8:00 AM, desperately fanning a dying ember of charcoal while four drunk guys dressed as mascot-themed superheroes screamed at him for raw burgers.
Tailgating is supposed to be a party, not a high-stress short-order cook shift. Yet, every weekend, dedicated hosts chain themselves to portable grills, missing every interception, big tackle, and legendary pre-game highlight because they are too busy nursing flared-up grease fires.
It is time to fire your inner martyr. The secret to legendary game-day hosting is shifting the workload home – specifically to the 24 to 48 hours before kickoff.
Mastering smart tailgating recipes make ahead strategies lets you pull up to the lot, crack open a beverage, and actually enjoy the pre-game hype.
Essential Equipment for Tailgating Recipes Make Ahead
Before diving into the menu, let us talk strategy. A solid make-ahead plan relies entirely on your transport gear.
- The Insulated Cooler (For Hot Food): Known in pitmaster circles as the “fake Cambro.” An inexpensive, clean cooler lined with towels will keep wrapped hot pans steaming for up to four hours.
- Thermal Soup Flasks/Wide-Mouth Thermoses: Perfect for holding liquid gold like chili, cheese sauce, or pulled pork.
- Heavy-Duty Foil Pans: The unsung heroes of parking lot dining. Prep, store, heat, and throw away. Zero dishwashing required when you get home.
- Color-Coded Totes: Pack your dry goods, paper plates, and serving utensils in one tote, and cleaning supplies in another.
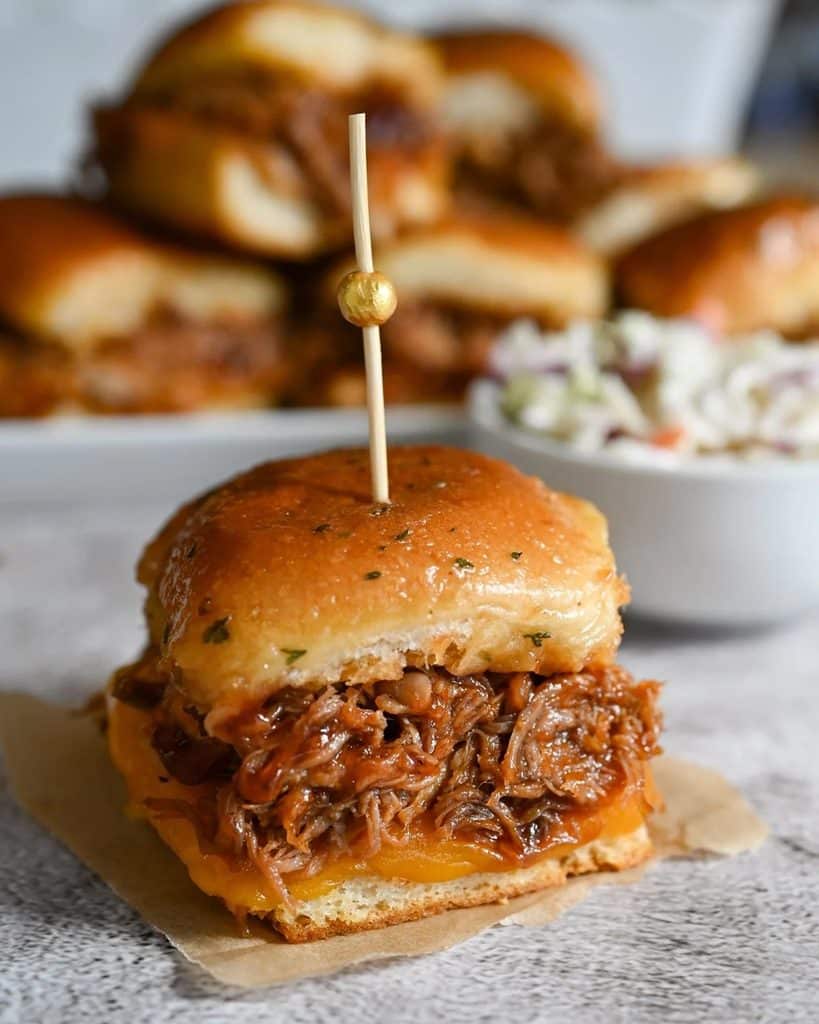
1. Slow-Cooker Pulled Pork Sliders
Make-Ahead Window: 2 days prior.
Nothing says tailgate like tender pork shoulder, but nobody wants to manage a 12-hour smoker setup in a gravel parking lot. Cook your pork shoulder two days ahead at home.
Shred the meat while warm, toss it in your favorite vinegar- or tomato-based barbecue sauce, and chill it overnight in the fridge.
On game morning, warm the pulled pork on your stove, pack it directly into a wide-mouth thermal flask, and head out.
Bring Hawaiian sweet rolls in their original packaging, slice the whole block horizontally on-site, pile the pork on top, and hand out instant sliders.
- Prep Day: Slow cook and shred the pork shoulder.
- Game-Day Transport: Pack in a wide-mouth thermal flask.
- Assembly On-Site: Slice the rolls horizontal-style and stack the pork.
- Key Advantage: Zero raw meat handling at the stadium.
- Pro Tip: Pack pickled jalapeños and coleslaw in separate containers to keep the rolls from turning soggy.
Make ahead recipe
- Prep time: 15 mins
- Cook time: 8 hrs (Low)
- Rest time: 20 mins
- Yield: 12 sliders
Ingredients:
- 3 lbs pork shoulder (boston butt)
- 2 tbsp BBQ dry rub
- 1 ½ cups BBQ sauce
- 12 Hawaiian sweet rolls
Instructions:
- Rub pork shoulder evenly with dry rub and place in a slow cooker.
- Cover and cook on Low for 8 hours until fork-tender.
- Transfer pork to a board, let rest for 20 minutes, then shred with two forks.
- Toss shredded pork with BBQ sauce.
- Pack into a thermal flask for transport. Slice rolls horizontally at the site and stack high.
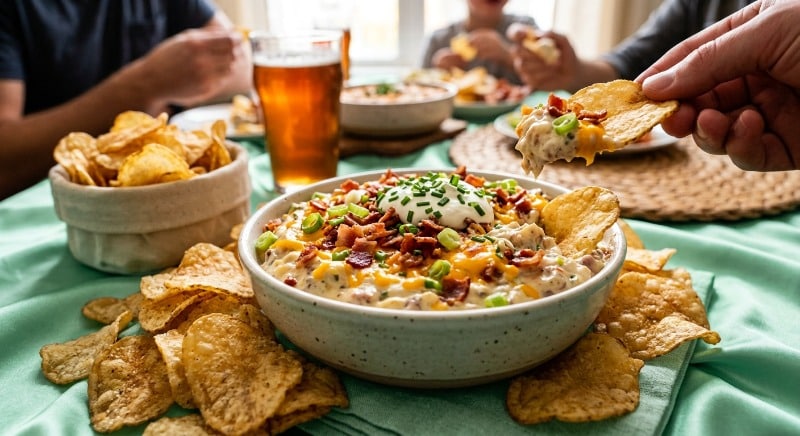
2. Loaded Baked Potato Dip with Kettle Chips
Make-Ahead Window: 24 hours prior.
Forget boring sour cream dips that separate into sad puddles under the sun. This heavy-hitting dip combines sour cream, cream cheese, sharp cheddar, thick-cut bacon, and fresh chives.
Mixing this dip 24 hours in advance lets the smoky bacon infuse into the dairy base, creating a flavor profile far superior to anything made on the spot.
Transfer the dip into a sealable container and tuck it into the cooler. Serve alongside thick-cut kettle chips or waffle potato chips – regular potato chips will snap instantly under the density of this dip.
- Key Advantage: Keeps cold for hours and tastes better the longer it sits.
- Pro Tip: Fry your own bacon crisp at home; pre-packaged bacon bits turn rubbery in cream cheese.
Make ahead recipe
- Prep time: 15 mins
- Cook time: 10 mins (for bacon)
- Rest time: 4 hrs (chill)
- Yield: 8 servings
Ingredients:
- 16 oz sour cream
- 8 oz cream cheese, softened
- 6 slices thick-cut bacon, cooked crisp and chopped
- 1 ½ cups sharp cheddar cheese, shredded
- ⅓ cup fresh chives, chopped
- Kettle chips for serving
Instructions:
- In a large bowl, beat sour cream and softened cream cheese until smooth.
- Fold in crisp bacon, shredded cheddar, and chives.
- Transfer to an airtight container and chill in the fridge for at least 4 hours (overnight preferred).
- Serve cold directly from the cooler alongside sturdy kettle chips.
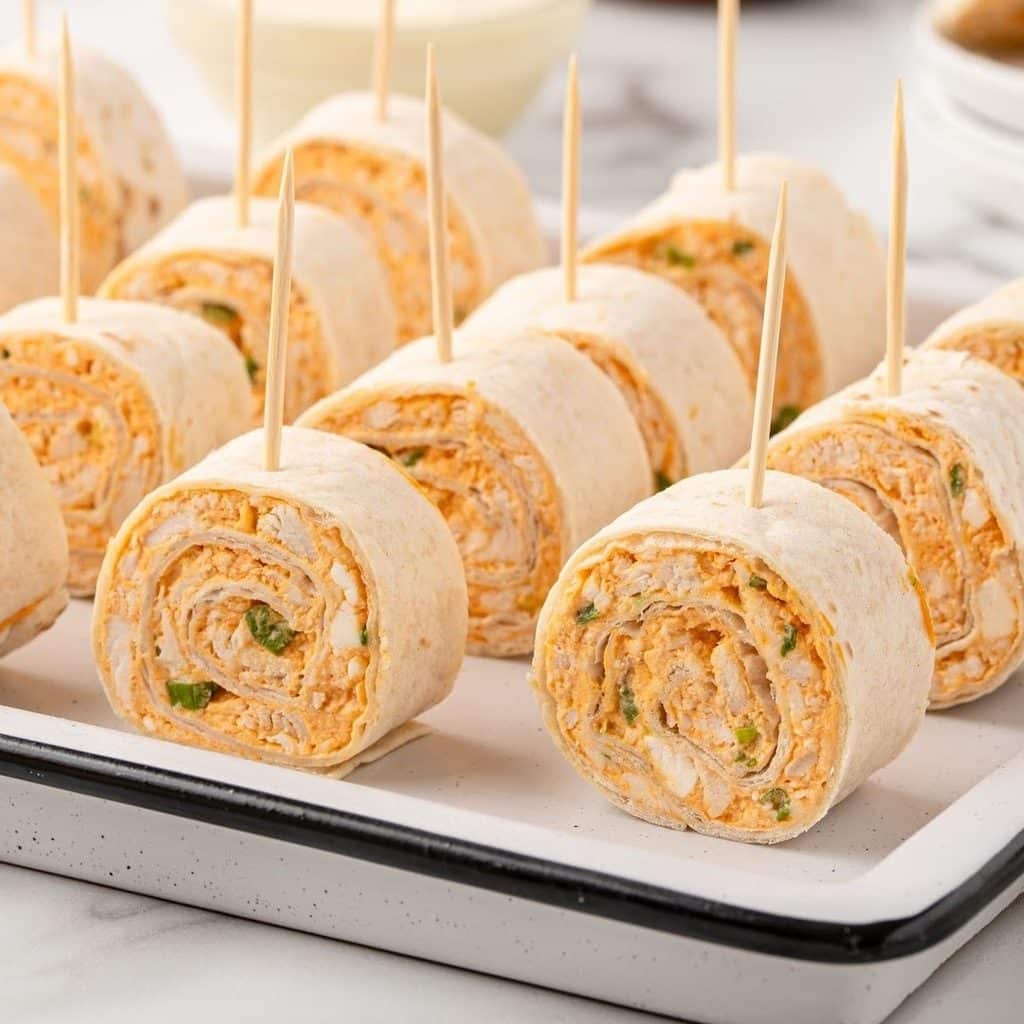
3. Buffalo Chicken Pinwheels
Make-Ahead Window: Night before.
Traditional chicken wings are fantastic until you realize you have bright orange sauce smeared from your elbows to your favorite jersey. These pinwheels capture every bit of that fiery flavor in a clean, finger-friendly roll-up.
Mix shredded cooked chicken with cream cheese, hot sauce, crumbled blue cheese, and a splash of ranch seasoning. Spread the mixture over large flour tortillas, roll them tightly in plastic wrap, and refrigerate overnight.
The tortilla absorbs just enough moisture to bind the roll together. Slice them into bite-sized pinwheels right before packing your cooler.
- Key Advantage: Neat, bite-sized, and zero mess on your fingers.
- Pro Tip: Use spinach or sun-dried tomato tortillas to bring vibrant color to your serving platter.
Make ahead recipe
- Prep time: 20 mins
- Cook time: 0 mins (uses pre-cooked chicken)
- Rest time: 4 hrs (chill)
- Yield: 24 pinwheels
Ingredients:
- 2 cups cooked chicken, shredded
- 8 oz cream cheese, softened
- ½ cup hot sauce (e.g., Frank’s RedHot)
- ½ cup blue cheese crumbles
- 1 tbsp ranch seasoning mix
- 4 large flour tortillas
Instructions:
- Mix cream cheese, hot sauce, blue cheese, and ranch seasoning until blended. Stir in shredded chicken.
- Spread mixture evenly over the four tortillas.
- Roll each tortilla tightly into a log, wrap securely in plastic wrap, and refrigerate for at least 4 hours.
- Slice each log into 6 pinwheels right before packing into your cooler.
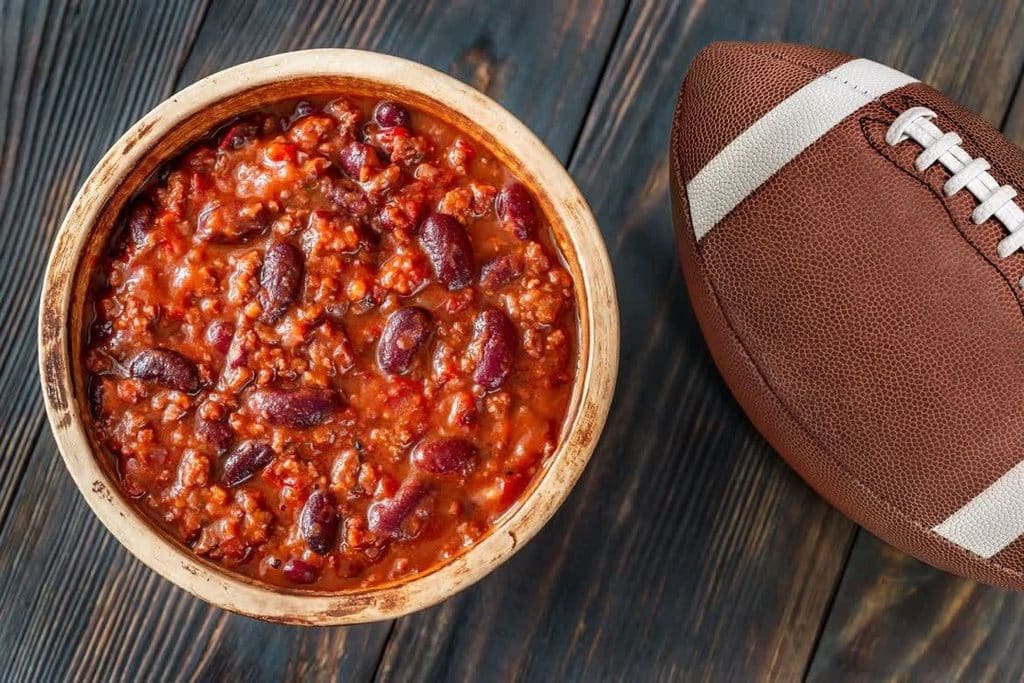
4. Game-Day Chili in a Thermos
Make-Ahead Window: Up to 3 days prior.
Chili is famous for a culinary truth: it always tastes better on day two or three.
As the ingredients sit, the chili powder, cumin, garlic, and seared meat meld together into a rich sauce.
Simmer a batch of beef and bean chili on Thursday night.
On Sunday morning, heat the chili until piping hot, pour it into an insulated container, and seal it. Pair it with single-serve bags of corn chips.
Guests can cut open the top of a chip bag, ladle hot chili inside, sprinkle shredded cheddar on top, and eat “chili in a bag” with a plastic fork.
- Key Advantage: Zero cleanup; discard the chip bag when finished.
- Pro Tip: Preheat your thermal flask with hot tap water for 10 minutes before adding the chili to maximize heat retention.
Make ahead recipe
- Prep time: 15 mins
- Cook time: 45 mins
- Rest time: 10 mins
- Yield: 6 servings
Ingredients:
- 1.5 lbs ground beef
- 1 packet (1.25 oz) chili seasoning
- 1 can (15 oz) kidney beans, drained
- 1 can (14.5 oz) diced tomatoes
- 1 cup beef broth
- Single-serve corn chip bags & shredded cheese for serving
Instructions:
- Brown ground beef in a pot over medium-high heat; drain excess fat.
- Stir in chili seasoning, kidney beans, diced tomatoes, and beef broth.
- Bring to a boil, reduce heat to low, and simmer uncovered for 40 minutes.
- Let sit for 10 minutes. Reheat on game day and funnel into a thermal flask to serve over opened bags of corn chips.
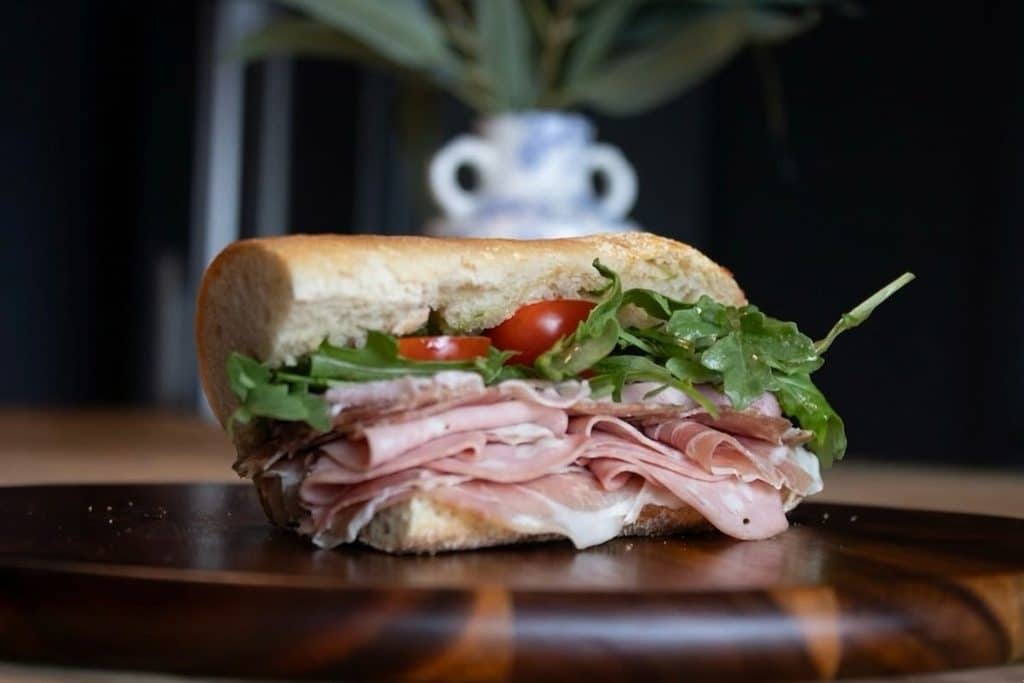
5. Cold Italian Sub Layer Sandwiches
Make-Ahead Window: 12 to 18 hours prior.
Buying ten individual subs from a sandwich shop gets expensive quickly. Building a master sub loaf at home delivers high impact for half the cost.
Grab a long crusty Italian loaf, slice it lengthwise, and scoop out some of the interior bread crumb to make a hollow trench. Layer salami, capicola, prosciutto, provolone, and sliced pepperoncini inside.
Wrap the entire sandwich tightly in parchment paper and foil, then weigh it down in your fridge overnight with a heavy cast-iron skillet. Pressing the sub melds the cured meats together while preserving the outer crust.
- Top Crust: Crusty Italian Bread
- Filling Layers: Salami, Capicola, Provolone Cheese, Prosciutto, and Pepperoncini
- Preparation: Wrapped tight and pressed overnight under heavy weight
- Key Advantage: Serves an entire crowd with a single knife slice.
- Pro Tip: Keep oil, vinegar, and tomatoes on the side; apply them right before eating to prevent a soggy sandwich.
Make ahead recipe
- Prep time: 20 mins
- Cook time: 0 mins
- Rest time: 8 hrs (overnight press)
- Yield: 6 servings
Ingredients:
- 1 long crusty Italian loaf
- ¼ lb deli salami, sliced
- ¼ lb capicola, sliced
- ¼ lb prosciutto, sliced
- 6 slices provolone cheese
- ½ cup sliced pepperoncini
Instructions:
- Slice the loaf in half lengthwise and hollow out a bit of the bread crumb from the top half.
- Layer salami, capicola, prosciutto, provolone, and pepperoncini inside the bread.
- Wrap the loaf tightly in parchment paper followed by aluminum foil.
- Place in the fridge overnight under a heavy weight (like a cast-iron skillet) to press before slicing.
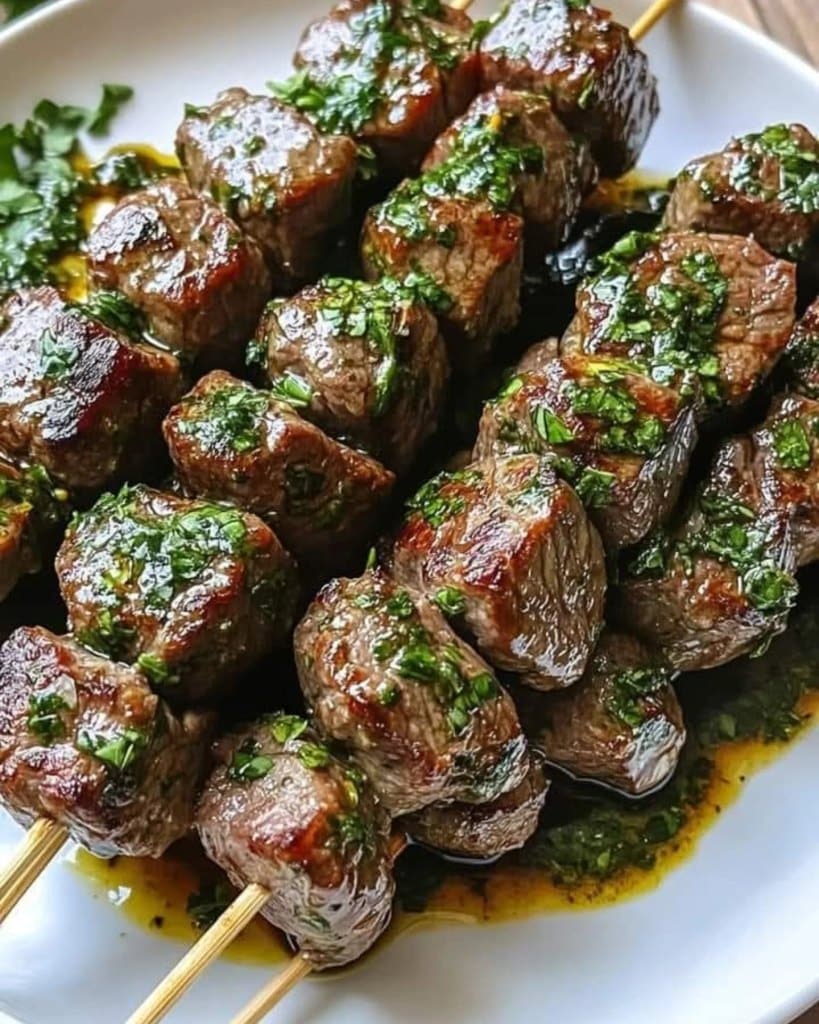
6. Marinated Steak Skewers with Chimichurri
Make-Ahead Window: 24 hours prior.
Serving steak at a tailgate sounds like a recipe for overcooked, rubbery meat. The trick is cooking your skewers completely at home and serving them at room temperature with an aromatic sauce.
Marinate sirloin strips in soy sauce, garlic, and olive oil, skewer them, and flash-grill them to medium-rare at home. Pack them in a shallow container.
Separately, blend fresh parsley, garlic, red wine vinegar, and olive oil into a punchy chimichurri. At the stadium, set out the skewers alongside the chimichurri jar.
- Key Advantage: No need to bring a hot grill or contend with raw meat prep.
- Pro Tip: Use flat wooden skewers instead of round ones so the meat turns cleanly during the home-cooking phase.
Make ahead recipe
- Prep time: 20 mins (plus 2 hrs marinade)
- Cook time: 8 mins
- Rest time: 5 mins
- Yield: 10 skewers
Ingredients:
- 1.5 lbs sirloin steak, cut into 1-inch strips
- ¼ cup soy sauce
- 2 tbsp olive oil
- 2 cloves garlic, minced
- 1 cup fresh chimichurri sauce (parsley, garlic, oil, vinegar)
Instructions:
- Marinate steak strips in soy sauce, olive oil, and garlic for 2 hours.
- Thread meat onto flat wooden skewers.
- Grill over high heat for 3-4 minutes per side (medium-rare).
- Rest 5 minutes, then pack into a container. Serve at room temperature with chimichurri for dipping.
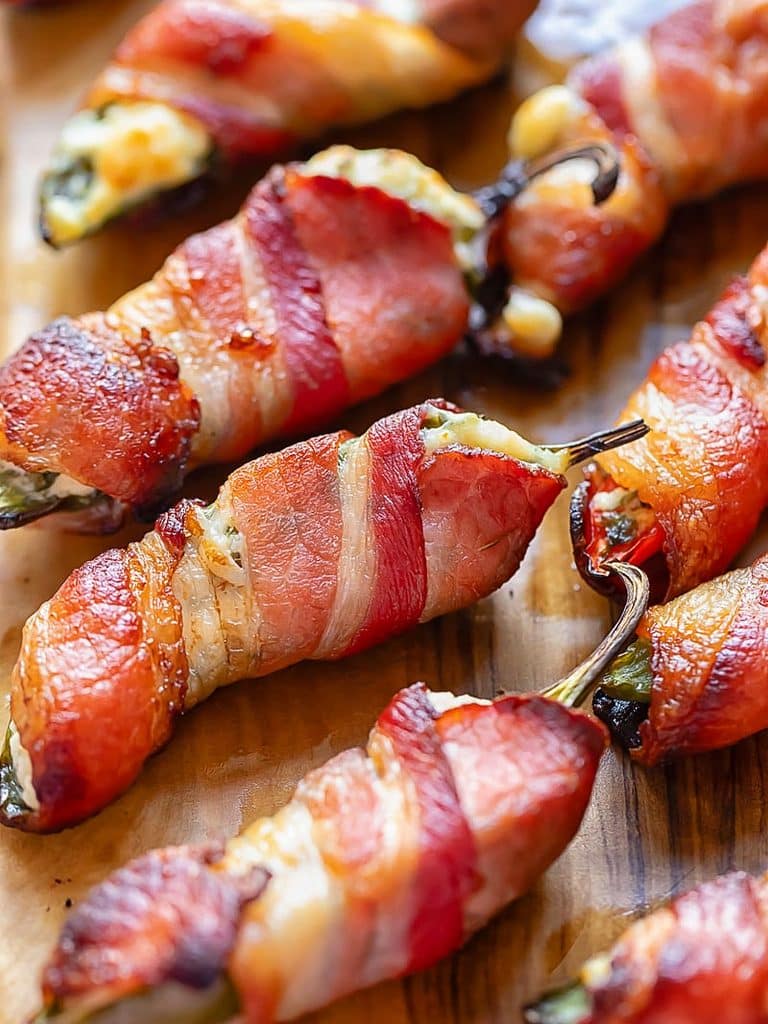
7. Bacon-Wrapped Jalapeño Poppers
Make-Ahead Window: Assemble 24 hours ahead; bake morning-of.
Jalapeño poppers are an absolute crowd favorite, but trying to seed pepper halves and wrap slippery bacon in a parking lot is a recipe for disaster.
Halve your jalapeños, scrape out the seeds, and stuff them with a mixture of cream cheese, cheddar, and garlic powder. Wrap each pepper tightly in half a strip of bacon, securing it with a toothpick.
Store them arranged in disposable aluminum baking pans in the fridge. On game morning, pop the pans in your oven at 400°F until the bacon crisps up. Cover the pan in heavy foil and slide it into your insulated warm cooler.
- Key Advantage: High-value finger food with zero on-site assembly.
- Pro Tip: Leave a few seeds in the cream cheese mix if your crowd likes extra heat.
Make ahead recipe
- Prep time: 20 mins
- Cook time: 25 mins
- Rest time: 5 mins
- Yield: 12 poppers
Ingredients:
- 6 fresh jalapeños, halved lengthwise and seeded
- 4 oz cream cheese, softened
- ½ cup cheddar cheese, shredded
- ½ tsp garlic powder
- 6 slices bacon, halved crosswise
Instructions:
- Mix cream cheese, cheddar cheese, and garlic powder in a bowl.
- Stuff each jalapeño half with the cheese mixture.
- Wrap each stuffed pepper with half a slice of bacon and secure with a toothpick.
- Bake at 400°F (204°C) for 20-25 minutes until bacon is crisp. Let rest 5 minutes before packing into an insulated container.
8. 7-Layer Mexican Party Dip
Make-Ahead Window: 24 hours prior.
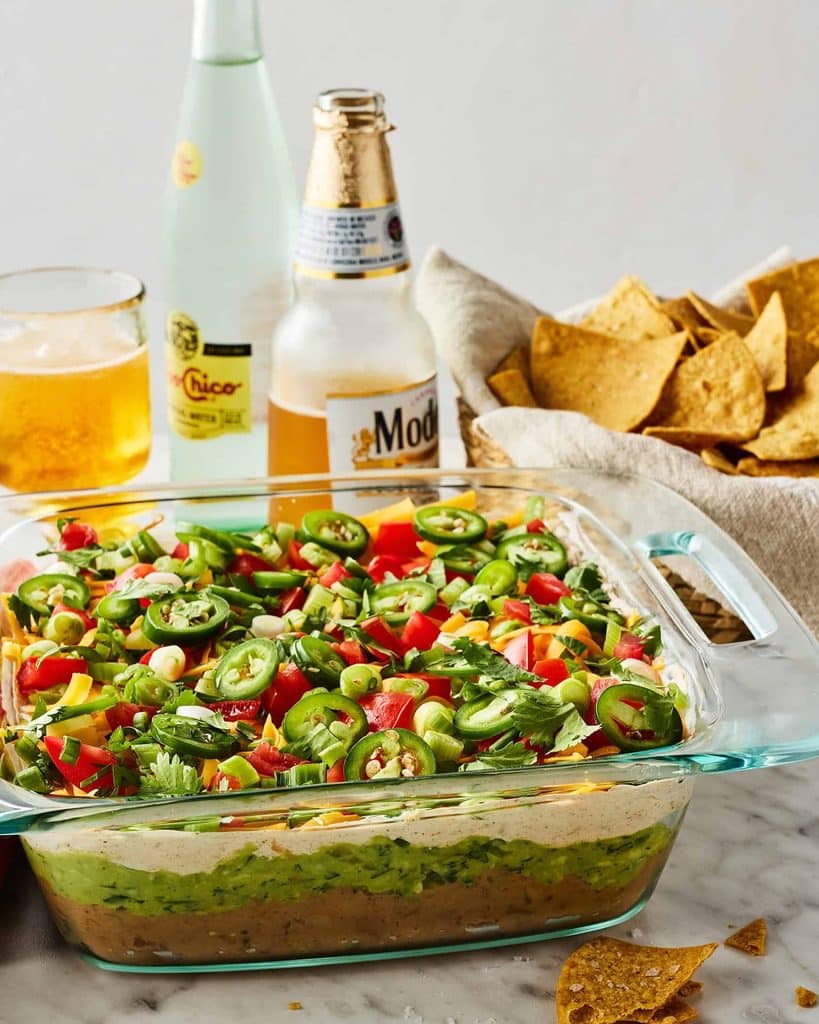
A well-constructed 7-layer dip is a masterpiece of textures, provided it doesn’t turn into a watery mess. Building this dip in a clear, deep glass dish or disposable pan 24 hours in advance allows the layers to set firmly.
- Refried beans mixed with taco seasoning
- Seasoned sour cream and cream cheese blend
- Fresh guacamole (thoroughly laced with lime juice to prevent browning)
- Mild or hot salsa (drained of excess liquid)
- Shredded Mexican blend cheese
- Sliced black olives and diced Roma tomatoes
- Chopped green onions and fresh cilantro
Keep it chilled in your cooler right up until serving time.
- Key Advantage: Bright, colorful, and requires zero heat source.
- Pro Tip: Drain your salsa in a fine-mesh strainer before adding it to prevent liquid from weeping into the lower layers.
Make ahead recipe
- Prep time: 20 mins
- Cook time: 0 mins
- Rest time: 2 hrs (chill)
- Yield: 10 servings
Ingredients:
- 1 can (16 oz) refried beans + 1 tbsp taco seasoning
- 1 cup sour cream mixed with 4 oz cream cheese
- 1 cup fresh guacamole
- 1 cup salsa, well-drained
- 1 cup shredded Mexican cheese blend
- ½ cup sliced black olives & 1 diced tomato
- ⅓ cup chopped green onions
Instructions:
- Spread seasoned refried beans in the bottom of a shallow dish.
- Carefully layer the sour cream mixture, guacamole, drained salsa, and shredded cheese.
- Top with olives, diced tomatoes, and green onions.
- Chill in the refrigerator for at least 2 hours before placing in the cooler.
9. Honey-BBQ Baked Chicken Wings
Make-Ahead Window: Night before.
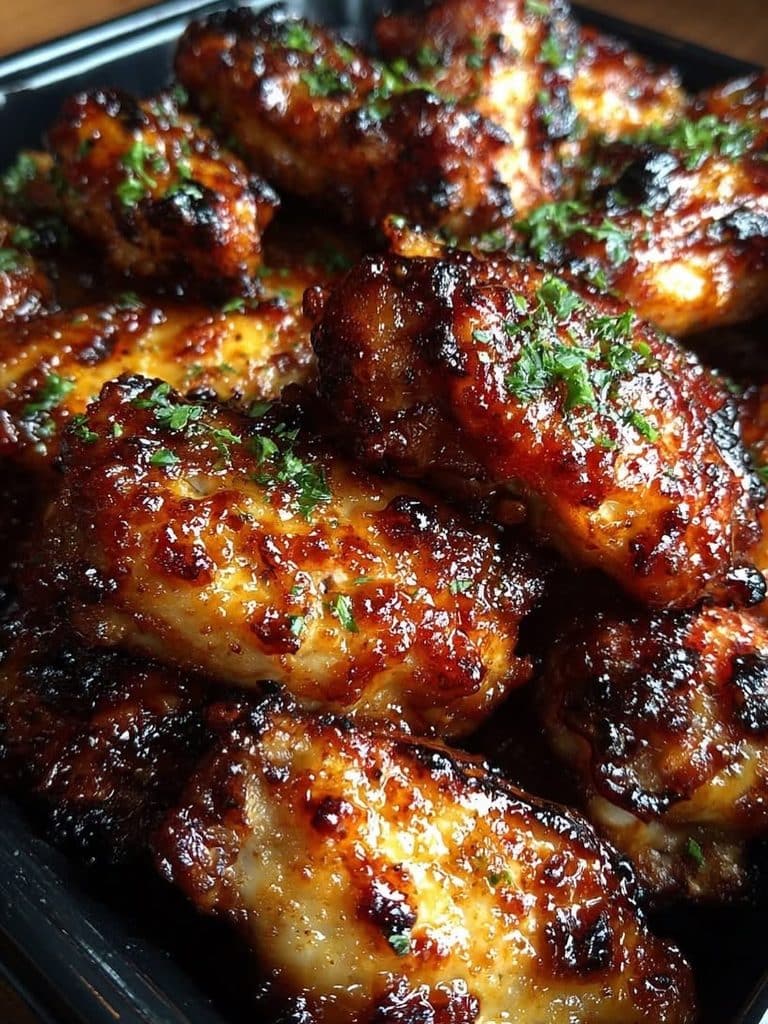
Frying wings at a tailgate is dangerous, and grilling raw wings takes precious time away from socializing. Bake your wings at home using a baking powder rub.
Baking powder alters the skin’s pH, giving you crackling, crispy skin directly from your kitchen oven without deep frying.
Toss the cooked wings in a warm glaze of honey, barbecue sauce, and a dash of cayenne pepper. Transfer the glazed wings into an aluminum pan, cover tight, and slide into your insulated thermal transport box.
They will stay hot, sticky, and tender for hours.
- Key Advantage: All the crispiness of fried wings with none of the grease setup.
- Pro Tip: Pass around wet wipes before serving; sticky fingers and smartphone screens do not mix.
Make ahead recipe
- Prep time: 10 mins
- Cook time: 45 mins
- Rest time: 5 mins
- Yield: 4 servings (approx. 20 wings)
Ingredients:
- 2 lbs chicken wing flats and drumettes
- 1 tbsp aluminum-free baking powder
- ½ tsp salt
- ½ cup BBQ sauce
- 2 tbsp honey
Instructions:
- Toss dry chicken wings thoroughly with baking powder and salt.
- Arrange on a wire rack set inside a baking sheet; bake at 400°F (204°C) for 45 minutes until skin is crackling crisp.
- Warm BBQ sauce and honey together in a small saucepan.
- Toss baked wings in warm glaze, rest 5 minutes, and transfer to a heavy foil pan inside a thermal carrier.
10. Fudge Brownie Bites with Game-Day Sprinkles
Make-Ahead Window: Up to 3 days prior.
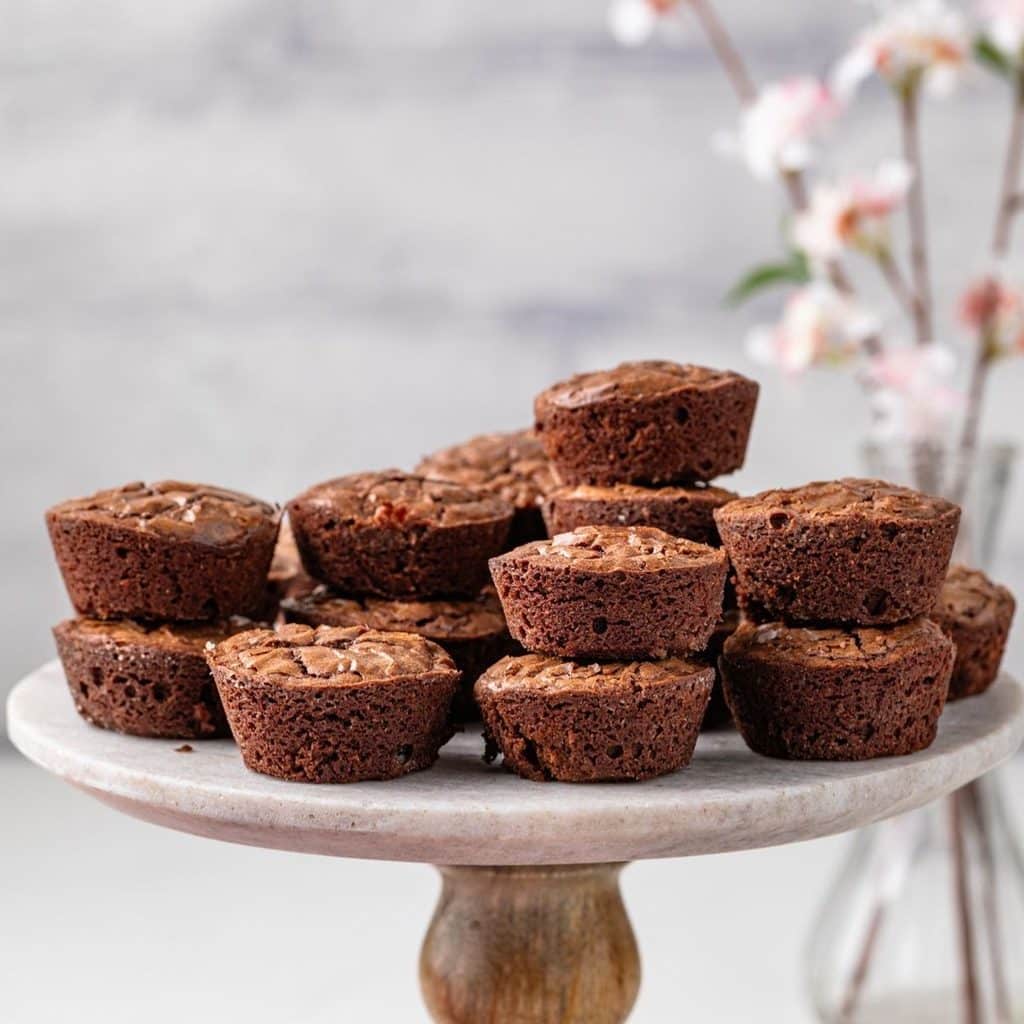
Every great tailgate needs a sweet finisher, but complicated desserts or melting frosted cakes are impractical. Dense fudge brownies made in a mini-muffin tin are the ultimate portable dessert.
Bake your favorite dark chocolate brownie batter in mini-muffin tins, topping each bite with team-colored sprinkles right before they enter the oven. Allow them to cool completely before packing. Store them in flat containers, using sheets of parchment paper between layers.
- Key Advantage: Stays fresh for days and survives warm weather without melting.
- Pro Tip: Add a half-cup of semi-sweet chocolate chips into your batter for a richer fudge bite.
Make ahead recipe
- Prep time: 15 mins
- Cook time: 18 mins
- Rest time: 30 mins (cooling)
- Yield: 24 mini bites
Ingredients:
- 1 box (18 oz) fudge brownie mix (plus required oil/eggs per box)
- ½ cup semi-sweet chocolate chips
- 3 tbsp game-day/team color sprinkles
Instructions:
- Prepare brownie batter according to package instructions and stir in chocolate chips.
- Lightly grease a 24-cup mini-muffin tin and spoon batter evenly into cups.
- Top each with sprinkles and bake at 350°F (177°C) for 16-18 minutes until a toothpick inserted comes out mostly clean.
- Cool completely in the pan for 30 minutes before packing in single layers separated by parchment paper.
Pro-Tips for Stress-Free Game Day Execution
- Master the Two-Cooler Rule: Dedicate one cooler strictly to beverages and another to food. The drink cooler will be opened constantly, letting cold air escape. Keeping food in a dedicated, unopened cooler maintains food-safe temperatures for much longer.
- Label Everything with Tape: Use blue painter’s tape and a permanent marker to label containers with instructions like “Serve Cold,” “Heat First,” or “Sauce for Sliders.” This allows helpful friends to grab items without constantly interrupting your conversation.
- Pack a “Trash Kit”: Bring two heavy-duty trash bags, paper towels, sanitizer wipes, and a roll of painter’s tape. Tape a trash bag directly to the edge of your tailgate truck bed or folding table to keep wind from blowing empties across the parking lot.
Game Over, You Win
Tailgating isn’t about proving you can manage a three-ring circus over a bag of charcoal while wearing a jersey. It’s about community, atmosphere, and making memories.
By leaning into smart tailgating recipes make ahead tactics, you swap panic for prep work. Cook on Friday, pack on Saturday, and on Sunday, enjoy the party you put so much effort into hosting.
Touchdown.
Featured image credit: @chroniclebooks
