
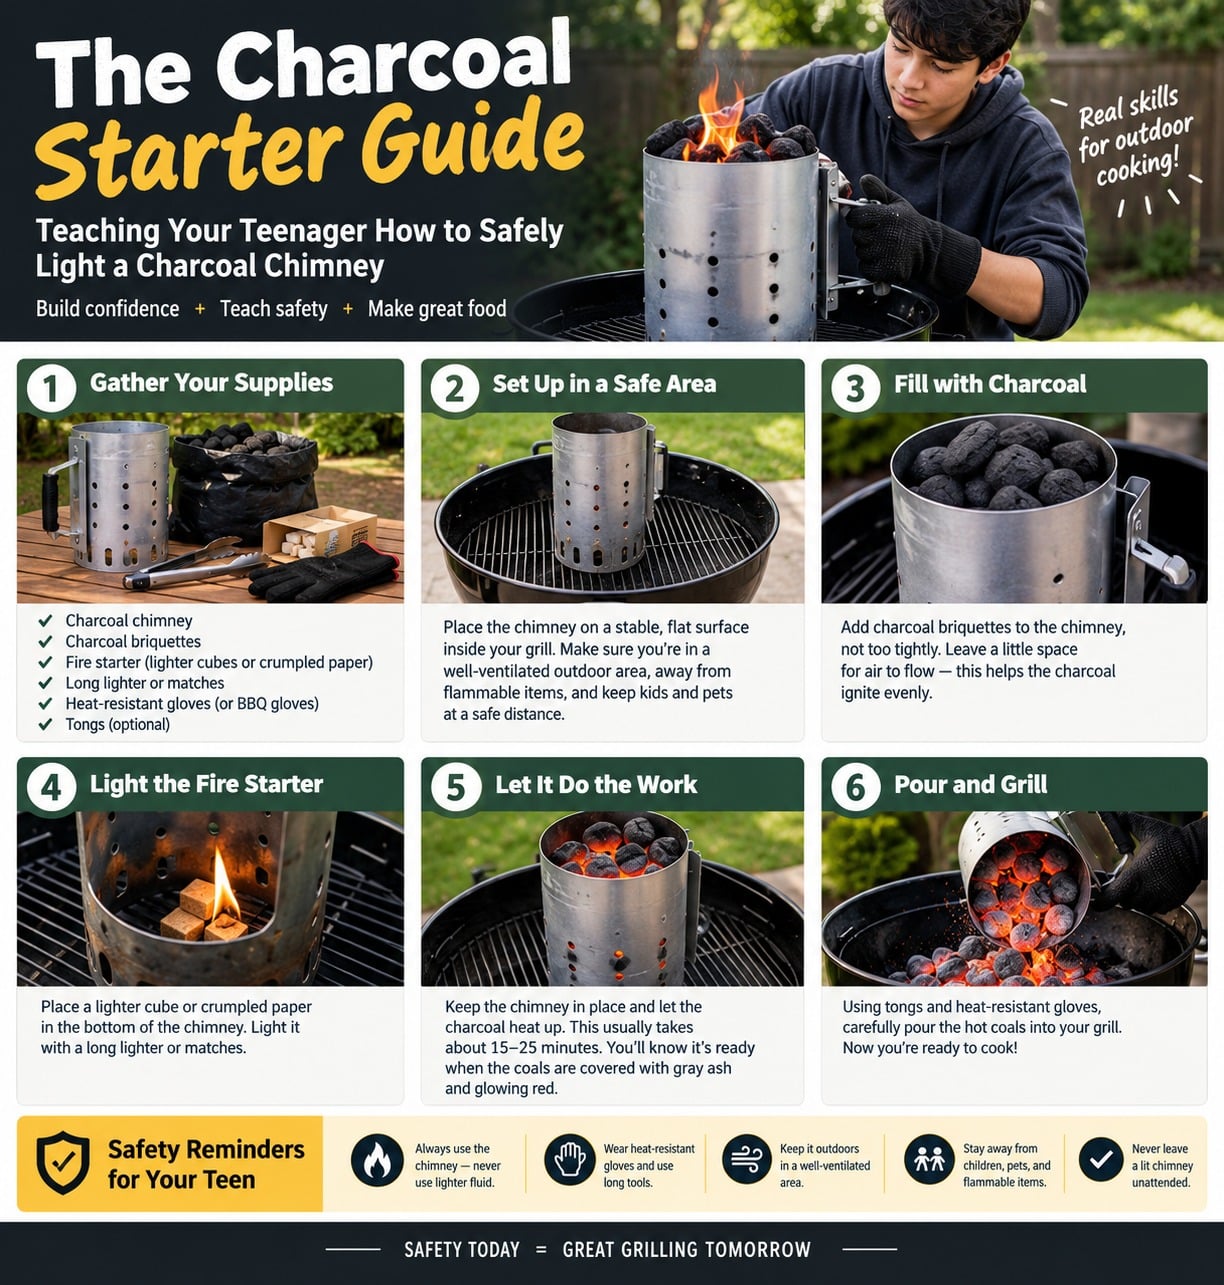
Did Anthony Bourdain ever imagine that the simple act of firing up a backyard grill would become the ultimate test of teenage responsibility?
Bourdain famously believed that learning how to cook was an essential life skill, a fundamental human rite of passage.
Handing a teenager the keys to the family car gets all the hype, but handing them control over roaring live embers is where real trust is forged.
Let us be honest: lighter fluid is the lazy person’s shortcut, and it ruins everything it touches. It makes your food taste like a gas station pump and turns an innocent cookout into a terrifying game of backyard pyrotechnics.
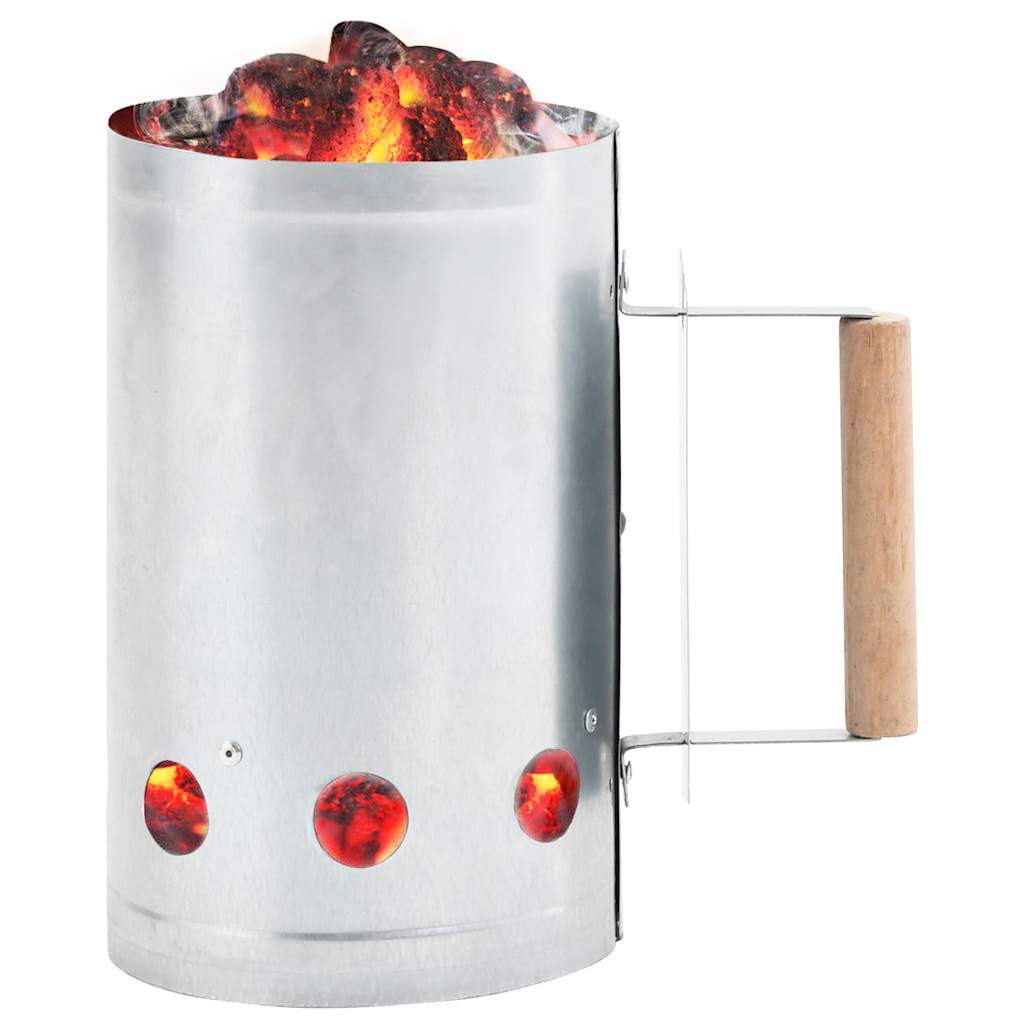
A proper charcoal chimney is the single best tool for lighting live fire safely, efficiently, and cleanly.
Teaching your teenager how to master this metal cylinder isn’t just about making dinner; it’s about passing down confidence, fire safety, and the satisfaction of cooking over real coals.
Essential Gear & Prep: Setting Up for Success
Before letting your teen anywhere near a match, you need to gear them up correctly. Fire demands respect, and proper preparation turns potential chaos into a smooth, controlled operation.
- The Right Charcoal Chimney: Choose a standard metal charcoal chimney equipped with a heat shield and a secondary handle for support. Avoid cheap knockoffs without safety shields; that heat shield is the only barrier keeping scorching radiant heat away from knuckles.
- Barbecue Heat Gloves: Regular kitchen oven mitts will not cut it here. Equip your teen with heavy-duty leather or aramid-fiber heat-resistant barbecue gloves that extend past the wrist.
- Long-Handled Tongs: A reliable pair of 16-to-18-inch stainless steel tongs provides necessary reach when adjusting stray embers later.
- Safety Backup: Always keep a bucket of dry sand, a garden hose connected to an open tap, or a certified ABC fire extinguisher within arm’s reach before lighting anything.
- Clean Fuel & Igniters: Ditch the lighter fluid entirely. Stock up on natural paraffin wax cubes, wood tumbleweeds, or plain unprinted newspaper. Pair these with lump charcoal or quality hardwood briquettes.
Choosing the Workstation: Location & Surface Safety
Fire is unpredictable when paired with bad judgment or a stray gust of wind. Establishing a solid workstation is non-negotiable before your teenager strikes a single match.
Ground Rules for Placement
Always place the charcoal chimney directly inside the grill on top of the bottom charcoal grate. Never set it on wooden decks, dry lawns, plastic tables, or concrete driveways.
Concrete might seem non-flammable, but trapped moisture inside concrete can rapidly expand under intense heat, causing the surface to pop or spall violently.
Clearance and Overhead Safety
Position the grill at least ten feet away from any structure. Keep a clear perimeter from wooden fences, vinyl siding, low-hanging tree branches, and patio awnings.
Outdoor Ventilation
Lighting charcoal indoors or under fully enclosed patio spaces creates invisible, lethal carbon monoxide buildup. A charcoal chimney must strictly live outdoors where air circulates freely.
Teach your teenager to check the prevailing wind direction so they aren’t standing directly downwind of rising smoke and flying embers.
Step-by-Step Charcoal Chimney Tutorial
Breaking down the process into clear, manageable phases takes the anxiety out of handling live fire. Walk through these exact steps together.
Step 1: Loading the Ignition Base
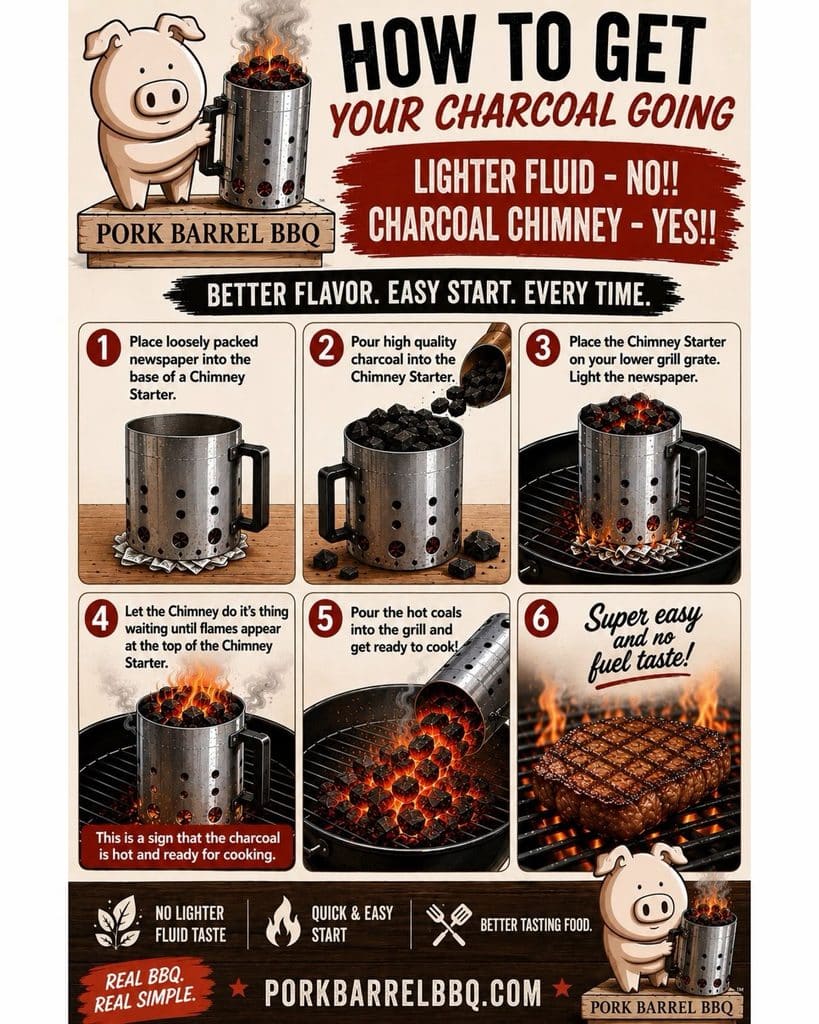
Flip the charcoal chimney upside down to expose the bottom cavity under the wire grate. Tuck two or three loosely crumpled sheets of newspaper or place a wax firestarter cube directly underneath.
Avoid packing the paper too tightly; tight paper chokes off oxygen and creates thick, lingering smoke instead of a clean, hot flame.
Step 2: Filling the Charcoal Chamber
Turn the chimney right-side up and begin loading your fuel into the top section. Fill the metal cylinder with briquettes or lump charcoal up to the top rim.
Teach your teen to inspect the pieces briefly: discard fine coal dust that clogs airflow, and stack larger pieces loosely so heat can travel upward smoothly.
Step 3: Igniting the Starter
Place the loaded chimney firmly onto the grill’s lower charcoal grate. Using a long-neck utility lighter or a long match, ignite the starter paper or wax cube through the bottom ventilation holes.
Light the fuel in two or three separate spots around the base to ensure an even burn.
Step 4: The Airflow Burn (15 to 20 Minutes)
Once the base catches, physics takes over. Cold air enters through the bottom vents, feeds the flames, and draws superheated air up through the charcoal cylinder like a blast furnace.
Watch for these three visual cues as the fire takes hold:
- 0 to 5 Minutes: Heavy gray smoke billows out as the bottom coals catch fire.
- 5 to 12 Minutes: Smoke clears up, and bright orange flames peek out through the top layer.
- 15 to 20 Minutes: The top coals develop a light coat of white ash. This white-ash layer signals that the chimney is primed and ready to pour.
Step 5: The Controlled Pour
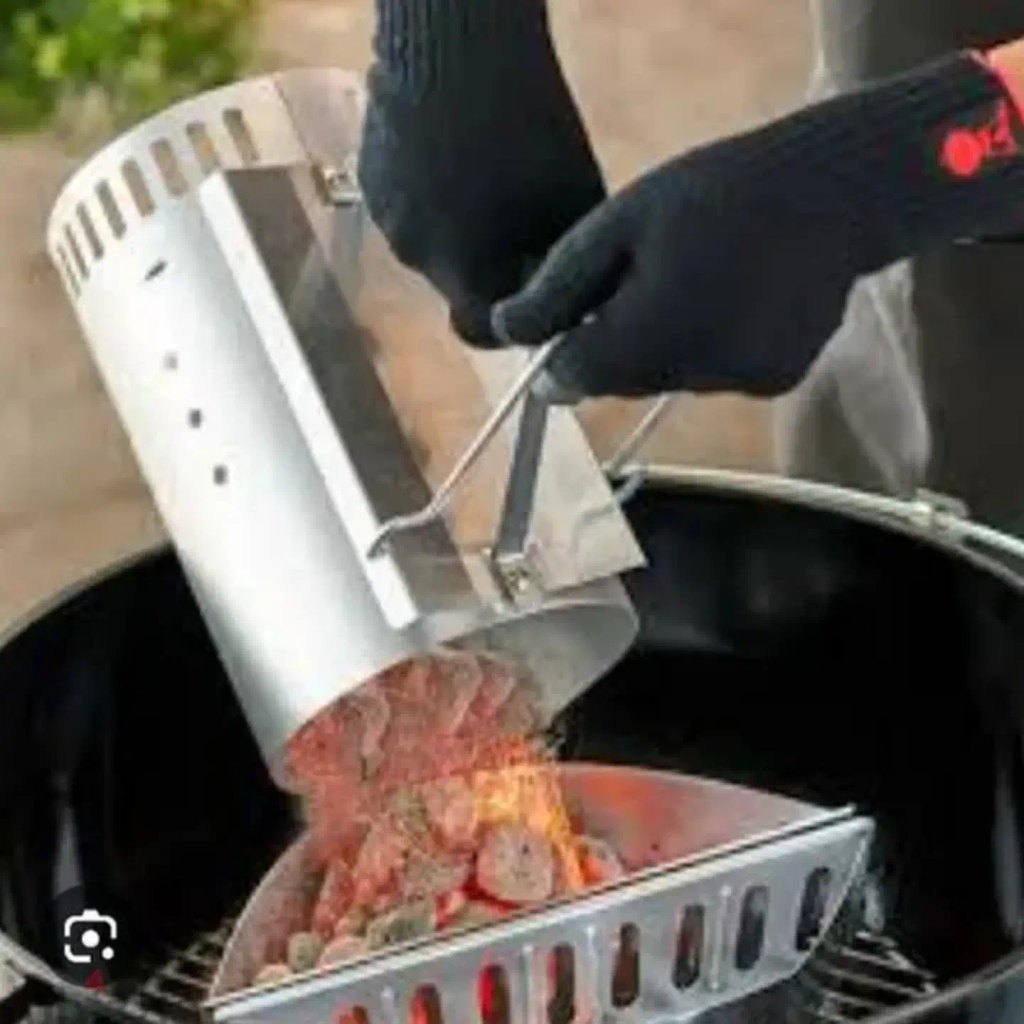
This is the moment where confidence meets technique. Put on both heat-resistant gloves. Instruct your teenager to grab the main handle with their dominant hand while holding the secondary support handle with their opposite hand.
Stand upwind with feet planted wide for stability. Lift the charcoal chimney smoothly out of the grill, hold it low over the charcoal grate, and invert it slowly to dump the burning coals.
Never drop coals from a high angle, as dropping them blasts clouds of red-hot ash and flying sparks straight into the air.
Key Safety Rules for Teenagers
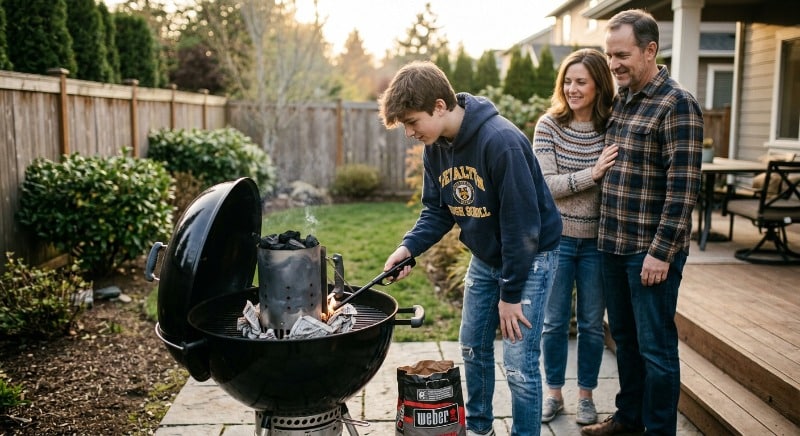
Working around live fire requires a distinct mindset. Establishing firm rules keeps safety top of mind throughout the entire cook.
- The Absolute Zero-Lighter-Fluid Rule: Never pour lighter fluid onto coals inside a charcoal chimney, and never squirt lighter fluid onto already burning embers. It creates instant explosive flashovers and ruins the flavor profile of food.
- Respecting Thermal Mass: Metal cylinders and burning coals retain blistering heat long after flames disappear. Treat every metal surface on or near the grill as if it is screaming hot, even if it doesn’t look red.
- Proper Outdoor Attire: Synthetics like polyester or nylon melt instantly when touched by stray sparks. Require your teen to wear 100% cotton clothing, closed-toe leather shoes or sneakers, and have them tie back long hair before starting.
- Managing Flying Embers: Gusts of wind can kick up embers without warning. Teach your teenager to stay calm, keep their face clear of the rising heat column, and step back smoothly rather than swatting wildly at flying sparks.
Troubleshooting Common Chimney Starter Mishaps
Even when you follow the rules, live fire can throw a curveball. Here is how to navigate common issues smoothly without panicking.
Problem 1: The Fire Dies Halfway Through
If smoke stops rising and the top coals remain completely black, the bottom starter fuel likely burned out before catching the charcoal.
- The Fix: Do not attempt to re-stuff paper into a half-hot chimney from the top. Wear heat gloves, carefully lift the loaded charcoal chimney using long tongs, set it down on a safe section of the grill grate, light a fresh wax cube on the grate, and set the chimney back over the new flame.
Problem 2: Excessive, Bitter Smoke
Thick, dark gray smoke that stings the eyes indicates choking embers, wet charcoal, or synthetic inks burning off coated paper inserts.
- The Fix: Stick strictly to plain newsprint, butcher paper, or natural wax starters. Store your charcoal bags indoors or in airtight storage tubs to protect them from ambient humidity.
Problem 3: Accidental Embers Spilled Outside the Grill
If a hot coal tumbles over the rim onto the patio during the pour, stay calm.
- The Fix: Never pick up hot coals with gloved fingers. Use long-handled metal tongs immediately to scoop the stray ember up and drop it back into the grill base.
Here is the rewritten version of all 5 subtopics, incorporating selective bullet points to break down the key details, make the content easy to skim, and keep the key words and phrases highlighted.
The Chemistry of Coals: Lump Wood Versus Briquettes
Understanding fuel is just as important as mastering the charcoal chimney. Not all charcoal is created equal, and teaching your teen the chemical differences between fuel types elevates their skills from basic following to true culinary science:
- Natural Hardwood Lump Charcoal: Ignites faster, burns much hotter, and leaves minimal residual ash, but burns unevenly due to random piece sizes.
- Compressed Briquettes: Uniform in size, offering steady, predictable heat duration – ideal for long, slow cooks like pork shoulder or brisket.
Have your teenager experiment with both fuel options inside the charcoal chimney to observe how different woods behave, smell, and burn. This deep dive turns a routine backyard chore into a hands-on lesson in organic chemistry and thermodynamics.
Weather Wizardry: Mastering Wind, Humidity, and Altitude
Fire is always at the mercy of Mother Nature, making environmental awareness a vital safety lesson for young cooks. Teach your teenager how changing elements directly affect the burn rate inside the charcoal chimney:
- High Humidity: Dampens charcoal ignition speed and leaves newspaper starter soggy and slow to light.
- Gusty Winds: Can violently redirect sparks, accelerate fuel consumption, or starve flames of steady airflow.
- High Altitudes: Lower atmospheric pressure means reduced oxygen levels, requiring noticeably longer burn times.
Show your teenager how to read weather conditions before stepping outside and how to position the grill strategically as a natural windbreaker. Adapting to weather shifts builds true resourcefulness under any conditions.
The Sensory Symphony: Listening to and Smelling the Fire
Experienced pitmasters never rely solely on timers; they use sight, sound, and smell to monitor live fire. Introduce your teenager to the distinct auditory and aroma cues of combustion:
- Sounds to Listen For: The gentle crackle of igniting paper, the steady roar of oxygen currents rising inside the charcoal chimney, and the sharp pop of escaping wood moisture.
- Scents to Recognize: The harsh, acrid smell of poor airflow or chemical fuels versus the clean, earthy fragrance of superheated hardwood.
When your teen learns to spot the transition from thick smoke to invisible, radiant heat waves using sound and scent, they evolve from a hesitant beginner into an intuitive cook with complete flame control.
Eco-Friendly Fire: Repurposing Ash and Sustainable Grilling
Managing grill waste responsibly teaches teenagers long-term environmental stewardship. Instead of tossing spent fuel straight into the trash, show your teen how wood ash can be repurposed safely:
- Garden Soil & Compost: Pure hardwood ash is rich in potassium and calcium carbonate, making it a great amendment for acidic soil or compost piles when added in moderation.
- Safety Precaution: Never reuse ash produced from briquettes containing synthetic additives, lighter fluid, or chemically treated materials around edible plants.
Transforming waste management into a sustainable post-grill routine demonstrates that being a responsible pitmaster extends far beyond the cooking grate and into caring for the local ecosystem.
Transitioning from Coals to Cooking Zones: Two-Zone Setup
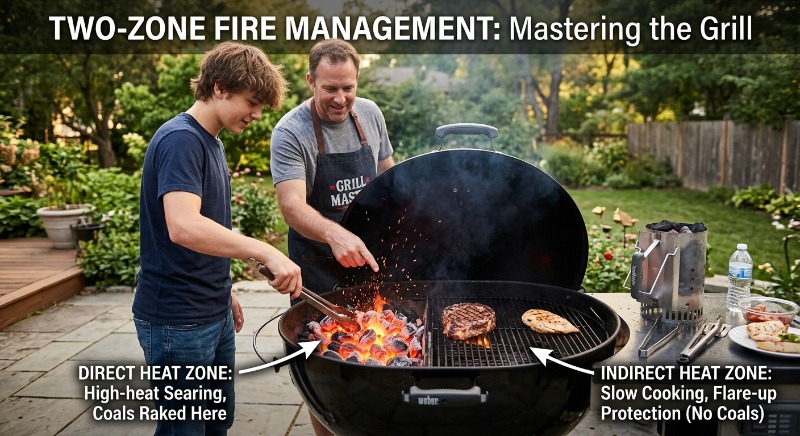
Lighting the charcoal chimney is only half the battle; how you arrange those glowing coals determines whether dinner is a masterpiece or a charred mess. Teach your teen the art of two-zone fire management:
- Direct Heat Zone: Rake hot coals over one side of the grill grate for high-heat searing, locking in juices on steaks and burgers.
- Indirect Heat Zone: Leave the opposite side completely empty, creating a gentle convection oven area for slow cooking and flare-up protection.
Mastering this simple dual-layout gives your teenager total temperature control, ensuring they can sear delicate foods to perfection without burning them.
Post-Grilling & Ash Disposal Protocols
The cooking might be finished, but the safety process continues until every ember is fully extinguished. Finishing the job completely builds true pitmaster discipline.
- Cooling the Empty Chimney: Once emptied, the charcoal chimney remains dangerously hot. Place the empty hot metal cylinder back inside the grill or on a heat-safe metal tray. Never set it on grass, wood, or plastic surfaces while cooling down.
- Extinguishing Remaining Coals: When the cook is over, close the grill lid and shut both top and bottom air dampers completely. Starving the coals of oxygen extinguishes the fire naturally without creating thermal shock or messy ash clouds.
- 24-Hour Ash Storage: Never dump fresh ash into plastic garbage cans, paper bags, or vinyl trash bins. Embers can harbor live heat for over 24 hours under a deceptive layer of grey ash. Wait until the next day, then scoop cold ashes directly into an airtight metal ash bucket.
From Apprentice to Pitmaster
Teaching your teenager how to light a charcoal chimney safely does far more than save you a trip to the patio. It builds spatial awareness, respects elemental fire, and replaces guesswork with clear execution.
Once your teen masters the loading, lighting, and pouring phases, step back and let them take the lead on the next family cookout.
There is nothing quite like watching a young cook take full ownership of the fire, pour hot coals with quiet confidence, and serve up a fantastic meal built over flames they started entirely on their own.
Frequently Asked Questions
1. Why should I use a charcoal chimney instead of lighter fluid?
A charcoal chimney is safer, faster, and far cleaner than lighter fluid. Lighter fluid introduces dangerous chemicals that leave unpleasant petroleum tastes on your food and creates unpredictable flash-fire risks.
A chimney uses natural air draft physics and plain newspaper or wax starters to light coals evenly, efficiently, and chemical-free every time.
2. How long does a charcoal chimney take to get coals ready?
It typically takes 15 to 20 minutes for a full charcoal chimney to reach optimal cooking temperature. You will know it is ready when heavy smoke clears, orange flames rise through the top, and the top layer of charcoal develops a light coat of white ash.
3. What is the safest way for a teenager to pour hot coals out of the chimney?
Your teen should always wear heat-resistant barbecue gloves (leather or aramid fiber) that cover the wrists. Instruct them to stand upwind with a wide, stable stance, grip the main handle with their dominant hand, and hold the heat-shielded assist handle with the other.
Lower the chimney deep inside the grill base and invert it slowly – never drop coals from high above, as this kicks up dangerous sparks and flying ash.
4. Can we light a charcoal chimney on a concrete patio or wooden deck?
No. Always light the charcoal chimney directly on top of the lower charcoal grate inside the grill. Placing a burning chimney on concrete can cause trapped moisture inside the slab to expand rapidly and pop violently under intense heat.
Wooden decks, dry grass, plastic tables, and glass surfaces are flammable or prone to melting and should never be used as a base.
5. What should my teen do if the fire dies out inside the chimney before the coals catch?
If the fire dies, do not attempt to stuff paper or starters into the chimney from the top.
Have your teen put on heat-resistant gloves, use long-handled metal tongs to lift the loaded charcoal chimney, set it safely on another part of the grill grate, light a fresh wax firestarter cube directly on the lower grate, and set the chimney back over the new flame
Featured image credit: ChatGPT
