It’s not always necessary to trim pork butt or picnic shoulder before you cook it. In some cases, though, you might need to carve away some fat in order to give the meat a uniform appearance.
Should this happen to you, there’s no need to throw away the extra product. Here’s our ultimate guide on pork trimmings—why you should save them, what to do with them, and more.
Pork Trimmings
You can use pork trimmings to make lard, which is rendered pork fat; or cracklings, which are the bits of fat and meat that don’t render completely. Lard is a choice ingredient when making fried chicken, home fries, doughnuts, or pastry crust. Pork cracklings are less versatile, but still present many opportunities to get creative.
About Pork Trimmings
Pork trimmings are loosely defined as pork fat that may still have some meat attached. Obviously, you can save them yourself when preparing a pork roast or other large cut, but some butcher shops also sell them by the pound. If you’re hoping to buy pork trimmings, they typically sell for 60 to 90 cents per pound.
Know that when you purchase pork trimmings, you can’t always tell exactly what you’re getting. Some might have bits of bone included in the package, while others will be pure fat with no usable meat at all. Whether or not this is a concern depends on what you plan to do with the trimmings once you’ve brought them home.

About Lard
Lard is pork fat that’s been separated from the meat, rendered, and then chilled. When the process is complete, the lard should be white and creamy. This is one of the most popular uses for pork trimmings, and it’s easy enough for beginners to master.
While lard always comes from pigs, the fat may come from different parts of the body. Which one you use will have a noticeable effect on the finished lard. Some may still have a distinct bacon-like taste, while others won’t impart any flavor at all.
Lard used to be a popular ingredient, but in recent years, chefs began to turn up their noses at the prospect of using pig fat in pie crusts and similar recipes. The truth is, lard doesn’t pose any more of a health risk than vegetable shortening, which is the most common substitute.
What’s more, you can make lard yourself, using the trimmings from your pork butt or shoulder. While it’s important to exercise moderation, lard can be used in most recipes that call for oil, butter, or shortening.
Types of Pork Fat

Belly
Let’s start with the section of the pig that doesn’t make great lard: the belly. This is the section of the pig that’s used to make bacon. As such, it consists of layers of meat alternating with strips of fat. Because there’s usually a fair amount of meat attached, the fat from the belly has a strong pork taste when rendered.
Leaf Fat
The fat that’s taken from the area surrounding the hog’s kidneys is known as “leaf fat,” and it’s ideal for making lard. The fat is cleaner than the other types and has virtually no flavor or odor once it’s been rendered and chilled.
Fatback
As the name suggests, fatback comes from the hog’s back, including the rump and shoulder regions. It’s located right under the skin, and often used as an ingredient in sausage recipes. The lard from fatback is yellowish-white, with a mild pork flavor. This makes it a better ingredient for deep-frying than for pie crusts and other pastries.
How To Make Lard
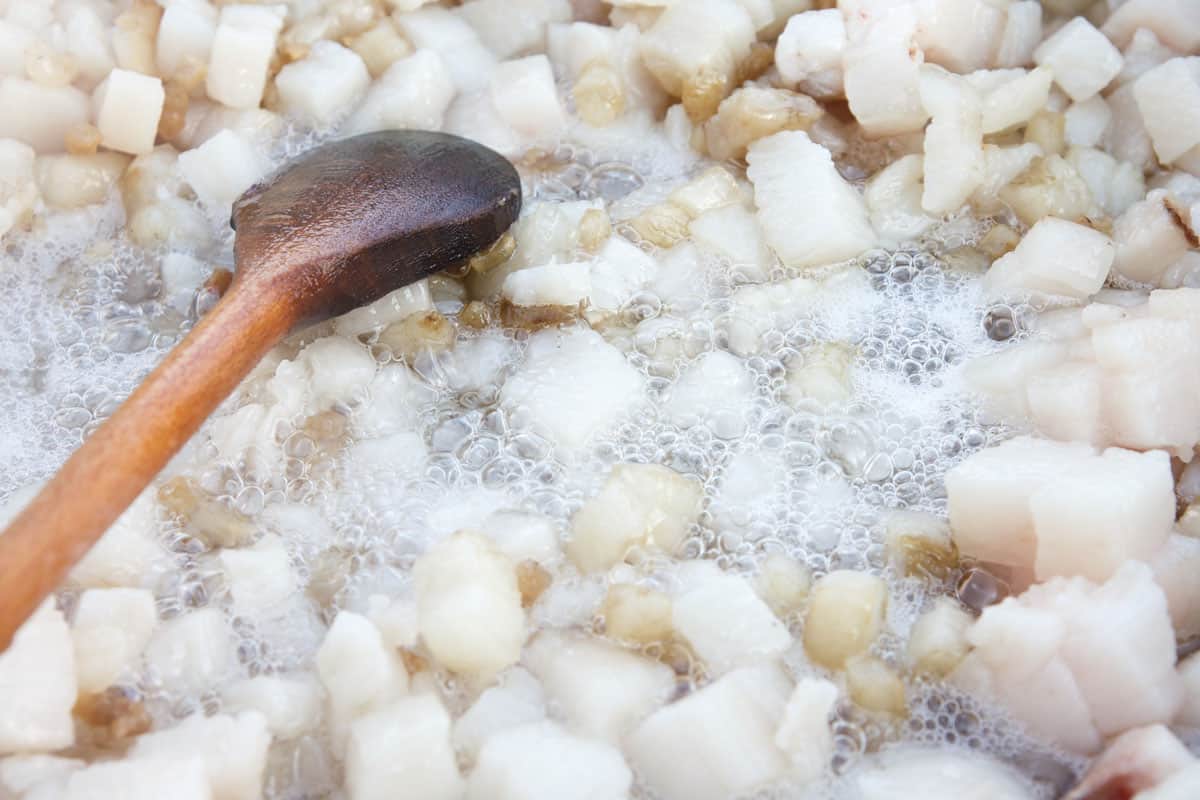
When it comes to rendering lard, you have a few options. You can place the pork fat in a Dutch oven or other heavy pot and melt it in a low oven, or you can use the stove top or a slow cooker. The key is to use very low heat. If the fat renders too quickly, it will have a bolder pork flavor—which is fine for some recipes, but not all.
To begin, dice the pork fat into tiny cubes. You can use also a food processor to grind it into small pieces. If you have a good relationship with your local butcher, ask them to grind it for you.
Tip: The fat is easier to prepare if you put it in the freezer for at least an hour beforehand.
Next, put the fat in a Dutch oven or slow cooker. If you’re using the oven, set the temperature to 225 degrees Fahrenheit.
On the stove top, use the “Low” setting, or “2” if the dials are numbered. Once the fat begins to render, turn the dial down to “1.”
If you’re using a slow cooker, set it to “Low.” No matter which method you choose, leave the pot uncovered. This will allow any moisture to evaporate, which lessens the chances of spoilage.
The process should take at least 3 hours. To test for doneness, take a look at the cracklings. When they’ve sunk to the bottom and then risen to the top again, the lard is ready to be taken off the heat.
Tip: Should you overcook the lard, it will turn slightly brown. That’s okay—it will just have a strong pork flavor that’s better suited for home fries and other savory dishes.
Line a heatproof colander with several layers of cheesecloth and set it over a nonreactive bowl that’s large enough to hold the lard. Strain the mixture into the bowl, repeating with a clean piece of cheesecloth, if necessary, until all the sediment and cracklings have been left behind.
Transfer the lard to your chosen storage containers and let it cool. Once it hardens and turns white and opaque, store it in the refrigerator until you’re ready to use it.
How To Store Lard
For best results, store lard in the refrigerator. It should keep for up to a year when it’s stored properly, and possibly even longer than that. To check whether the product is still good, give it a sniff. When lard has gone bad, it will have a rancid odor.
Don’t panic if you’ve left lard out overnight, or even for a few days. People have been making lard and storing it at room temperature for centuries. You’re better off keeping it in the fridge whenever possible, but it can still be salvaged after a day or two on the counter.
You can extend lard’s shelf life by keeping it in the freezer. Divide it into the amounts you think you’ll need, and freeze the portions so they can be thawed separately. Once you’ve thawed a portion, don’t refreeze it afterward, as this will affect the quality of the fat.
Other Uses for Pork Trimmings
Pork Cracklings
The bits of pork that don’t render out when making lard are called the cracklings. Fry them up until they’re crispy and brown, then season with salt for an enticing snack. You can experiment with different seasonings to get the flavor combination you want. Some people even dip the cracklings in barbecue sauce.
You can enjoy pork cracklings even if you haven’t used the fat to make lard. Just dice the fat into cubes (they don’t have to be that small—there will be a lot of shrinkage). Spread them in a roasting pan, season with salt, and roast in a 325 degree oven until browned and crisp, about 2 hours.
Tip: Don’t use too much salt beforehand, or the cracklings might be inedible once they’re done. You also might want to turn the pieces with tongs after the first hour or so, to keep them from sticking and to ensure even browning.
Pork cracklings make an excellent addition to salads, in place of bacon bits or croutons. They can also be tucked into omelets, added to biscuit dough, or used to season gravies and sauces.
The Bottom Line
Whether you purchase your pork trimmings at the butcher shop or create your own, you’re bound to appreciate having this ingredient on hand. In fact, you might find yourself trimming more fat from your pork butt than you normally would, just so you can enjoy the results.
Happy grilling!