Did you know that as recently as 2017, 70 percent of Americans owned a grill or smoker? That statistic might not come as a surprise. However, we’d be willing to bet that when it comes to mastery of the BBQ technique, the number would shrink down into the single digits.
When you know what you’re doing, barbecue can be more than just a cooking technique. It’s a way of life. If you only use your outdoor kitchen for the occasional hot dog roast, it’s time to change the way you think about cooking out.
If you’re looking for tips on how to create memorable dishes using your grill, you’ve come to the right place. In this guide, we’ll take you on a comprehensive tour of the mesmerizing, mouthwatering world of barbecue. When you’ve finished reading, you’ll be armed with all the information you need to become a master at the grill.
What Exactly is BBQ?
“BBQ” is an informal term for barbecue. The word itself can be used and understood in several ways.
First and foremost, barbecue refers to the method of cooking food over an open flame. Unlike most cooking techniques, which rely on the heat from an intermediate source (like a pot or a frying pan), barbecuing allows the food to come into direct contact with the fire. When the technique is used on meat, the insides should remain tender and juicy while the exterior offers a charred, crispy texture. This contrast—and the resulting flavor—is what sets barbecue apart.
Often, the word “barbecue” is used to refer to the food itself, rather than the technique. (In fact, I just did so at the end of the last paragraph.) It might also be used as a blanket term for an informal gathering with food that’s cooked outdoors. That’s usually when the abbreviated “BBQ” designation comes into play.
While many people are comfortable using the term interchangeably, there are exceptions. In Australia, for example, the word “barbecue” has more in common with what Americans refer to as “grilling”—that is, cooking ingredients over high heat for a short period of time. Aussies have a reputation for “throwing shrimp on the barbie,” but they’re just as likely to use the technique for sausages or lamb.
On the other hand, in certain parts of the southern United States, barbecue is practically a religion, with several distinct denominations. If you invite a guest from North Carolina to a barbecue and offer them a cheeseburger when they arrive, they’re bound to look at you as if you have three heads. In these places, the term refers to the food itself—pulled pork, beef brisket, and smoked chicken—as much as the cooking technique.
Step One: Getting Started

The best news about barbecue? It’s not difficult. Despite the savory complexity of the results, the cooking application itself is fairly straightforward. However, it is time-consuming, which is why many people prefer to stick to the basics when it comes to outdoor cooking.
The Grill
Before you begin, you’ll need a high-quality grill. These appliances are invaluable in more ways than one, but for BBQ, they’re essential. A grill consists of a main firebox topped with durable cooking grids. These grids are usually composed of stainless steel, but some manufacturers prefer cast iron. If the grates are coated in porcelain, they’ll be easier to clean. Be aware, though, that it’s impossible to achieve a good sear with a porcelain coating. If you really want that charred exterior crust, then you should look for straight-up metal grates with no enamel.
The Fuel
Gas, charcoal, and pellets are your three main options when it comes to fuel. We’ve covered the pros and cons of each one in What Type of Grill Should I Use?, below. Whichever grill you choose, be sure to start out with a generous supply of fuel. Barbecue utilizes the “low and slow” cooking method, so you’ll have the grill going for hours at a time. The last thing you want is to run out of fuel midway through the cooking process.
The Tools
Aside from the grill itself, you’ll need a number of trappings before you can fire up your first BBQ. Here are a few of the essentials:
1. Apron with pockets
In addition to protecting your clothing, this will give you a handy place to store your spices or cooking utensils.
2. Heat-resistant gloves
Silicone is excellent for handling the food itself, and the gloves can be thoroughly cleaned afterward. If you’re going to be shifting hot coals around by hand, leather is a great choice. Synthetic materials will allow for greater dexterity when wielding a knife or other tools.
3. Tongs
Invest in a stainless steel set that measures at least 16 inches long, with a locking handle.
4. Instant-read meat thermometer
Some grills come equipped with built-in thermometers. If yours doesn’t, invest in a digital wireless model with an easy-to-read display.
5. Basting brushes
You can’t have too many of these. Silicone models are heatproof and won’t react with the flavor of the food. As a bonus, you won’t have to worry about any pieces falling off while you’re working.
6. Spatula
A grilling spatula should be broad and rectangular, with a shallow L-shape to help you get a good grip on the meat. For these purposes, try to find one that’s made of solid metal, with no vents or holes.
7. Wire brush and grill scraper
Don’t be tempted to rely on the cheap wire brushes that are sold in the seasonal aisle at the drugstore. Visit your local hardware store and ask for recommendations on the best grill brushes.
As an alternative, wooden scrapers are efficient, long-lasting, and won’t shed on your cooking grates. Just make sure the grates have cooled sufficiently before attempting to use them.
8. Knives
You should have at least three different knives for barbecuing: A chef’s knife; a thinner, longer blade for slicing; and a meat cleaver. A boning knife might also come in handy. If you can only afford one, go for the chef’s knife—it’s the most versatile of the bunch.
9. Inexpensive roasting pan
Cheap, disposable aluminum pans will keep juices from spilling out into the flames. They’ll also cut down on the amount of time you spend cleaning up afterward.
10. Shredder tools or “claws”
These come in handy when you’re shredding the barbecued pork to make sandwiches. If you don’t have a pair on hand, two sturdy forks will work in a pinch.
11. Towels
A supply of inexpensive towels will help keep your hands and tools clean during the cooking process. They might also come in handy for polishing the exterior of the grill after each use.
Step Two: Selecting Your Ingredients
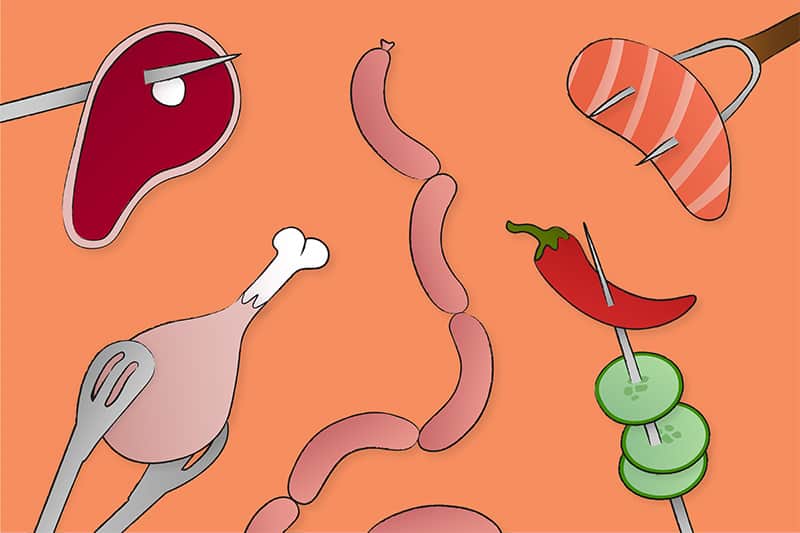
What are you grilling? A hearty steak, a hefty cut of pork, a batch of sausages, or a whole chicken? Perhaps you’re keeping it light with a fillet of fish and an assortment of vegetables. Since the cooking process will differ greatly depending on which ingredients you’ll use, we’ve provided you with a handy temperature chart for quick reference.
- Steak—High (450 to 500 degrees Fahrenheit)
- Beef Brisket—Low (225 degrees)
- Pork Chops (Bone-In)—Medium-high (400 to 450 degrees)
- Pork Chops (Boneless)—Medium-high (400 to 450 degrees)
- Pork Tenderloin—Medium (400 degrees)
- Pork Butt—Low (200 to 225 degrees)
- Pork Ribs—Low-medium to start (300 degrees), medium (400 degrees) to finish
- Chicken Breasts (Boneless)—Medium (350-400 degrees)
- Chicken Breasts (Bone-In)—Medium (400 degrees)
- Chicken Thighs (Bone-In or Boneless)—Low-medium to start (300 degrees), medium (400 degrees) to finish
- Whole Chicken—Medium (350-400 degrees)
- Fish—Medium-high (400 to 450 degrees)
- Vegetables—Medium (400 to 425 degrees)
Step Three: Preparing Your Grill
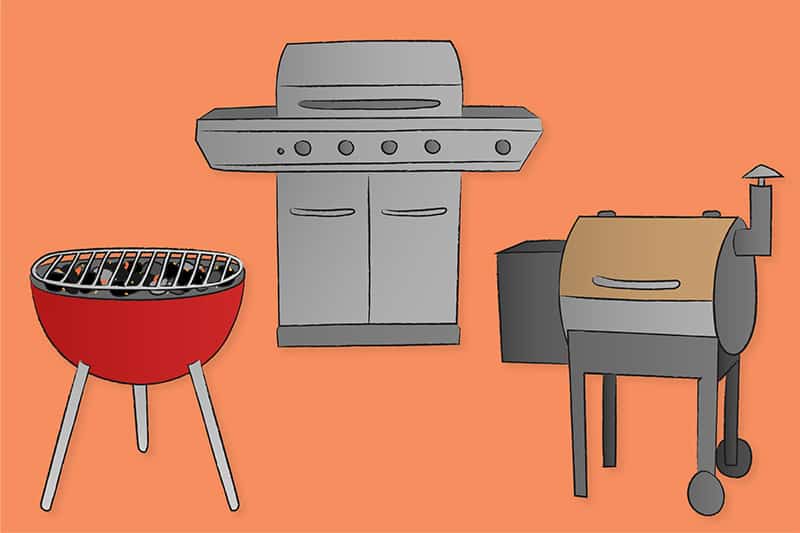
Now that you have everything you need to get started, it’s time to get your grill ready to do its work.
Assembly
Assemble your grill according to the manufacturer’s instructions. Depending on what type of unit you buy, this process could take anywhere from 15 minutes to a couple of hours. Charcoal grills take very little time to assemble, while a high-tech gas-powered unit could take all afternoon. If possible, ask a friend or family member to assist you with this process. The sooner the grill is put together, the sooner you’ll be able to enjoy the results.
Firing Up The Grill
1. Gas Grills
If this is the first time you’ve ever used your gas grill, it’s a good idea to start it up and let it run for a few minutes to make sure everything is working properly. This will also allow you to inspect the fuel line for leaks.
Once the grill has been “broken in,” follow these steps before every barbecue.
Step 1: Light the grill. When you have a good fire going, close the lid and wait for about 10 minutes. If there’s any residue on the grill grates from the last time, you might want to wait an additional five minutes before moving on to the next step.
Step 2: Turn off the heat and allow the grill to cool slightly. Using your heatproof gloves, remove the cooking grates and place them in a tub of hot, soapy water. Allow the grates to soak for 15 to 20 minutes. In addition to removing stubborn baked-on grease, this process will remove any insects that were unlucky enough to get caught on the cooking surface.
Step 3: Use a scrubbing pad to remove any lingering residue from the grilling grates. If the grids are coated in porcelain, it’s a good idea to use a non-abrasive material for the scrubbing. You might also want to wear latex gloves while performing this step.
Step 4: Repeat the above process as many times as necessary to dislodge all unwanted material from the cooking grates. Rinse well.
Step 5: Lightly oil the cooking grates with vegetable oil, or another neutral oil with a high smoke point (grapeseed or peanut oil are two alternatives). Return the grates to their usual position.
At this point, your gas grill will be ready for action.
2. Charcoal Grills
Charcoal or pellet grills will need more attention than their gas-fueled counterparts, because you’ll need to deal with the ashes. As long as you perform this maintenance on a regular basis, it shouldn’t take too much time.
Maintaining a charcoal grill isn’t all that different from cleaning a gas grill. However, since you won’t want to waste precious charcoal on a full-scale cleaning process before you start to cook, we’ve altered the steps slightly for this section.
Step 1: In addition to the basic grilling supplies we’ve listed above, you’ll need charcoal briquettes, lighter fluid and a stick lighter.
Step 2: Open the grilling grates and add a generous amount of charcoal. Arrange the briquettes in a pyramid shape.
Step 3: Add about a quarter-cup of lighter fluid for every pound of charcoal. Allow the fluid to set in for 30 seconds to one minute. Don’t wait much longer, or the fluid will evaporate and the coals won’t light properly.
Step 4: Light the coals carefully using the stick lighter. You should have a healthy blaze at first, which will die down gradually as the coals heat up. If the fire looks like it’s about to go out, you can add a bit more lighter fluid, but make sure to stand back to avoid getting burned!
Tip: If you’d like to avoid lighter fluid altogether, you can use a chimney starter instead. Insert a handful of crumpled newspaper or butcher paper into the bottom of the starter and place it right-side up on the charcoal grate. Then, fill the starter with briquettes and light the paper using your stick lighter or several matches.
Step 5: When the coals are coated in a fine layer of silvery ash, you’re ready to start cooking. Using a long stick or grill brush, spread the coals in an even layer to ensure proper heat distribution. If you’ve used a chimney starter, use oven mitts to remove the starter component and distribute the briquettes along the lower surface of your grill.
Step 6: Position the grilling grates above the coals. When they’ve gotten nice and hot, use your grill brush to remove any stubborn bits of food from the last use.
Note: If you don’t have a grill brush or scraper, you can perform this step using a wad of aluminum foil. This trick comes in especially handy if you’re using a public grill at a campground or park.
Step 7: Lightly oil your cooking grates with cooking spray or a neutral oil, such as canola.
Your charcoal grill is now fired up and ready for action!
Charcoal grills related articles:
- How to use wood pellets in a charcoal grill?
- How to use wood chips on a charcoal grill?
- Can you put wood chips directly on charcoal?
- How to start a charcoal grill without lighter fluid?
- How long does a charcoal grill stay hot?
3. Pellet Grills
Since pellet grills are more complex than gas or charcoal models, they require a bit more maintenance as well.
Step 1: Inspect your pellets to make sure they’re in good condition. If they’ve suffered any damage from moisture, they should be discarded.
Step 2: Load the hopper according to the manufacturer’s instructions.
Step 3: Make sure the ash can has been properly installed, and open the damper to ensure proper air flow.
Step 4: Turn the power on and listen for the sound of pellets dropping into the can. Once you’ve taken this step to make sure the auger component is working properly, close the ash damper and set the unit to 350 degrees Fahrenheit.
Step 5: Allow the grill to preheat for 30 minutes to one hour before the first use. This is to burn off any off-gassing odors that might have resulted from the packing and shipping process.
Step 6: Once you’ve finished with the initial burning procedure, set the grill to your desired temperature (see Selecting Your Ingredients for tips). Wait 15 to 20 minutes to make sure that the grill is heating properly before adding your ingredients.
Step 7: Lightly grease the cooking grates using vegetable oil or cooking spray.
You’re now ready to load your ingredients into the cooking chamber.
Step Four: The Cooking Process
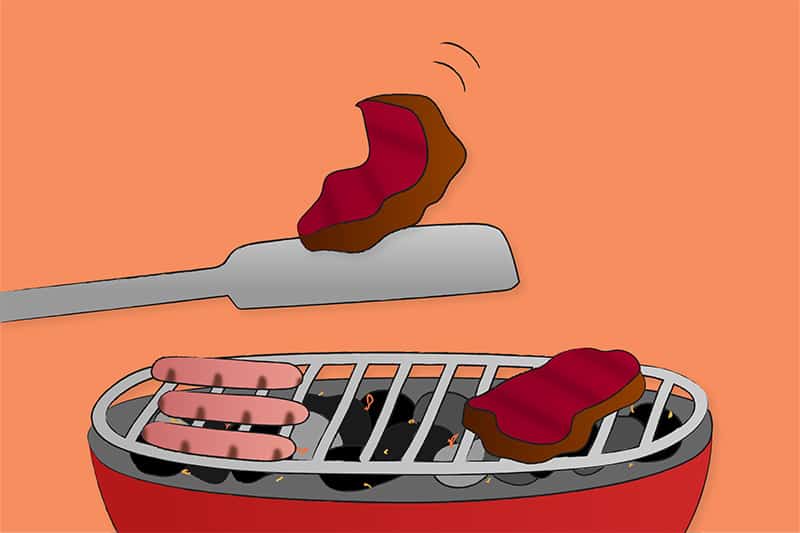
This is the step that allows you the most freedom and creativity when it comes to barbecue. If you’ve ever hosted a simple cookout, you might know how to grill a decent burger—a few minutes per side, maybe a slice of cheese melted on top, and you’re good to go. But there’s no reason to stop there. The grill is a versatile and dynamic piece of cooking equipment that can be used for just about any technique you can think of.
Tip: Whichever cooking method you choose, make sure to wash your tongs and other utensils if they’ve come into contact with raw meat. Don’t use the same utensils to flip the meat once it’s cooked—this could introduce dangerous bacteria and put you at risk of developing a food-borne illness.
Indirect Heat
For pork ribs or tough cuts like beef brisket, recipes will usually indicate that you should cook the meat for several hours over indirect heat. This will allow the connective tissue to break down, giving you that fork-tender texture that’s the hallmark of authentic Southern barbecue.
1. Gas Grills
Set the dial to “Low,” or whatever the lowest setting is. Set the meat on the main grilling grate, then close the lid so that the heat stays inside. Check on the progress at the halfway point and flip the meat over if the recipe calls for doing so. You might also choose to increase the heat to “High” for the last hour, to crisp up the exterior.
2. Charcoal Grills
To prepare your charcoal grill for this type of low-and-slow cooking, carefully shift all of the coals over to one side. Place the meat on the side of the grill that’s free of coals and close the lid. Depending on the type of meat you’re cooking, you might want to turn it over midway through the cooking time. For the last hour, slide the meat over to the hotter side to finish cooking. This will give the exterior a chewy texture and a strong smoke flavor.
3. Pellet Grills
Use the digital control panel to set the temperature to 200 degrees Fahrenheit. If the recipe indicates a lower temperature and your unit is capable of going lower, then by all means follow the instructions. Add your ingredients, close the lid, and allow the smoker to do its work.
Direct Heat
This is the technique used for burgers, hot dogs, steak, pork chops, chicken, fish, and vegetables. When you cook over direct heat, the grill is left uncovered, allowing you to check your progress more frequently. Don’t go overboard, though—the ingredients need time to cook through, and poking and prodding won’t make the process go any faster.
1. Gas Grills
Turn the setting to either “Medium” or “High,” depending on what ingredients you’ve selected. Make sure the food and the cooking grates have been sufficiently oiled before adding them to the grill. The coating of oil should be ample enough to keep the food from sticking, but not so thick that it drips down onto the flames.
2. Charcoal Grills
Spread your coals into a single layer as described above. Hold your hand a few inches from the coals, around the spot where the grilling grate will go. If you can only hold it there for 4-5 seconds before you have to pull away, the coals are hot enough to cook at “High.” If your recipe calls for a lower temperature, wait until you can hold your hand above the coals for 7-8 seconds before pulling away.
3. Pellet Grills
Again, the digital control panel takes the guesswork out of this step. Simply heat the grill to the designated temperature and wait for the readout to tell you when it’s ready.
Tip: When you’re cooking with wood pellets, you have more options as far as flavor is concerned. Always use hard woods, avoiding soft woods like pine or cedar. Soft wood contains too much resin, and may actually harm the grill in addition to ruining the flavor of the meat. As a rule of thumb, try to pair milder woods like maple and alder with poultry or fish. Save the stronger flavors, like hickory and mesquite, for beef and hearty cuts of pork.
Step Five: Testing For Doneness
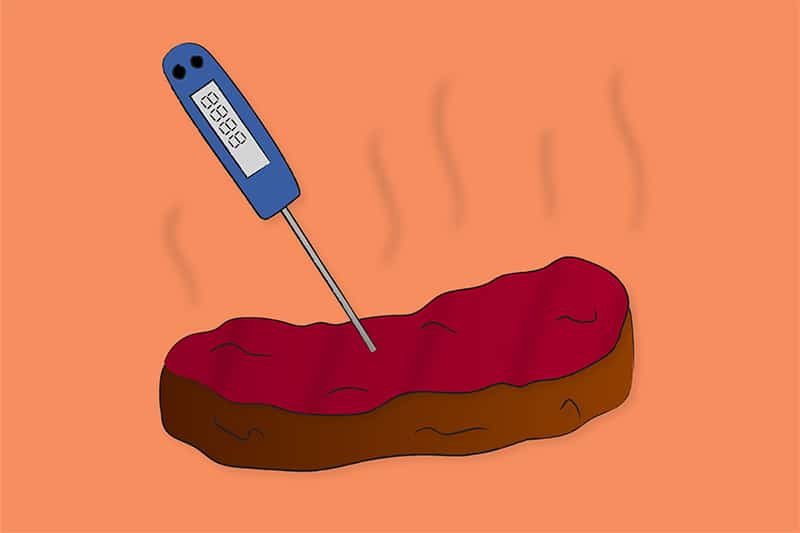
As you near the end of the cooking process, use your high-quality meat thermometer to test the meat for doneness. Poultry should be cooked to 165 degrees Fahrenheit, while pork and fish should have an internal temperature readout of 145 degrees. Beef has a broader range, especially when you’re dealing with steak. 140 degrees will give you a warm, red center (rare to medium-rare), while a readout of 170 degrees will yield a well-done steak with a firm, brown center. It’s permissible to pull the meat from the grill when it’s within 5-10 degrees of your desired temperature (see “The Resting Period,” below).
Tip: When you’re testing for doneness, make sure the probe is positioned in the center of the meat itself, and not pushing against bone or fat. This will help to ensure an accurate readout.
When the meat has finished cooking, wash the probe of your thermometer well in hot, soapy water. Be careful not to immerse the entire unit in water. To calibrate the thermometer, fill a glass with ice water and wait for three minutes. Stir the water, then add the thermometer and hold it suspended in the liquid, not allowing the probe to touch the bottom or sides of the glass. The temperature should read 32 degrees Fahrenheit. If it doesn’t, make a note of the difference and offset the thermometer accordingly. For this last step, you might need to consult your product manual.
Step Six: Knowing When to Add Sugar-Based Sauces and Seasonings

You’ll want to be careful when it comes to sauces that contain lots of sugar. Commercially prepared barbecue sauce is the most common culprit, but plenty of dry rubs also list sugar as one of their main ingredients. Since sugar has a low smoke point, you should add these sauces and seasonings during the final stages of the cooking process. Otherwise, your food might end up with an unpleasant burnt taste.
Step Seven: The Resting Period

As a rule of thumb, you should allow grilled meat to rest for a minimum of 5-10 minutes before serving. Large cuts like brisket, pulled pork, and whole chicken require even longer resting periods—20 to 30 minutes at least.
The resting period allows the meat’s natural juices to redistribute, making for a more succulent and tasty finished product. Since the meat will continue to cook for several minutes after it’s removed from the heat, it’s fine to take it off the grill when it’s within 5-10 degrees of your desired temperature. For poultry, try to make sure it’s cooked to at least 160 degrees before removing it. Consuming undercooked chicken or turkey poses a health risk.
It’s not really necessary to allow fish to rest when it’s been removed from the grill. If you need more time to prepare your side dishes, you can tent the fish with foil for 5-10 minutes before serving, but try not to wait any longer. Similarly, grilled vegetables should be served as soon as they’re finished cooking.
Step Eight: Slicing and Serving
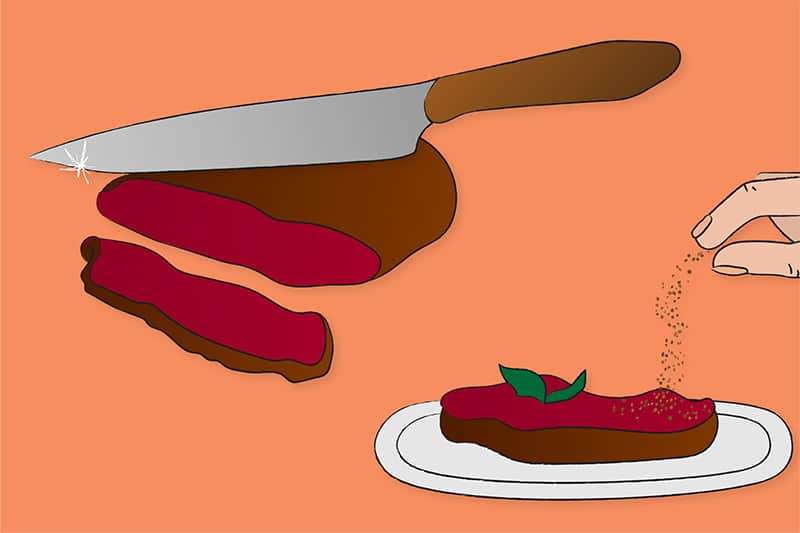
This step isn’t necessary for smaller cuts like chicken breast or boneless pork chops, which are typically served whole. However, for larger cuts like pork butt, or even oversized steaks like ribeye, slicing makes for a more attractive platter. It also allows you greater control over the portions that you’re serving.
Here’s where your properly sharpened knife comes in. Make sure to use the sharpest tool you have—it will keep the slices neat, and of a uniform thickness. If you find that you’re struggling to pull the knife through the meat, it’s time to get that knife sharpened again.
Locate the grain—that is, the long parallel lines that indicate the muscle fiber. You’ll want to cut the meat against the grain, perpendicular to these lines, to attain the proper texture. If you cut in the opposite direction, your slices will be too tough.
Arrange the sliced meat on a platter, drizzled with any juices that may have collected on the plate. If you’re serving any additional sauce on the side, make sure there’s plenty of it available at the table. You might want to portion the sauces into individual ramekins to ensure that every guest has access to the flavorings they want.
Step Nine: The Aftermath

Performing regular maintenance on your grill will ensure that your next barbecue goes more smoothly. Here are the steps you should take to clean and season your appliance after each use.
Gas Grills
- When the unit has cooled completely, clean out the firebox. For gas grills, this step will require a good scrubbing with a damp rag.
- Use a grilling brush or scraper to dislodge any burned-on particles or residue.
- Inspect the lid of your grill for buildup. Perform a power wash with soap and water if necessary.
- Wipe the cooking grates, the interior of the lid, and the body of the grill with a damp towel.
Charcoal Grills
- If there’s any residue left when you’re finished cooking, wait for the grates to cool, then remove them and wash them in soapy water.
- Once the grill has cooled, use the damper handle on the bottom of your charcoal grill to dispense the ashes into the catcher. When the catcher is full, you can dispose of these however you see fit. If you live in a region that sees lots of snow and ice, you can save the ashes to spread on your driveway during the winter months.
- Scrub the grill grates using a brush or scraper.
- When the grill is empty, scrub the charcoal grate with your grill brush or aluminum foil to help maintain proper ventilation.
- If your charcoal grill is a traditional kettle-style unit, wash the lid inside and out with hot, soapy water.
Pellet Grills
- Most pellet grills will be outfitted with a “shutdown” or “cooling” mode. If the model you’re using has this feature, use it to ensure that the auger component and fire box will be free of pellets the next time you fire up the grill.
- When the grill has cooled, use a shop vac to remove the ashes. Be sure to get all of the residue from inside the burn pot, as well as the main chamber.
What Type of Grill Should I Use?

If you’ve been paying attention to the instructions regarding use and maintenance, you might have already made your decision. However, if you’re still on the fence regarding what kind of grill you should invest in, here’s a primer on the pros and cons of each type.
Gas Grills
If you’re a beginner, gas grills are easy to use. They don’t require any particular skill or finesse—just turn on the gas, push the igniter button, and you’ll be rewarded with flames suitable for cooking. Since these units can be fired up in a matter of seconds, they’re also a good choice for the spontaneous outdoor chef. Most gas grills offer different settings—usually “Low,” “Medium,” and “High”—that allow you to calibrate the cooking temperature.
Cooking with gas is often cheaper than charcoal- or pellet-grilling. While most gas grills use propane as their fuel source, natural gas is even less expensive. However, since propane is much more common, it’s usually easier to come by. Here’s a handy tip for proponents of the natural alternative: If you already use natural gas to heat your home, you can hook up an additional line that runs to your grill.
Gas-fueled units are arguably the most sophisticated grills on the market. Some offer extra features, such as side burners and smoke boxes, to give the unit additional versatility. If the unit advertises “flavor bars” or something similar, it’s equipped with special tubes that redirect the meat drippings to a safe zone. This feature helps to imbue the food with more natural smoke flavor, in addition to cutting down on flare-ups.
Charcoal Grills
Charcoal grills are what most people think of when they think about barbecue. These units are inexpensive and relatively simple to use, though they don’t provide the instant gratification of their gas-fired cousins.
Cooking over a charcoal fire also requires a bit more care and attention. You’ll need to light the fire at least 15 minutes before you start to cook. You’ll know the coals are ready when they’re coated in a light film of silvery ash.
While many gas-grilling enthusiasts claim that the flavor difference is negligible and that the coals take too long to get ready, there are just as many advocates for the charcoal method. The burning coals will imbue the food with a lovely smoky flavor—the hallmark of any successful barbecue.
Pellet Grills
These versatile units represent the best of both worlds. They can be ready to cook within minutes, and they use real wood pellets as fuel, which greatly improves the flavor of the food.
Wood pellets are made of compressed hardwood sawdust. They’re stored in a hopper attached to the side of the grill and fed into the cooking chamber by an auger component. Once the pellets have entered the main chamber, they’re ignited by a hot metal rod, starting the fire that will serve as the centerpiece to your barbecue.
When you use a pellet grill, you can customize your ingredients by experimenting with different varieties of wood pellets. Hickory, cherry, and apple are great choices for barbecue, ranging in flavor from savory to sweet. This feature gives pellet grills a definite edge over the competition when it comes to smoked meats.
Unlike gas, charcoal or Kamado grills, pellet-burning models offer digital control panels that allow you to pre-set the interior temperature of the cooking chamber. The auger will feed the pellets into the firebox as needed, depending on your pre-selected temperature. If all of the parts are working properly, the temperature should remain accurate to within 15 or 20 degrees. That means that pellet grilling is a largely hands-free endeavor. You’ll have plenty of time for entertaining, whipping up side dishes, or just relaxing in the yard.
Frequently Asked Questions

Here are answers to some of the most common questions that novices ask about BBQ in general.
Can you use a grill on a covered porch?
Only if it’s a gas grill—and only if the roof is at least 9 feet above the cooking surface. Charcoal and pellet grills should only be used in open areas.
What is the best wood to use for traditional barbecue?
Oak is the preferred wood for most barbecue enthusiasts. However, you’re free to experiment with whatever flavors strike your fancy. Note that delicate ingredients, like fish or vegetables, would benefit from a milder wood like alder. Conversely, a strong flavor like mesquite should be used sparingly, and only with hearty cuts of beef or pork.
Is it more complicated to cook with a pellet grill than with a gas or charcoal grill?
Not exactly, although the digital control panels are more sophisticated than the rudimentary dials on a traditional gas-fired model. Pellet grills do require a little bit more maintenance than their charcoal-burning counterparts, and you have to keep a close eye on the pellet supply. As far as the cooking process is concerned, however, pellet grills are surprisingly easy to operate.
Help! My brisket has a black coating around it. Is it burnt?
Never fear—that black coating is called the bark, and it’s exactly what you want. The seasoning, smoke, and low-and-slow cooking process all contributed to that tasty, chewy outer layer. Once you’ve tasted it, you’ll understand what we mean—and you’ll probably be hooked.
There’s also a pink layer just beneath the bark. Is this normal?
Yep—that’s a smoke ring, and it’s a hallmark of perfectly cooked brisket. If you’ve done your job properly, you should see those deep, rosy rings on all of your larger cuts of smoked meat.
When should I use a marinade as opposed to a dry rub?
Marinades are best suited for chicken, beef, and pork ribs, while pork chops and tenderloin benefit most from dry rubs. Just don’t skip the brining step when it comes to pork chops—this step will keep the meat from drying out during cooking.
Can I use a marinade for basting?
Yes, as long as the marinade hasn’t come into contact with any raw meat. If you’d like to use the marinade as a basting liquid, set aside a small portion before adding the meat to the remainder of the mixture.
Why is it so important to maintain the correct temperature during cooking?
If your temperature is too high, the meat will burn on the outside before it’s cooked through on the inside. For long, slow cooking applications like smoking, you want to keep the temperature low and steady to give the meat that tender, melt-in-your mouth texture. Conversely, if the grill isn’t hot enough to create a good sear, your steaks will have an unpleasant mushy quality.
Read our best guides here:
- How long to smoke brisket per pound
- How long to smoke pork shoulder per pound
- Pork butt internal temperature
- When to wrap brisket
- How much brisket per person
- How much pulled pork per person
- Defrosting pork shoulder
- When to wrap ribs, how, and what with?
- Finish pork butt in the oven
- Pulled pork internal temp
In Conclusion
We hope this guide has provided you with all the information you need to make your BBQ experience the best it can be. Once you’ve tried your hand at BBQ, you’ll want to make it a regular part of your culinary lifestyle.
Happy grilling!

