The aroma of a cooking beef tri-tip roast instantly makes a weekend evening feel special. Maybe it’s the smell of sizzling garlic hitting a hot skillet.
Maybe it’s the dramatic moment when you slice into that perfectly pink center and everyone suddenly appears in the kitchen “just to check if it’s ready.” Funny how that happens.
As someone who has cooked everything from briskets that took 14 hours to steaks that disappeared in 14 seconds, I can tell you this: beef tri-tip is one of the smartest cuts of meat you can cook when you want maximum flavor without sacrificing your entire Saturday.
It’s rich, juicy, affordable compared to premium steaks, and best of all, it cooks fast. In about 45 minutes, you can put together a meal that tastes like you spent all day hovering over a smoker with a flashlight and a meat thermometer like a backyard detective.
And no, you don’t need a culinary degree or a cowboy hat to pull it off.

Why Beef Tri-Tip Deserves More Attention
The first time I cooked a beef tri-tip roast, I honestly underestimated it. Big mistake. I treated it like “the other roast” sitting quietly beside flashier cuts like ribeye or brisket.
Then I sliced into it.
That deep beefy flavor, the tender bite, the crisp crust from a hard sear — suddenly everybody at the table got real quiet. That’s always the sign of a successful dinner. Silence. Followed by someone saying, “You made enough for leftovers, right?”
Tri-tip comes from the bottom sirloin section of the cow, and it has a beautiful balance of lean meat and marbling. Cook it properly, and you get steakhouse flavor without steakhouse pricing.
The key phrase there is cook it properly.
Because tri-tip has muscle fibers running in different directions, it rewards attention and punishes laziness. Slice it wrong, and it chews like an old leather baseball glove.
Slice it correctly against the grain, and it becomes tender enough to make people think you trained in a fancy restaurant kitchen.
Why Santa Maria-Style Tri-Tip Became Legendary
If you want to understand why beef tri-tip has such a loyal following, you have to head to California’s Central Coast – the birthplace of the famous Santa Maria-style barbecue.
Local pitmasters transformed this once-overlooked cut into barbecue legend by keeping the cooking process incredibly simple.
The classic Santa Maria-style method includes:
- Salt, pepper, and garlic for bold, clean seasoning
- Cooking over red oak wood for smoky, earthy flavor
- High heat that creates a flavorful crust without drying the meat
What makes this cooking style special is its simplicity. There’s no sugary sauce hiding the meat. No twenty-step marinade. Just fire, smoke, and confidence. Honestly, that’s the kind of cooking every backyard griller secretly wants to master.
Today, Santa Maria-style tri-tip has become a weekend tradition across America because it proves something important: great beef doesn’t need much help when it’s cooked correctly.
The Secret Science Behind a Perfect Crust
That gorgeous crust on a beef tri-tip roast isn’t magic – it’s science. Specifically, it’s called the Maillard reaction, which sounds like a French villain but is actually the process that creates deep flavor and rich browning when meat hits high heat.
Here’s what happens during the Maillard reaction:
- Proteins and natural sugars rapidly break down
- New flavor compounds develop on the meat’s surface
- The crust becomes savory, smoky, and deeply beefy
That’s why a properly seared beef tri-tip tastes incredible even before adding sauces or herbs.
But there’s one major enemy of a perfect crust: moisture.
Before seasoning, experienced cooks always:
- Pat the roast completely dry
- Use high heat for searing
- Avoid overcrowding the pan
Think of it this way: a dry roast gives you steakhouse flavor. A wet roast gives you sadness and gray meat. Nature can be harsh sometimes.

How To Choose the Best Beef Tri-Tip at the Store
Not all beef tri-tip roasts are created equal. Some are beautifully marbled and tender, while others look like they’ve been training for a bodybuilding competition. Lean isn’t always better here.
When shopping for the best tri-tip, focus on a few key details:
- Good marbling – thin white streaks of fat throughout the meat
- Even thickness – helps the roast cook consistently
- Bright red color – a sign of freshness
- USDA Choice or Prime grades for better tenderness and flavor
Those little ribbons of fat matter more than people realize. As the roast cooks, they slowly melt into the meat, creating juiciness and rich flavor from the inside out.
Select grade can still work, but it often lacks the buttery texture that makes beef tri-tip truly memorable.
And remember: if the butcher smiles knowingly when handing it to you, you probably picked the right one.
Turning Leftover Beef Tri-Tip Into Next-Day Gold
One of the greatest things about cooking a large beef tri-tip roast is what happens the next day. Leftovers don’t feel like leftovers – they feel like an upgrade.
Some of the best ways to use leftover tri-tip include:
- Steak sandwiches with provolone and caramelized onions
- Breakfast hash with crispy potatoes and eggs
- Street-style tacos with charred peppers and lime
- Rice bowls topped with chimichurri or garlic sauce
The trick is reheating gently. High heat dries the meat out fast, and nobody wants leftover beef that chews like a hockey puck.
For the best results:
- Reheat in a skillet over low heat
- Add a splash of broth or melted butter
- Warm only until heated through
Honestly, leftover beef tri-tip can become so good that some cooks secretly make extra on purpose. That’s not poor planning. That’s strategy.
Best Side Dishes for Beef Tri-Tip
Tri-tip plays well with almost anything, but a few pairings consistently steal the show.
Garlic mashed potatoes are always a winner because they soak up the juices beautifully. Roasted vegetables add balance and texture. A crisp salad cuts through the richness.
Personally, I also love serving beef tri-tip with chimichurri sauce. That punch of garlic, herbs, and acidity wakes the whole plate up.
And if there’s warm bread nearby? Dinner becomes dangerous.
Common Mistakes to Avoid
The biggest mistake people make with beef tri-tip roast is overcooking it.
Tri-tip is leaner than brisket, so it doesn’t benefit from endless cooking times. Treat it more like a steak than a pot roast.
Another mistake is using low heat for searing. You want aggressive heat to create a crust quickly without overcooking the interior.
And finally, don’t skip the slicing technique. I know I already mentioned it, but it matters that much.
A properly sliced tri-tip feels luxurious.
A badly sliced tri-tip feels like cardio for your jaw.

Final Thoughts
If you’re looking for a weekend dinner that feels impressive without becoming a full-day project, beef tri-tip is hard to beat.
It’s quick, flavorful, versatile, and surprisingly forgiving once you understand the basics. A hot pan, a reliable thermometer, and a little patience are really all you need.
The best meals aren’t always the most complicated ones. Sometimes it’s just a beautifully cooked beef tri-tip roast, a cutting board full of juicy slices, and a kitchen full of people hovering around asking when dinner’s ready.
That’s the kind of feast worth making every weekend.

Beef Tri-Tip Roast Recipe
Image credit: Mohamed Olwy
Ingredients
- You don’t need a complicated ingredient list here. Tri-tip already brings serious flavor to the table.
- You’ll need:
- 2 to 3 pounds of beef tri-tip roast
- 2 tablespoons olive oil
- 1 tablespoon kosher salt
- 2 teaspoons black pepper
- 1 teaspoon garlic powder
- 1 teaspoon onion powder
- 1 teaspoon smoked paprika
- Fresh rosemary or thyme
- Optional: butter and crushed garlic cloves for basting
- That’s it. No mysterious powders. No marinades involving seventeen ingredients and emotional commitment.
Instructions
Step 1: Bring the Meat to Room Temperature
Before cooking your beef tri-tip, let it sit out for about 20 to 30 minutes.
Cold meat dropped into a screaming hot pan tends to tense up like someone entering a surprise math exam. Room temperature meat cooks more evenly and develops a better crust.
Pat the roast dry with paper towels. Moisture is the enemy of browning. Then rub it with olive oil and coat it generously with your seasoning mix.
And yes, be generous. A thick cut of beef can handle it.
Step 2: Sear Like You Mean It
This is where flavor gets built.
Heat a cast iron skillet over high heat until it’s seriously hot. Not “warm enough.” I mean hot enough that you question your life choices for a second.
Place the beef tri-tip roast into the skillet and let it sear undisturbed for about 3 to 4 minutes per side.
You’re looking for a dark golden crust. That crust equals flavor. It’s the difference between “pretty good roast” and “why is this restaurant-quality?”
If you’re using butter and garlic, toss them into the pan during the last minute of searing and spoon the melted butter over the meat.
That smell alone could probably sell houses.
Step 3: Finish in the Oven
Once the tri-tip is beautifully seared, transfer the skillet into a preheated 400°F oven.
Cook until the internal temperature reaches:
- 130°F for medium-rare
- 140°F for medium
- 145°F if you enjoy disappointing pitmasters
Kidding. Mostly.
For most people, medium-rare is the sweet spot for beef tri-tip because it keeps the meat juicy and tender.
Cooking time usually lands around 15 to 20 minutes depending on thickness, but don’t rely on guesswork. Use a meat thermometer. Every experienced cook does. The thermometer is smarter than all of us.
Step 4: Let It Rest
This part drives hungry people crazy.
After removing the roast from the oven, let it rest under loose foil for about 10 minutes.
Do not skip this step.
Resting allows the juices to redistribute throughout the meat. Slice too early, and all that flavor floods onto the cutting board instead of staying inside the roast where it belongs.
Think of resting meat like letting a great song finish before turning off the speakers.
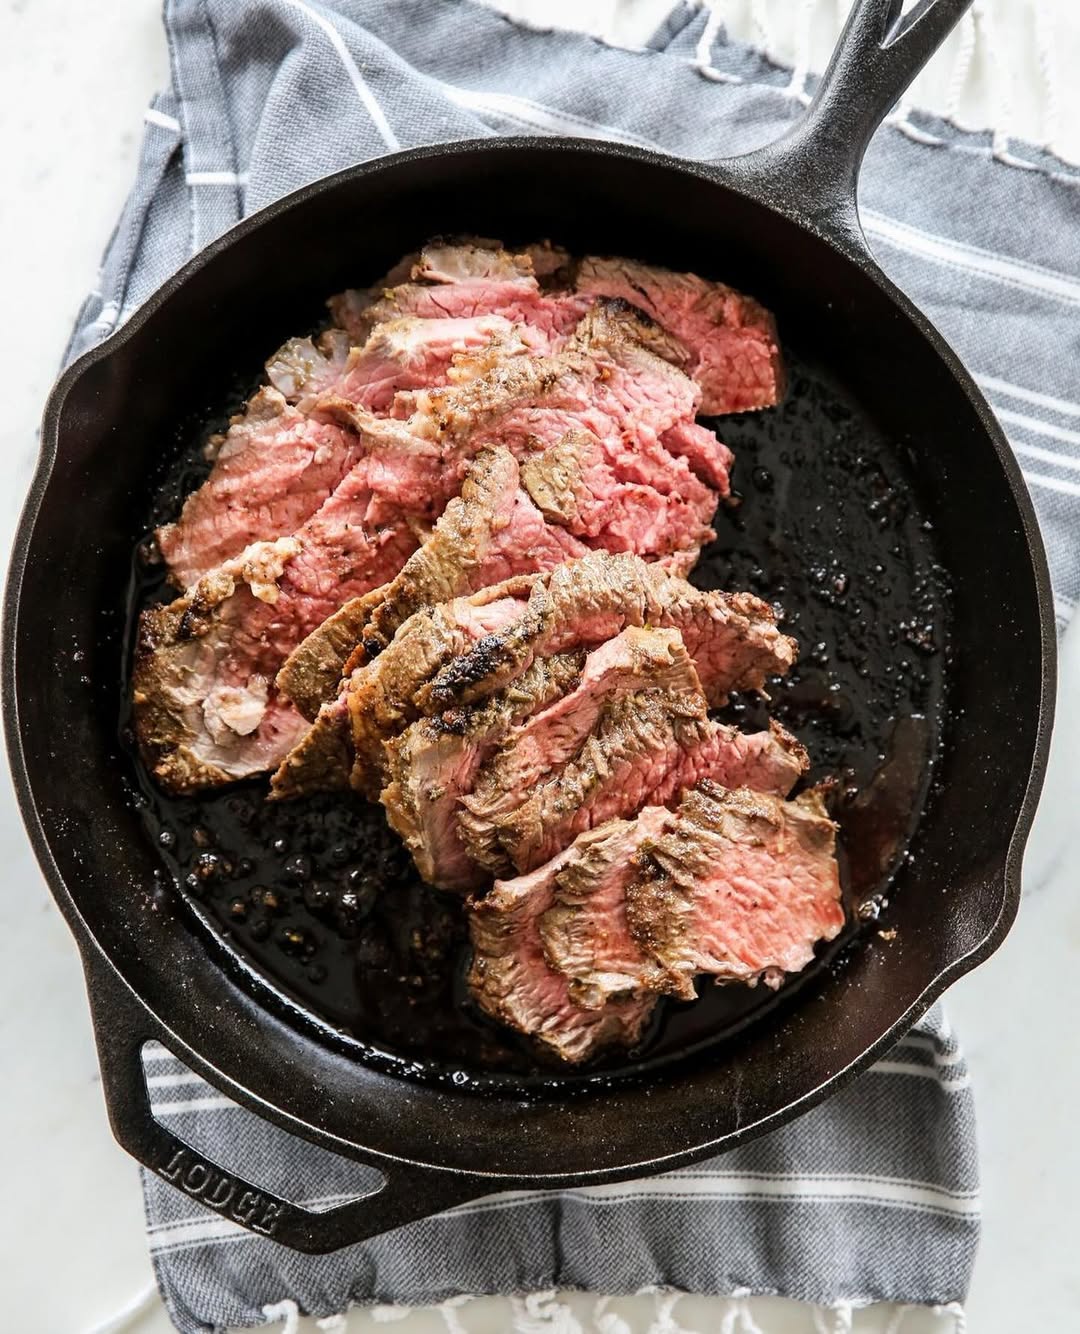
Step 5: Slice Against the Grain
Here’s where many people accidentally sabotage a perfectly cooked beef tri-tip roast.
Tri-tip has grain lines that shift direction midway through the roast. Pay attention before slicing.
Cut against the grain into thin slices. This shortens the muscle fibers and creates a much more tender bite.
Ignore this advice, and suddenly your guests are chewing with the determination of cattle ranchers testing boot leather.
Featured image credit: @ourbestbites