Steak debates can get heated fast.
Charcoal or gas. Ribeye or strip. Butter or no butter.
But one argument keeps showing up around every grill and smoker: reverse sear vs. hot-and-fast.
I’ve cooked thousands of steaks in my life – on backyard grills, offset smokers, and cast-iron pans that could double as medieval weapons. And if there’s one thing I’ve learned, it’s this:
A great steak is less about fancy gear and more about understanding heat.
Two methods dominate the modern steak world:
- The reverse sear
- The classic hot-and-fast method
Both promise a crispy crust and juicy center. Both have loyal fans. And both can produce a steak that makes people close their eyes on the first bite.
So I ran a side-by-side steak test to see how they really compare.
Let’s break it down like a pitmaster would – simple, practical, and honest.
The Two Steak Cooking Philosophies
Cooking steak really comes down to how heat moves through meat.
The hot-and-fast method throws the steak into intense heat right away.
The reverse sear, on the other hand, takes a slower, more controlled approach.
Think of it like two different driving styles:
- One floors the gas pedal.
- The other eases into the highway before hitting top speed.
Both can get you where you’re going. The experience just feels different.
 1")
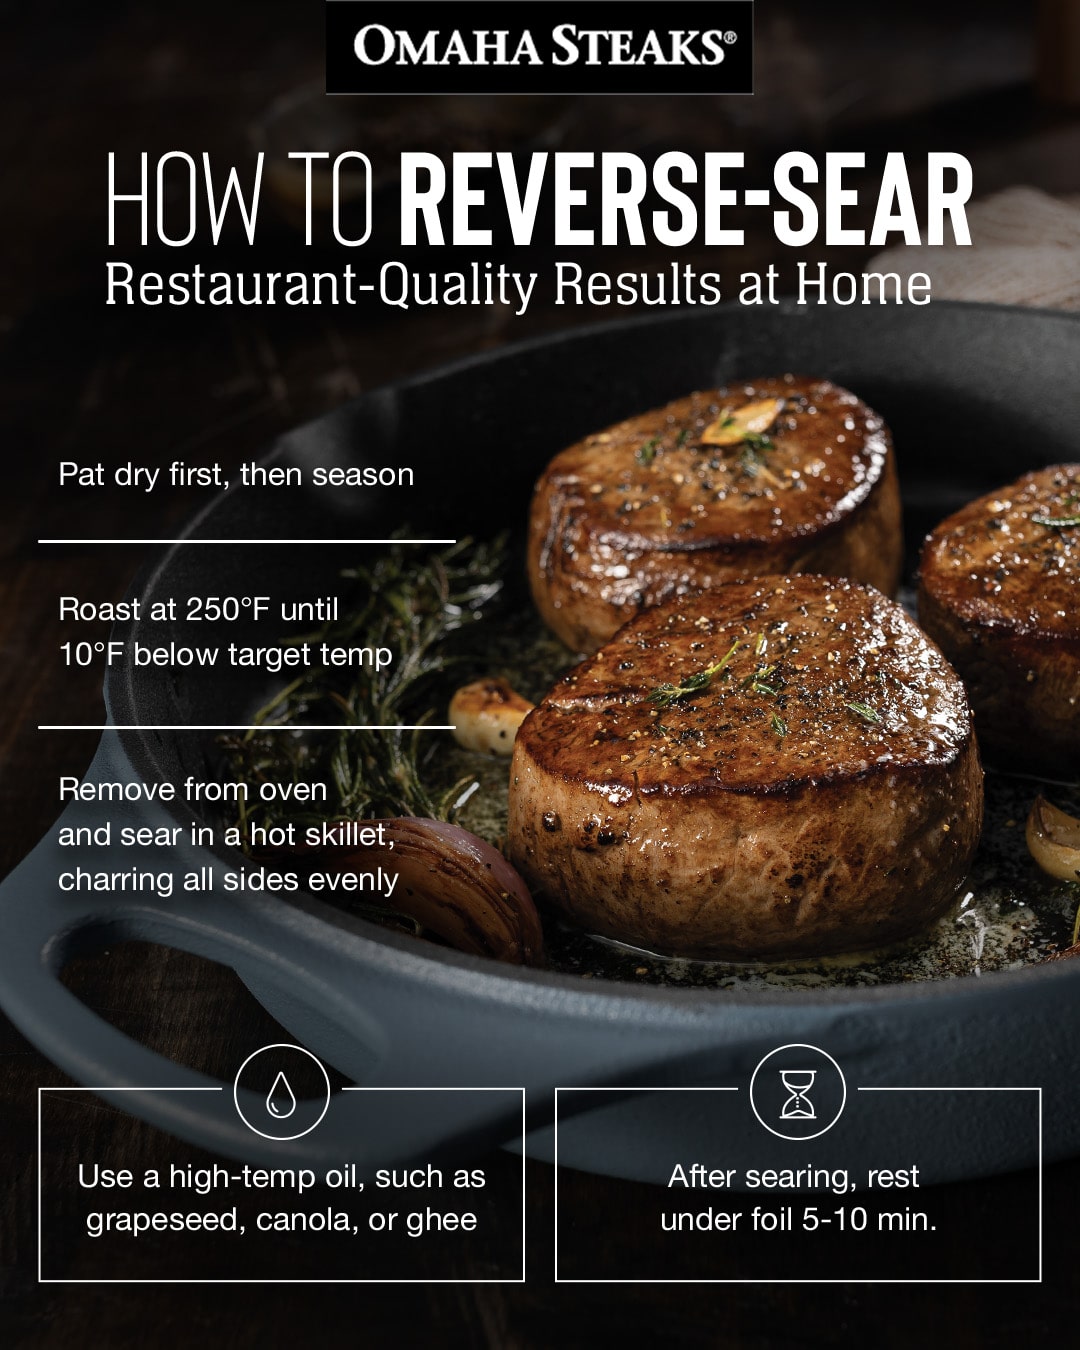
What Is Reverse Searing?
The reverse sear flips the traditional steak process on its head.
Instead of searing first and finishing later, you cook the steak gently first, then blast it with heat at the end.
Here’s the basic idea:
- Cook the steak slowly with low heat
- Bring it close to the target internal temperature
- Finish with a high-heat sear
That last step builds the crust everyone loves.
The result?
A steak that’s evenly pink from edge to edge.
No big gray bands. No overcooked edges.
Just pure, juicy steak.
Why Pitmasters Love the Reverse Sear
The first time I tried the reverse sear, I remember slicing into the steak and thinking:
“Wait… why does the whole thing look perfect?”
With the traditional method, you usually see a doneness gradient.
Brown outside. Gray layer. Pink center.
But with the reverse sear, the color stays consistent.
That’s because low heat cooks the steak evenly before the crust forms.
And that slow cook also does something important.
It dries the surface slightly.
And a dry surface is the secret to a killer crust.
What Is the Hot-and-Fast Steak Method?
Now let’s talk about the old-school classic.
The hot-and-fast method is exactly what it sounds like.
You cook the steak over blazing hot heat right from the start.
This is how most steakhouses do it.
And it works beautifully.
The process usually goes like this:
- Preheat a grill or pan until it’s screaming hot
- Drop the steak directly onto the heat
- Flip occasionally until done
It’s simple. Fast. And dramatic.
When that steak hits the surface, you hear that instant sizzle.
That sound alone could make a vegetarian reconsider.
Why the Hot-and-Fast Method Became the Standard
Before digital thermometers and pellet grills, cooks needed a fast, reliable way to cook steak.
Hot-and-fast delivered exactly that.
It’s quick.
It creates a deep, aggressive crust.
And if you know your timing, it produces fantastic steak.
But it also has a downside.
Heat hits the outside so hard that the interior sometimes struggles to keep up.
That’s where the reverse sear started gaining popularity.
 2")
The Science Behind a Perfect Steak
Let’s talk steak science for a minute. Nothing too nerdy.
Just the stuff that matters.
Because great steak isn’t magic.
It’s chemistry.
The Maillard Reaction: The Flavor Machine
That deep brown crust on steak comes from something called the Maillard reaction.
It happens when:
- Proteins
- Sugars
- High heat
combine.
The result is the complex, savory flavor that makes steak taste like steak.
No crust?
No magic.
That’s why both the reverse sear and hot-and-fast methods end with serious heat.
You need it.
Internal Temperature Is Everything
Ask ten grill masters what ruins steak most often and nine will say the same thing.
Overcooking.
Steak doesn’t care how long it cooks.
It only cares about internal temperature.
Some basic targets:
- Rare: 125°F
- Medium rare: 130–135°F
- Medium: 140–145°F
This is where the reverse sear shines, because it gives you incredible temperature control.
The Side-by-Side Steak Test
To keep things fair, I ran both methods with identical steaks.
Same cut.
Same seasoning.
Same thickness.
Here’s what I used:
- Two 1.5-inch ribeye steaks
- Kosher salt and black pepper
- Cast-iron skillet
- Oven and grill
- Instant-read thermometer
No fancy marinades.
No complicated tricks.
Just steak.
Cooking the Reverse Sear Steak
First up: the reverse sear.
I set the oven to 250°F.
The steak went onto a wire rack so air could circulate around it.
Then I waited.
Low heat slowly brought the internal temperature up to 115°F.
At this stage the steak looks pretty boring.
No crust.
No dramatic sizzle.
But inside, something important is happening.
The meat is cooking evenly and gently.
Once it hit temperature, I pulled it out and fired up the skillet.
Cast iron. Maximum heat.
Then the steak hit the pan.
And suddenly the quiet process turned into a fireworks show.
Thirty seconds per side.
Boom.
Crust achieved.
Cooking the Hot-and-Fast Steak
Now for the traditional method.
The cast-iron skillet went on the burner until it was rippling hot.
When the steak touched the pan, the sound was incredible.
That loud sear is basically flavor forming in real time.
I flipped every 45 seconds.
This helps build crust while preventing burning.
After several flips, the internal temperature hit 130°F.
Then the steak rested.
No oven. No slow cooking.
Just pure high heat.
 3")
The Moment of Truth: Cutting the Steaks
This is where things get interesting.
Every pitmaster knows the moment.
Knife in hand.
Steam rising.
Time to see what happened.
Crust Comparison
Let’s start with the exterior.
The hot-and-fast steak had a darker crust.
No surprise there.
High heat from the beginning tends to build deeper browning.
But the reverse sear crust was still excellent.
It just looked a little more even and slightly lighter.
Both had great texture.
Both had strong flavor.
No complaints here.
Interior Doneness
This is where the reverse sear really stood out.
When I sliced into it, the inside was perfectly pink from edge to edge.
No thick gray bands.
Just a thin seared edge and beautiful medium-rare throughout.
The hot-and-fast steak looked different.
Still delicious.
But you could see the layers:
- Dark crust
- Gray transition
- Pink center
That gradient is normal for the method.
But visually, the reverse sear wins here.
Juiciness
Both steaks were juicy.
But the reverse sear had slightly more consistent moisture.
That slow cooking process prevents sudden protein tightening.
Which means less juice gets squeezed out.
The hot-and-fast steak was still excellent.
Just a little drier near the outer edges.
Cooking Time
Now let’s talk practicality.
The hot-and-fast steak finished in about 10 minutes.
The reverse sear took closer to 35 minutes.
So if you’re starving and staring at a steak in the fridge, that time difference matters.
Sometimes dinner needs speed.
And that’s where hot-and-fast shines.
Ease of Cooking
Interestingly, beginners often find the reverse sear easier.
Why?
Because you’re creeping toward your final temperature slowly.
It’s harder to overshoot.
The hot-and-fast method requires more instinct.
You’re managing intense heat from the start.
One extra minute can push a steak past medium rare.
 4")
Pros of the Reverse Sear
The reverse sear method delivers several big advantages.
1. Edge-to-edge doneness
The entire steak cooks evenly.
2. Excellent moisture retention
The gentle heat protects the juices.
3. Fantastic for thick steaks
Anything over 1.5 inches benefits from slow heating.
And honestly?
Watching that final sear after the slow cook feels like the grand finale of a fireworks show.
Pros of the Hot-and-Fast Method
The classic technique still holds its ground.
1. Faster cooking
Dinner happens quickly.
2. Deep steakhouse crust
High heat builds aggressive browning.
3. Simple setup
One grill or pan.
No oven required.
Sometimes simple really is best.
When Reverse Sear Is the Better Choice
After years behind the grill, I reach for the reverse sear in a few situations.
- Thick steaks (1.5 inches or more)
- When I want perfect medium rare
- When cooking for guests
It’s incredibly consistent.
And consistency is the pitmaster’s best friend.
When Hot-and-Fast Makes More Sense
That said, I still cook steaks hot-and-fast all the time.
Especially when:
The steak is thin
Dinner needs to happen fast
I’m cooking inside with cast iron
Sometimes you just want steak now, not in half an hour.
Pitmaster Tips for Perfect Steak
No matter which method you choose, a few fundamentals make a huge difference.
Dry the steak before cooking.
Moisture kills crust.
Salt generously.
Salt brings out natural beef flavor.
Use a thermometer.
Guessing leads to overcooked steak.
Let the steak rest.
Five minutes allows juices to redistribute.
Skip this step and those juices end up on the cutting board instead of in your mouth.
So… Which Steak Method Wins?
Here’s the honest pitmaster answer.
Both methods win.
But in different situations.
If the goal is perfect internal doneness and maximum juiciness, the reverse sear takes the crown.
If the goal is speed and a bold crust, the hot-and-fast method still dominates.
Personally?
For thick steaks, I almost always go reverse sear.
It’s reliable. Predictable. And incredibly satisfying.
But if I’m hungry at 9 PM with a strip steak in the fridge?
Hot pan.
High heat.
Let it rip.
 5")
Why Steak Thickness Changes Everything
If there’s one detail that quietly decides whether your steak succeeds or fails, it’s steak thickness.
A thin steak – say under 1 inch – doesn’t give you much room to work. By the time a crust forms, the inside is already racing toward well-done. That’s why the hot-and-fast method usually works better for thinner cuts.
But once you move into the territory of thick steaks (1.5 to 2 inches), the game changes completely.
Now you have a big chunk of meat that needs time for heat to travel from the outside to the center.
This is where the reverse sear becomes a pitmaster’s best friend.
The slow cooking phase gently warms the steak all the way through before the final sear. The result is that beautiful edge-to-edge pink interior steak lovers chase.
The rule I always tell people is simple:
Thin steaks love speed. Thick steaks love patience.
The Role of Dry Brining Before Cooking
Want to make either steak method instantly better?
Use dry brining.
It sounds fancy, but the process is almost laughably simple.
You just salt the steak well ahead of time and let it rest in the refrigerator. Anywhere from 1 hour to overnight works beautifully.
Here’s what happens behind the scenes.
Salt pulls moisture out of the meat at first. But then something interesting happens – the salty liquid gets reabsorbed back into the steak, seasoning it deeper than surface seasoning ever could.
At the same time, the steak’s exterior becomes slightly drier, which helps create a stronger crust during searing.
This is especially powerful for the reverse sear method, because a dry surface plus a blazing hot pan equals Maillard reaction magic.
I tell backyard grillers this all the time:
If you remember only one steak upgrade, remember dry brining.
It’s the easiest trick in the pitmaster playbook.
Why Resting Steak Is Not Optional
One of the biggest steak mistakes I see happens after the cooking is done.
Someone pulls a beautiful steak off the grill… then slices it immediately.
And suddenly the cutting board looks like a crime scene of lost juices.
Here’s what’s going on.
While the steak cooks, its muscle fibers tighten and push moisture toward the center. When the steak comes off the heat, those juices need time to redistribute throughout the meat.
That’s where resting the steak becomes critical.
Give it 5 to 10 minutes.
During that time the fibers relax, and the juices settle back inside.
Cut too early and the liquid runs out.
Wait just a little longer and the steak stays juicy in every bite.
It’s not the most exciting step in steak cooking.
But it might be the most important one people skip.
The Butter Baste Trick Steakhouse Chefs Use
If you’ve ever wondered why steakhouse steaks taste so rich, there’s a good chance butter basting is involved.
This technique is simple but incredibly effective.
During the final sear – especially when using cast iron – you add a couple tablespoons of butter, garlic, and herbs to the pan.
As the butter melts, you tilt the pan slightly and spoon the hot butter over the steak repeatedly.
What happens next is pure flavor layering.
The butter carries aromatics like thyme, rosemary, and garlic across the meat while reinforcing the crust.
It also adds a glossy finish and that unmistakable steakhouse aroma.
Butter basting works beautifully with both hot-and-fast cooking and the reverse sear method, since the sear stage is where flavor development explodes.
And yes – your kitchen will smell incredible.
Fair warning though.
Once you try butter-basted steak, plain steak might start feeling a little lonely.
Frequently Asked Questions
Is the reverse sear better than the hot-and-fast method?
It depends on what you want from your steak.
The reverse sear is usually better for thick steaks because it cooks the meat slowly before the final sear, creating even doneness from edge to edge.
The hot-and-fast method, however, is excellent when you want a deep, aggressive crust and a much faster cooking time.
In most pitmaster kitchens, the rule is simple: reverse sear for thick steaks, hot-and-fast for thinner cuts.
What thickness of steak works best for reverse searing?
The reverse sear method works best for steaks that are at least 1.5 inches thick. Thick cuts give the slow cooking stage enough time to gently bring the internal temperature up before the final sear.
If the steak is thinner than about one inch, it will cook too quickly during the searing stage, making the reverse sear less effective. For thin steaks, the hot-and-fast method usually produces better results.
Do you need a thermometer for reverse searing?
While it’s technically possible to cook steak without one, using a meat thermometer makes reverse searing much more accurate.
The method relies on slowly bringing the steak close to its final temperature before searing. A thermometer helps you pull the steak at exactly the right moment, usually around 10–15°F below your final target temperature.
In short, a thermometer removes the guesswork and helps you cook steak perfectly every time.
Does reverse searing make steak more tender?
The reverse sear doesn’t change the tenderness of the cut itself, but it can improve the overall texture and juiciness of the steak.
Because the meat cooks slowly and evenly, fewer juices are pushed out during the cooking process. The result is a steak that feels more consistently tender and juicy from edge to edge.
Can you reverse sear on a grill?
Yes, and many pitmasters actually prefer it.
To reverse sear on a grill, you start by cooking the steak on the indirect heat side of the grill at a low temperature.
Once the steak approaches the desired internal temperature, you move it directly over the high heat zone to finish with a hard sear.
This method works especially well on charcoal grills and pellet smokers, where you can control both low and high heat zones.
Why does the hot-and-fast method create a darker crust?
The hot-and-fast method exposes the steak to intense heat immediately, which accelerates the Maillard reaction – the chemical reaction responsible for browning and deep savory flavor.
Because the steak spends more time directly over high heat, the crust often becomes darker and more aggressive than what you get with a reverse sear.
Some steak lovers actually prefer this bold crust, especially on ribeye and strip steaks.
Should you rest steak after cooking?
Yes—resting steak is essential, regardless of which cooking method you use.
When steak cooks, the juices move toward the center of the meat. Letting the steak rest for 5 to 10 minutes allows those juices to redistribute throughout the steak, making every bite more flavorful and juicy.
Cutting into a steak too early often causes those juices to spill onto the cutting board instead of staying inside the meat.
Can beginners use the reverse sear method?
Absolutely. In fact, many beginners find reverse searing easier than traditional steak cooking.
Because the steak heats slowly during the first stage, there’s less risk of overcooking the interior. The final sear happens quickly and mainly focuses on building the crust.
For people who want more control and consistent results, the reverse sear is one of the most beginner-friendly steak techniques available.
 6")
The Bottom Line
Steak cooking doesn’t need to be complicated.
The real secret is understanding how heat works with meat.
Once you get that part down, both the reverse sear and hot-and-fast methods become powerful tools.
And the best cooks don’t pick just one.
They use both.
Because the real goal isn’t winning a cooking argument.
The real goal is simple.
Serve a steak so good people stop talking when they take the first bite.
Featured image credit: @omahasteaks