Grilling a thanksgiving turkey is the kind of holiday move that makes your family think you’ve secretly enrolled in culinary school.
The truth? You just decided to take the bird outside and let the grill do the heavy lifting.
As a pitmaster, I can tell you this: once you taste a turkey that’s been kissed by wood smoke and wrapped in crispy, bronzed skin, there’s no going back to the oven.
A grilled turkey isn’t just delicious – it’s practical. Your oven stays free for pies, casseroles, and that aunt who insists her stuffing “needs the top rack.” And with the method below, you’ll get a perfectly smoked, tender bird every single time.
So fire up the grill, sharpen your carving knife, and let’s turn tradition into a flex.
Why Grill Your Thanksgiving Turkey?
First, the flavor. A grilled turkey develops a deep, smoky profile you just can’t fake indoors.
The skin browns better, the meat stays juicier, and the whole bird tastes like you gave it a first-class ticket to flavor town – without saying cheesy things like “flavor town.”
Second, the logistics. Thanksgiving usually looks like a kitchen traffic jam. Moving the turkey outdoors instantly clears space. And yes, you get bragging rights when your guests ask, “Wait… you grilled the turkey?”
Finally, control. Whether you’re running gas, charcoal, or a pellet grill, the slow-and-steady approach makes it hard to screw up.
Add a simple brine, a good seasoning rub, and a little smoke, and you’ve got a turkey that looks like it was carved for a magazine cover – except it actually tastes better.
As I like to say, “The grill never lies.”

Choosing the Right Grill Setup for Your Thanksgiving Turkey
Picking the right grill setup is half the battle when you’re chasing that perfectly grilled thanksgiving turkey. You don’t need a fancy competition pit – just a smart approach to indirect heat, steady airflow, and clean-burning fuel.
Charcoal fans love the classic flavor, especially when paired with apple or cherry wood. Gas grill users get easy temperature control, which makes maintaining that 300–325°F sweet spot almost effortless.
Pellet grills? Well, that’s basically a smoker with automation – set it, forget it, and look like a wizard when the turkey comes out bronzed and glorious.
The key is simple: heat on one side, turkey on the other. No football-style blitzing with flames directly under the bird. With the right setup, your turkey cooks evenly, absorbs gorgeous smoke, and stays moist from wingtip to wishbone.
The grill becomes your secret weapon, and the bird becomes your masterpiece.
How to Build the Perfect Thanksgiving Turkey Rub
A great rub turns a good bird into a show-stopping thanksgiving turkey, and it doesn’t need to be complicated. Start with the essentials: kosher salt, cracked pepper, garlic powder, onion powder, and paprika.
This creates the foundation that makes flavors pop without overpowering the smoke. Then add the personality – herbs like thyme, rosemary, sage, or even a little cayenne if you want heat.
Don’t forget the fat: brushing the turkey with melted butter or olive oil helps the seasoning cling, promotes browning, and gives your turkey that crispy, bronze skin everyone fights over. Apply the rub liberally over the bird, under the skin, and inside the cavity.
A well-rubbed turkey isn’t just seasoned – it’s insured. The grill will bring the smoke, but your rub brings the soul, turning each bite into a perfect balance of herbs, spice, and rich turkey flavor.
The Science of Keeping Turkey Moist on the Grill
Turkey gets a bad reputation for being dry, but grilling actually gives you several tools to keep your thanksgiving turkey juicy and tender. The first secret is brining.
Whether you choose a wet brine or a dry brine, salt works its magic by helping the meat retain moisture during cooking.
The second trick is temperature control – low and steady heat prevents the dreaded dryness spiral. Third, think like a pitmaster: positioning a drip pan under the turkey catches fat drippings and prevents flare-ups while also stabilizing humidity.
And don’t forget the finish. Resting the turkey after grilling allows juices to redistribute instead of spilling all over your cutting board.
When you understand the science – salt, heat, fat, and rest – you unlock the formula for a turkey that’s smoked beautifully, tender throughout, and anything but dry.

Elevating Your Turkey With Flavor Injecting and Aromatics
If you really want to flex your pitmaster skills, consider injecting your thanksgiving turkey with a flavorful buttery broth or using aromatic ingredients inside the cavity.
Injecting allows flavor to travel deep into the meat – especially the breast, which needs all the help it can get.
A simple mix of melted butter, garlic, herbs, and broth works wonders. Meanwhile, stuffing the cavity with rosemary, thyme, citrus, garlic, and onion adds subtle fragrance as the bird cooks, enhancing the smoke rather than competing with it.
The beauty of these techniques is that they’re invisible but powerful. Guests won’t see you injecting or tucking in aromatics, but they’ll taste the results immediately.
It’s the kind of upgrade that transforms a “nice turkey” into a seriously impressive, flavor-packed centerpiece worthy of its holiday spotlight.
Carving Techniques That Make You Look Like a Pro
After grilling a smoked thanksgiving turkey to absolute perfection, don’t sabotage your masterpiece with awkward carving. Good carving is half skill, half confidence. First, make sure you’ve let the turkey rest at least 20–30 minutes.
This keeps it juicy and makes slicing cleaner. Start by removing the legs and thighs – they come off easily when you cut at the joint. Next, take off the wings.
Then glide your knife along the breastbone, peeling off whole breast sections instead of hacking away thin slices on the bird.
Once you’ve removed the breast, slice it crosswise into even, picture-perfect pieces. This method keeps the meat tender, serves beautifully, and avoids the dreaded “shredded turkey” look.
With a sharp knife and a calm hand, you can carve like someone who’s been doing Thanksgiving demos on live TV. The bird deserves a clean presentation – and so do you.
Tips for Perfect Smokiness and Tenderness
- Choose the right wood: Apple for sweet, hickory for bold.
- Crispy skin hack: Keep the turkey as dry as possible before cooking. Moisture is the enemy of crisp.
- Moisture trick: Add water to the drip pan. No steam bath, just enough to stabilize temps.
- Avoid flare-ups: Keep the turkey over indirect heat. This bird is not interested in fireball surprises.
- Flavor variations: Try a lemon-herb rub, Cajun spice blend, or a sweet BBQ glaze for the last 20 minutes.
These small tweaks turn a standard turkey into a signature turkey.
What to Serve With Grilled Turkey
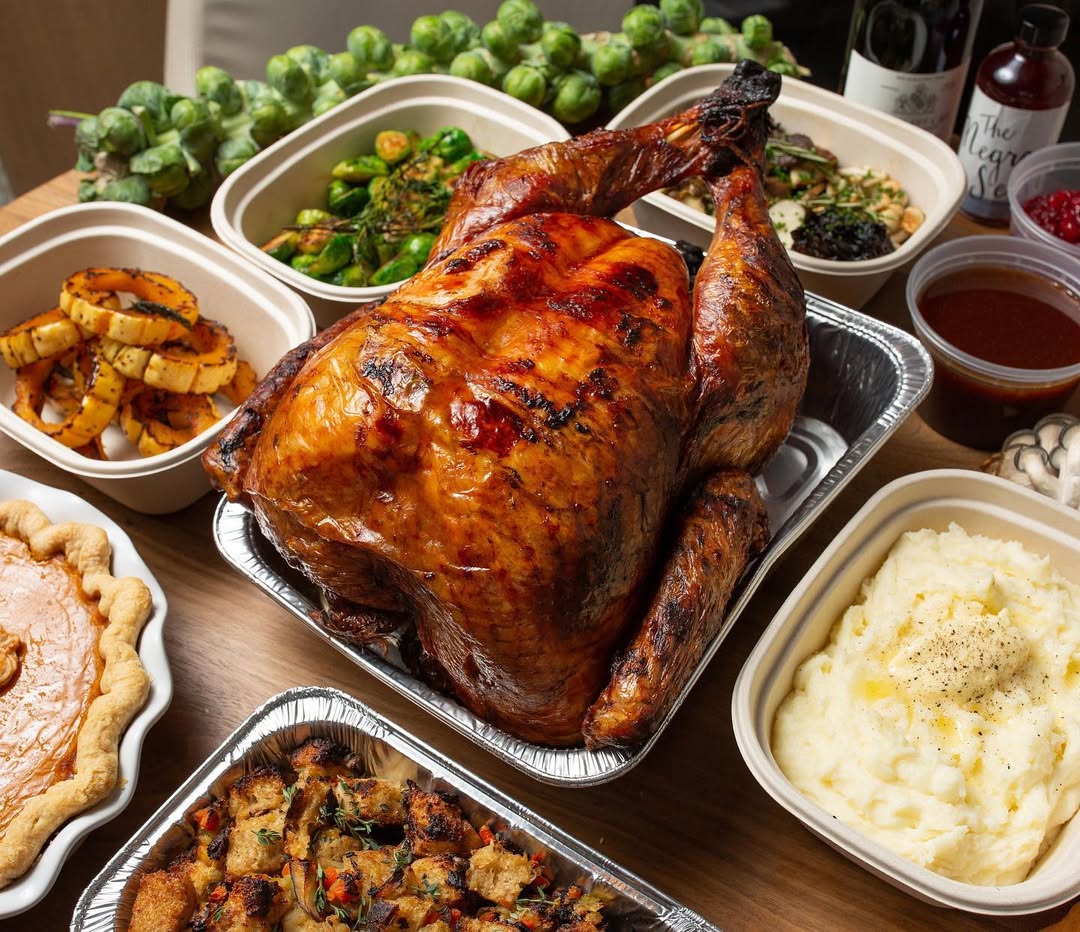
Smoky turkey loves bold but clean flavors. Serve with grilled veggies, mashed potatoes, cranberry sauce, stuffing, and classic gravy. The turkey brings the smoke; the sides bring the balance.

Troubleshooting & FAQs
What if the turkey cooks too fast?
Lower the grill temp to 275°F and relax. Slow is good.
Why is my skin pale?
The turkey wasn’t dry enough or the temp was too low. Higher heat at the end can fix it.
Can I grill a bigger turkey?
Yes, but anything over 16 lbs gets awkward. Consider two smaller birds.
How long for a 12–14 lb turkey?
Usually 2.5–3.5 hours, depending on grill temp.
Can I stuff the turkey?
No. Stuffing slows cooking and risks food safety. Cook it separately like a civilized human.
Final Notes
Grilling a thanksgiving turkey isn’t just about taste – it’s about taking control of your holiday meal like a pitmaster with purpose. The grill gives you smoke, crispiness, tenderness, and brag-worthy flavor without added complexity.
And once you do it, the oven turkey will feel like a relic from a past life.
Happy grilling – and may your bird be juicy, your smoke be clean, and your guests be impressed for all the right reasons.

Grilled Thanksgiving Turkey Recipe
Image credit: @goodtastetv
Ingredients
For the Turkey
- 1 whole thanksgiving turkey, 12–14 lbs
- Olive oil or melted butter
- Kosher salt and black pepper
- Poultry seasoning or herb blend
- Optional aromatics: garlic, onion, thyme, rosemary
For the Brine (Optional but highly recommended)
- Water
- 1 cup kosher salt
- ½ cup brown sugar
- Citrus slices
- Bay leaves and peppercorns
- Pro tip: A thermometer isn’t optional. It’s your insurance policy. Cutting into turkey “to check doneness” is how juice gets lost and tears form.
Instructions
- Prep the Turkey. Thaw the turkey fully – no shortcuts. Remove the giblets and pat the whole bird dry with paper towels. Moisture on the surface equals soggy skin, and soggy skin equals sadness.
- Brine the Turkey. If using a wet brine, soak the turkey for 12–18 hours. If using a dry brine, rub it with salt and let it sit uncovered in the fridge overnight. Brining is the difference between “This turkey is good” and “Why isn’t all turkey this good?”
- Season Generously. Coat with olive oil or melted butter. Apply salt, pepper, and your herb blend. Slide some seasoning under the skin – this is legal and highly encouraged. Stuff the cavity with aromatics. Not stuffing. Aromatics.
- Set Up the Grill for Indirect Heat. A) Gas Grill: Turn on burners on one side only. B) Charcoal Grill: Bank charcoal to one side or use the snake method. C) Pellet Grill: Set temp and relax—pellet grills do the engineering for you. Add wood chunks or chips directly to the heat source. We're building clean smoke, not a fog machine show. Target temp: 300–325°F.
- Place Turkey on Grill. Position the bird over a drip pan to catch juices and prevent flare-ups. Breast side up. If the wings look like they’re trying to escape, tuck them in.
- Slow Grill & Add Smoke. Close the lid. No peeking. Every time you lift the lid, you add 15 minutes to the cook. Unless you truly enjoy waiting, resist. Baste with butter or pan drippings every 45–60 minutes if you want extra color and flavor.
- Check Internal Temperature. When the breast hits 165°F and the thigh hits 175°F, you’re done. A 12–14 lb turkey usually takes 2.5–3.5 hours at 300–325°F. The thermometer tells the truth. The timer guesses.
- Rest and Carve. Let the turkey rest 20–30 minutes. This redistributes juices and makes carving cleaner. Resting is not optional. It’s science – and the good kind.
Featured image credit: @jean_georgesnyc