Kitchen work is a game of seconds. Timing is the pulse of the line; miss it by a fraction, and your sauce breaks or your brisket hits the “burn” point before you can blink.
But here’s the truth: even chefs need a quick grab-and-go snack.
And when you’re running on fumes between meals, granola bars step in like a reliable sous chef – simple, dependable, and surprisingly powerful.
Now, most store-bought bars? Let’s just say they look healthy but read the label and suddenly you’re decoding a science experiment.
That’s why I started making my own. These homemade granola bars are clean, satisfying, and packed with real flavor – no shortcuts, no nonsense.
And the best part? You don’t need a culinary degree to pull this off. Just a bowl, a pan, and a little bit of know-how.

Why These Granola Bars Work
Here’s the thing about a good snack – it should hold you over without weighing you down.
These bars do exactly that.
They’re:
- Balanced – carbs, fats, and a bit of protein working together
- Customizable – like building your own flavor lineup
- Budget-friendly – way cheaper than premium packaged bars
- Meal-prep gold – make once, snack all week
I like to think of them as the “set it and forget it” of smart snacking. You make a batch, stash it, and suddenly your future self looks a whole lot more organized.
The Secret Science Behind a Perfect Granola Bar Texture
Let me tell you – texture is everything. You can have the best ingredients in the world, but if your granola bars crumble like dry sand or chew like a brick, you’ve lost the game.
The magic lies in ratio and heat control. Too many dry ingredients? You get dust. Too much liquid? You’ve got a sticky mess. What you’re aiming for is that perfect chew – firm, but with a slight give.
Here’s the trick most folks miss: your binding syrup needs to be warm, not hot. Too hot, and it dries out as it cools. Too cool, and it won’t coat properly.
Also, don’t underestimate rest time. This isn’t instant noodles – structure develops as it sets. Give it time, and your bars will reward you with that clean, satisfying bite every single time.
Choosing the Right Oats: The Backbone of Great Granola Bars
If granola bars had a spine, it would be oats. And not all oats play the role equally well.
You’ve got rolled oats, quick oats, and steel-cut oats – but only one really shines here.
Rolled oats are your best friend. They give you that classic chewy texture while holding everything together like a seasoned line cook during dinner rush.
Quick oats? They’ll work in a pinch, but expect a softer, less structured bar. Steel-cut oats? Save those for breakfast – they’re too tough and won’t bind properly.
Here’s a chef’s move: lightly toast your oats before mixing. It brings out a nutty, deep flavor that makes your granola bars taste like they came from a high-end café instead of your kitchen.
Simple step, big payoff.
Sweeteners That Work (and Ones That Don’t)
Sweetness isn’t just about flavor – it’s about function. In granola bars, your sweetener is also your glue, your moisture, and your balance.
The classics – honey and maple syrup – do the job beautifully. They bind, they sweeten, and they bring a natural depth of flavor. Honey gives you that rich, slightly floral note, while maple syrup leans more earthy and smooth.
Now here’s where things go sideways: using dry sugar alone. That’s a fast track to crumbly, disappointing bars. Sugar needs help – either melted into a syrup or paired with fats.
Want a deeper flavor? Try mixing sweeteners. A little honey plus a touch of maple creates a layered sweetness that hits differently.
Bottom line: smart sweetening makes or breaks your bars.

How to Turn Granola Bars into a Power Snack
A good snack fills the gap. A great one fuels your day.
If you want your granola bars to actually perform, you need to think like a chef and a nutritionist. It’s all about balance.
Start with protein – add nuts, seeds, or even a scoop of protein powder. This helps with satiety and muscle support. Then bring in healthy fats like peanut butter or almonds for steady energy release.
Carbs? That’s your oats and dried fruit – quick fuel without the crash when balanced right.
Here’s the goal: a bar that doesn’t just taste good, but keeps you going for hours.
Whether you’re working, studying, or chasing deadlines, this is the kind of snack that pulls its weight.
Think of it less like a treat – and more like edible strategy.
Common Granola Bar Mistakes (And How to Avoid Them)
I’ve seen it all – bars that fall apart, bars that could double as doorstops, and bars so sweet they feel like dessert in disguise.
Let’s fix that.
Mistake #1: Not pressing the mixture firmly enough
Loose mix = crumbly bars. Simple as that.
Mistake #2: Skipping the chill time
If you cut too early, you’re asking for chaos. Let it set properly.
Mistake #3: Overloading add-ins
More isn’t always better. Too many extras = weak structure.
Mistake #4: Ignoring balance
Too dry? Too sticky? That’s a ratio problem.
Here’s the real takeaway: great granola bars are built, not guessed. Pay attention to the details, and you’ll go from “not bad” to consistently excellent.
And trust me – that’s a jump worth making.
Tips for Perfect Granola Bars
After years of trial, error, and a few crumbly disasters, here’s what I’ve learned:
- Pressing matters more than mixing – compact bars are sturdy bars
- Don’t rush the chill time – patience pays off
- Balance your textures – too dry or too sticky throws everything off
- Taste as you go – you’re the chef here
And here’s a little kitchen truth:
If it falls apart, call it “granola clusters” and move on. Still tastes great.
Variations & Flavor Twists
Once you’ve nailed the base recipe, the fun really starts.
- Vegan Version – swap honey for maple syrup
- Nut-Free Option – use sunflower seed butter
- High-Protein Boost – mix in a scoop of protein powder
- Low-Sugar Take – cut back on sweeteners, add more nuts
Flavor ideas:
- Chocolate chip peanut butter
- Cranberry almond
- Coconut honey
- Dark chocolate sea salt
Think of it like seasoning a steak – you can keep it classic or get creative.
Storage & Shelf Life
You’ve got options:
- Room temp: 3–4 days in an airtight container
- Fridge: up to 1 week (firmer texture)
- Freezer: up to 3 months
Pro tip: Wrap them individually and you’ve got a grab-and-go snack ready anytime.
Nutritional Benefits That Actually Matter
Let’s keep this real – not all snacks are created equal.
These granola bars bring:
- Fiber from oats – keeps you full longer
- Healthy fats from nuts and seeds – steady energy, no crash
- Natural sweetness – no artificial junk
- Sustained fuel – perfect for busy days
This is the kind of snack that works with your body, not against it.

Ditch the Perfection, Grab a Bar
At the end of the day, smart snacking isn’t about perfection – it’s about better choices. And these homemade granola bars hit that sweet spot between convenience and quality.
You’re not just making a snack – you’re building something reliable, something you’ll actually reach for when hunger kicks in.
So give it a shot. Play with flavors. Make it yours.
And remember:
A well-made granola bar might not win you a Michelin star…
…but it will save you from bad snack decisions – and that’s a win in my kitchen.

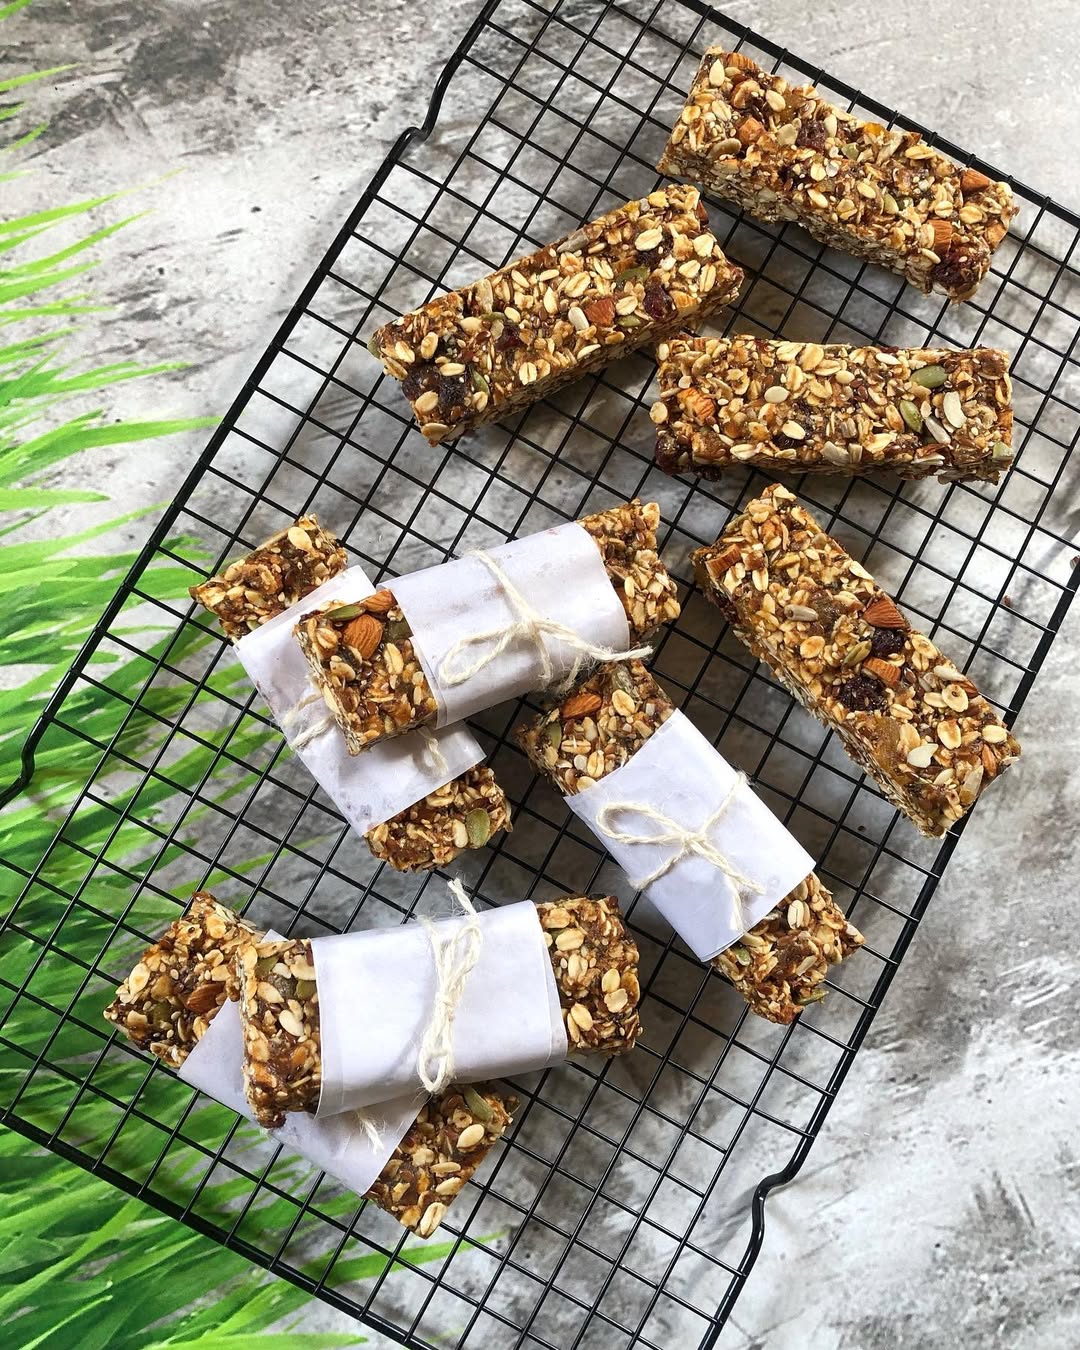
Delicious Granola Bars Recipe
Image credit: @castledairies
Ingredients
- A good dish always starts with good ingredients. Same rule applies here.
- Dry Ingredients
- 2 cups rolled oats (the backbone – don’t skip this)
- ½ cup chopped nuts (almonds, peanuts, walnuts – your call)
- ¼ cup seeds (chia, flax, or sunflower for texture and nutrition)
- ½ cup dried fruit (raisins, cranberries, chopped dates)
- Wet Ingredients
- ⅓ cup honey or maple syrup
- ½ cup peanut butter (or almond butter)
- 1 tsp vanilla extract
- Optional Add-ins
- Dark chocolate chips
- Coconut flakes
- Protein powder
- Chef’s note: Don’t overload it. Too many extras and your bars fall apart faster than a rookie on their first dinner rush.
Featured image credit: @taheridelights