Why This Challenge Even Exists
I’ve cooked barbecue on rigs that cost less than a weekend grocery run – and on smokers that cost more than my first car. Here’s the uncomfortable truth most pitmasters won’t admit out loud: great barbecue doesn’t care how much money you spent.
Fire management, airflow, patience, and feel matter more than chrome lids and digital screens.
That’s where the $100 smoker challenge comes in. The idea is simple and slightly rebellious: Can you build a smoker that produces legit, competition‑worthy barbecue using nothing more than a steel drum, basic hardware, and a Benjamin?
Not a showpiece. Not a gadget. A cooker that works.
The Ugly Drum Smoker – affectionately known as the UDS – has been answering that question for years. It’s ugly. It’s stubborn. It’s brutally effective. And once you cook on one, you start looking at expensive smokers the way you look at bottled water at the airport.
This article walks you through the entire build and mindset behind the $100 smoker challenge, from picking the right drum to cooking your first rack of ribs. No fluff. No gatekeeping. Just hard-earned pit wisdom, shared with a cold drink and a grin.
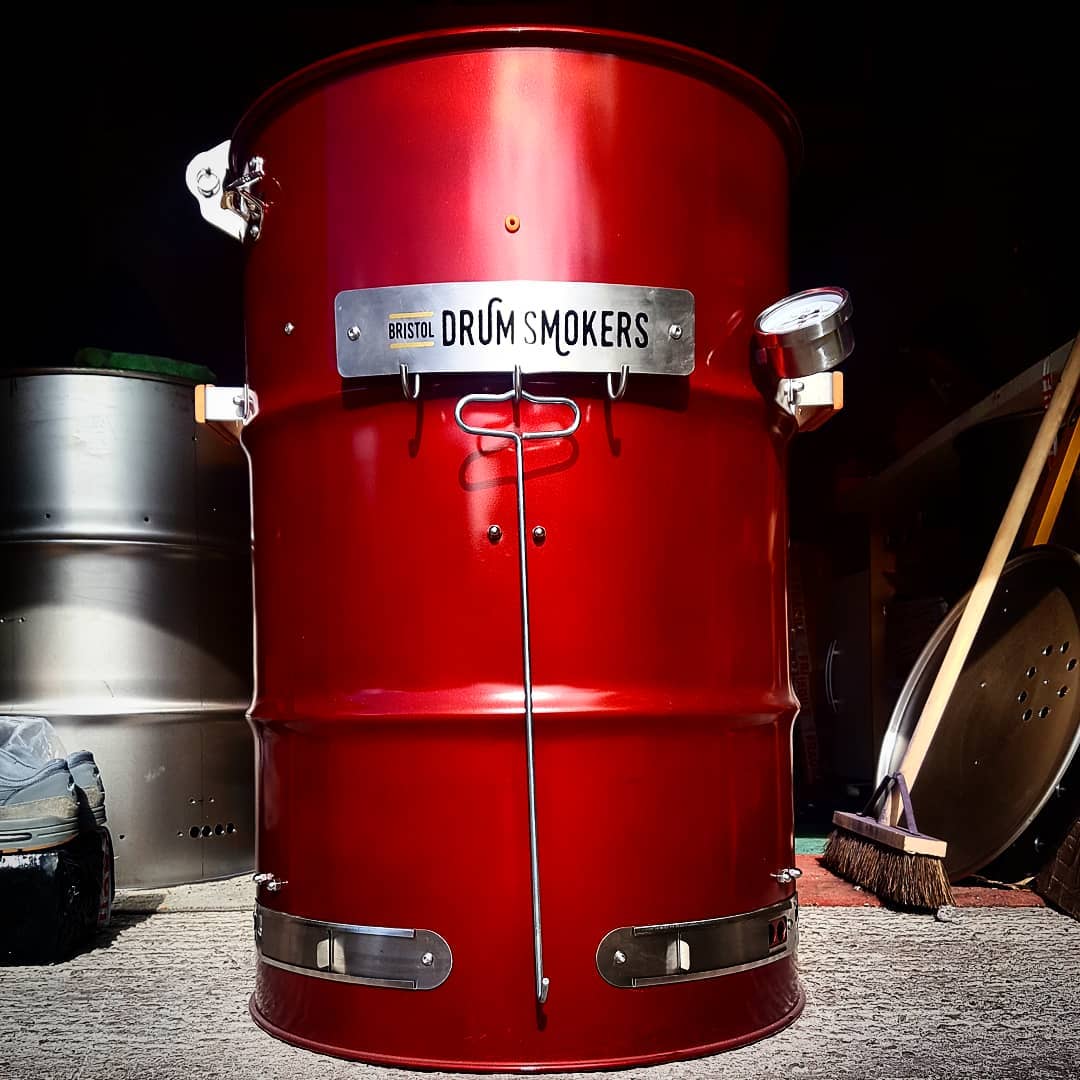
What Exactly Is an Ugly Drum Smoker?
An Ugly Drum Smoker is a vertical charcoal smoker made from a 55‑gallon steel drum. That’s it. No firebox. No offset chamber. No complicated baffles. Just fire at the bottom, meat above it, and controlled airflow doing the heavy lifting.
Why pitmasters love it:
- Rock-solid temperature stability once dialed in
- Insanely fuel-efficient—12 to 18 hours on one basket isn’t rare
- Simple airflow physics that are easy to learn and hard to mess up
The “ugly” part isn’t an insult. It’s a warning. This thing prioritizes performance over appearance, like a beat-up cast iron pan that cooks better than anything new.
Important phrase: Ugly Drum Smokers trade looks for results – and always win.

Can You Really Build a Smoker for $100?
Short answer? Yes. Longer answer? Yes, but you need to be smart, flexible, and a little scrappy.
The $100 smoker challenge isn’t about cutting corners that affect safety or performance. It’s about avoiding unnecessary spending. That means:
- Used or surplus drums
- Hardware-store basics instead of BBQ-branded parts
- Function over polish
I’ve seen people blow the budget trying to make their drum pretty. Paint, fancy handles, custom badges. Meanwhile, the guy next to them cooked a better brisket using a drum that still smelled faintly like pickles.
Important phrase: A $100 smoker doesn’t look expensive – it cooks expensive.
Planning the Build Before You Touch a Drill
Before you buy anything, set your rules. The smartest pitmasters plan before they build.
Choose the Right Drum
You want a food-grade 55‑gallon steel drum. Period. No mystery liners. No chemical residue. If it held cooking oil, syrup, or juice in a past life, you’re golden. If it held something that requires a hazmat suit, walk away.
Expect to pay:
- $20–$40 if you hunt a little
- Free if you get lucky and ask the right warehouse guy at the right time
What Counts Toward the $100
Most folks agree on these ground rules:
- Materials count toward the budget
- Tools do not (unless you’re buying them specifically for this build)
- Sweat equity is free and highly encouraged
The $100 Budget Breakdown
This is where the challenge gets real – and fun.
A typical $100 smoker challenge budget looks like this:
- Steel drum: $30
- Cooking grates (2): $20
- Expanded metal for charcoal basket: $15
- Bolts, nuts, washers: $10
- Air intakes and caps: $10
- Thermometer (optional): $10
That’s roughly $95. Enough left over for a bag of charcoal and a victory beverage.
Important phrase: Spend money where heat and airflow matter. Save everywhere else.
Tools You’ll Need (Nothing Fancy)
If you’ve ever fixed a fence or assembled IKEA furniture without crying, you’re qualified.
- Drill with step bit or metal bits
- Wrenches or socket set
- Marker and measuring tape
- Safety gloves and eye protection
An angle grinder helps but isn’t mandatory. Plenty of great UDS builds were done without one.

Step-by-Step: Building the Ugly Drum Smoker
Step 1: Clean and Prep the Drum
If your drum has an interior liner, it must go. No shortcuts here. Burn it out, grind it off, or both. This step smells terrible but prevents your ribs from tasting like a tire fire.
Once clean, wash it thoroughly and let it dry. This is the foundation of everything that follows.
Important phrase: If the drum isn’t clean, nothing else matters.
Step 2: Install the Air Intakes
Airflow is the brain of the smoker. Most UDS builds use:
- Three 3/4‑inch intakes near the bottom
- Two capped nipples and one adjustable valve
This setup gives you fine control without overthinking it. Too much air and the fire runs wild. Too little and it sulks.
Step 3: Build the Charcoal Basket
This is the heart of the smoker. Use expanded metal to form a basket roughly 12–14 inches wide and 8–10 inches tall. Mount it on bolts or a grate to keep it off the bottom.
A good basket:
- Promotes clean airflow
- Holds enough fuel for long cooks
- Lets ash fall away instead of choking the fire
Important phrase: A bad fire basket creates bad barbecue.
Step 4: Mount the Cooking Grates
Most pitmasters run one or two grates. Place the main grate about 24 inches above the fire. This spacing gives you clean smoke and even heat.
Second grates are optional – but great for ribs or chicken.
Step 5: Lid and Exhaust Setup
A flat drum lid works fine. A domed kettle lid works even better if you can score one cheap.
Exhaust should be simple:
- One central vent or multiple small holes
- No dampers needed in most cases
Remember, exhaust should never be more restrictive than intake.
Seasoning the Smoker
Before you cook food, you cook oil.
Coat the interior lightly with cooking oil. Fire it up. Let it run hot for a couple hours. This protects the steel and lays the foundation for future flavor.
It’s like breaking in a new pair of boots – do it right once, and they’ll treat you well for years.
How the $100 Smoker Actually Performs
Here’s the part that surprises people.
Once dialed in, a UDS:
- Holds 250°F like it’s glued there
- Uses less fuel than most offsets
- Produces clean, thin blue smoke
I’ve cooked briskets overnight without touching a vent. That’s not marketing – that’s physics.
Important phrase: Cheap smokers don’t cook bad barbecue – bad airflow does.

Learning Fire Discipline the Hard Way (And Why That’s a Good Thing)
One thing the $100 smoker challenge teaches fast is fire discipline. There’s no digital controller. No app. No alarm yelling at you from inside the house. It’s just you, airflow, and consequences.
At first, most people overcorrect. Temps spike, panic sets in, vents get slammed shut. Then the fire suffocates and you’re chasing heat for the next hour. Every pitmaster has lived this moment. It’s how you learn.
A UDS forces you to understand cause and effect. Tiny vent adjustments matter. Ten minutes of patience beats constant fiddling. You stop reacting and start anticipating.
That skill transfers everywhere. Once you master fire on a drum, other smokers feel easier – almost forgiving.
Important phrase: The drum doesn’t forgive panic, but it rewards patience.
This is barbecue school with no tuition – just charcoal and humility.
Cooking Different Meats on a UDS (Not Just Brisket)
Most people think the $100 smoker challenge is all about brisket. It’s not. The Ugly Drum Smoker shines with versatility, and that’s where it really earns its keep.
Chicken cooks hot and clean with crispy skin. Pork butts hum along overnight without drama. Ribs benefit from vertical airflow that wraps smoke evenly around the meat. Even sausage loves a UDS – steady heat, light smoke, no flare-ups.
The key is understanding heat zones. The center runs hotter. The edges stay gentler. Once you learn where your drum runs warm, you cook smarter.
I’ve baked cornbread in a cast iron skillet on a UDS. No joke.
Important phrase: If it fits in the drum, you can smoke it.
That kind of flexibility makes this build more than a novelty – it’s a daily cooker.
Weather, Wind, and Why the Drum Doesn’t Care Much
Wind ruins a lot of smokers. Rain sends others into a spiral. One of the quiet strengths of the Ugly Drum Smoker is how little it cares about weather.
The vertical design shields the fire. The thick steel acts like a heat battery. Once it’s up to temp, it holds steady through cold mornings, light rain, and shifting winds.
That said, placement matters. Always block direct wind from the intake side. Elevate the drum slightly if you’re cooking on wet ground. Small adjustments go a long way.
I’ve cooked through surprise storms without touching a vent. Meanwhile, buddies with offsets were chasing temps like unpaid interns.
Important phrase: A drum smoker is stubborn – in the best way possible.
That reliability is gold when long cooks meet real-world conditions.
Food Safety, Clean Smoke, and Avoiding Rookie Mistakes
A big part of the $100 smoker challenge is proving that cheap doesn’t mean careless. Food safety matters more on DIY pits, not less.
Clean smoke is the goal. Thin and blue beats thick and white every time. If your smoke smells harsh, your fire needs air – not wood.
Use hardwood chunks, not scraps. Avoid treated lumber like it owes you money. Keep grease from dripping directly onto the fire unless you enjoy flare-ups and bitterness.
Thermometers help, but trust your senses too. Smell tells the truth before numbers do.
Important phrase: Bad smoke ruins good meat faster than bad seasoning.
Respect the fire, respect the food, and your drum will treat you right.
Customizing Without Blowing the Budget
Once you finish the $100 smoker challenge, temptation kicks in. Thermometers. Shelves. Paint jobs. It’s a slippery slope.
Smart upgrades focus on usability, not looks. A simple hook rack inside the lid? Useful. Extra grate bolts for flexibility? Smart. Expensive paint and custom logos? That’s how budgets die.
The beauty of a UDS is modular simplicity. You can change it as you learn. No pressure to get it perfect on day one.
My rule: if it doesn’t help airflow, fire control, or cooking space, it waits.
Important phrase: Upgrade with purpose, not ego.
That mindset keeps the drum honest – and the barbecue front and center.

The Pride Factor: Cooking on Something You Built
There’s a quiet pride that comes with the $100 smoker challenge. You didn’t order this cooker. You didn’t assemble it from a box. You built it, learned it, and earned your results.
When people taste the food, they expect a story about a fancy smoker. When you point to a steel drum, they laugh – until they go back for seconds.
That moment never gets old.
You start trusting your instincts more. You cook with confidence. You stop blaming equipment and start owning outcomes.
Important phrase: The drum doesn’t make you a pitmaster – but it reveals one.
That’s the real payoff. Not the money saved – but the skill gained.
Common Mistakes First-Time Builders Make
Even simple smokers punish impatience.
Common errors:
- Overspending on cosmetics
- Adding too many vents
- Chasing temperature instead of letting it settle
- Opening the lid “just to check” every 10 minutes
Remember: if you’re peeking, you’re leaking.
Who the $100 Smoker Challenge Is Perfect For
This build is ideal if you:
- Love DIY projects
- Want serious BBQ without serious cost
- Enjoy learning fire control
- Don’t care what your smoker looks like on Instagram
If you want push-button convenience, this probably isn’t your pit. And that’s okay.
Frequently Asked Questions (FAQs)
What is the $100 smoker challenge?
The $100 smoker challenge is a DIY barbecue project where you build a fully functional smoker using a $100 materials budget. The goal isn’t looks or convenience – it’s learning fire control, airflow, and fundamentals while producing real barbecue on a tight budget.
Is an Ugly Drum Smoker safe to cook on?
Yes – if you use a food-grade drum and prep it correctly. The drum must be free of chemical liners and thoroughly cleaned before use. Safety comes from proper materials, clean smoke, and good fire management – not price.
Can a $100 smoker really cook as well as expensive smokers?
Absolutely. A properly built Ugly Drum Smoker can hold steady temperatures for hours and produce clean, consistent smoke. Many pitmasters prefer UDS rigs over high-dollar smokers because performance depends more on airflow and fire discipline than brand names.

How long can a UDS hold temperature?
With a well-built charcoal basket, a UDS can run 12 to 18 hours on a single load of charcoal. Once dialed in, it often requires little to no adjustment during long cooks like brisket or pork butt.
What meats work best on an Ugly Drum Smoker?
Almost anything. Brisket, ribs, pork shoulder, chicken, turkey, sausage, and even baked sides cook beautifully on a UDS. The vertical design creates even heat and efficient smoke circulation, making it extremely versatile.
Do I need welding skills to build one?
No welding required. Most $100 smoker challenge builds use bolts, nuts, and washers. Basic hand tools and patience are far more important than fabrication skills.
What’s the biggest mistake first-time builders make?
The most common mistake is overthinking airflow. Too many vents or constant adjustments create unstable fires. A UDS works best when you make small changes and let the smoker settle.
Can I upgrade my Ugly Drum Smoker later?
Yes – and that’s part of the fun. Many pitmasters start with a bare-bones build and add features over time. Just remember: upgrade function first, not appearance.
Is this a good smoker for beginners?
Very much so. The $100 smoker challenge teaches core barbecue skills without relying on electronics or automation. If you want to truly understand how fire behaves, a UDS is one of the best teachers you’ll ever have.
Why do pitmasters still use Ugly Drum Smokers?
Because they work. They’re efficient, reliable, and brutally honest. A UDS doesn’t hide mistakes – but it rewards patience and skill better than almost any other cooker.
Final Thoughts: Why This Challenge Matters
The $100 smoker challenge isn’t about being cheap. It’s about being intentional. It proves that barbecue is a craft, not a shopping list.
When you build your own Ugly Drum Smoker, you learn how fire breathes. You stop blaming the cooker. You start trusting yourself.
And the first time someone takes a bite and asks what smoker you’re using – then looks confused when you point to a beat-up drum – you’ll smile.
Because you’ll know the secret.
Great barbecue isn’t bought. It’s built.
Featured image credit: @bristoldrumsmokers_uk